Glued To My Crafts

Join thousands of others who have gotten GLUED to our craft tutorials!

  • Home
  • About Us
  • Safety Guidelines
  • Seasonal Crafts
    • New Years
    • Valentine’s Day
    • St. Patrick’s Day
    • Spring
    • Easter
    • Mother’s Day
    • Summer
    • Father’s Day
    • Patriotic
    • Halloween
    • Thanksgiving
    • Fall
    • Winter
    • Christmas
    • Snowmen
    • Story Time
  • Monthly Themes
    • January Craft Ideas
    • February Craft Ideas
    • March Craft Ideas
    • April Craft Ideas
    • May Craft Ideas
    • June Craft Ideas
    • July Craft Ideas
    • August Craft Ideas
    • September Crafts
    • October Crafts
    • November Crafts
    • December Crafts
  • Amazon Storefront
  • Privacy Policy

Popsicle Stick & Toothbrush Painted Fall Fairy Craft Idea

When engaging in craft activities, it is important for young children to have adult supervision at ALL times. It is also recommended to use supplies that are suitable for your child's age. Feel free to modify materials or steps to meet your specific requirements. Please refer to our safety guidelines for more information.

As an Amazon Associate I earn from qualifying purchases. This post may contain affiliate links. Glued To My Crafts is independent and not affiliated with or endorsed by the publishers of the books featured on our website. For more information, please see our disclosure policy.

UPDATE FOR 2026 - To reduce storage costs and download fees, we recently made some changes to our website. The password for all our files this year is GLUEDTOMYCRAFTS2026. No sign-up is required to download our free printables! You can enjoy our printables without creating an account or paying for Box.com. Simply follow the download instructions on our FAQ PAGE.

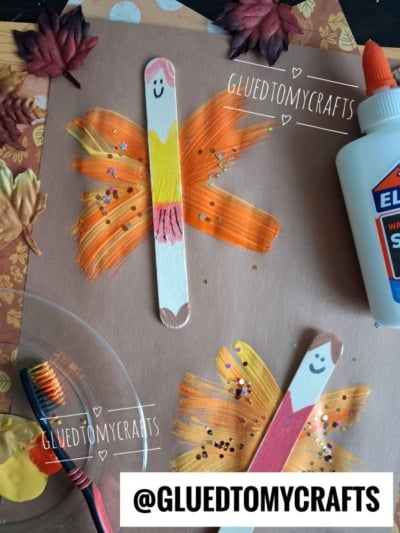
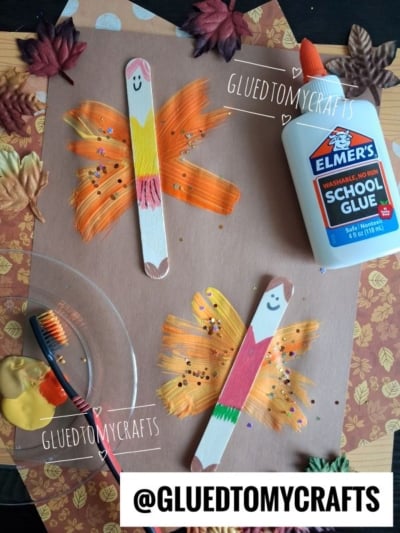
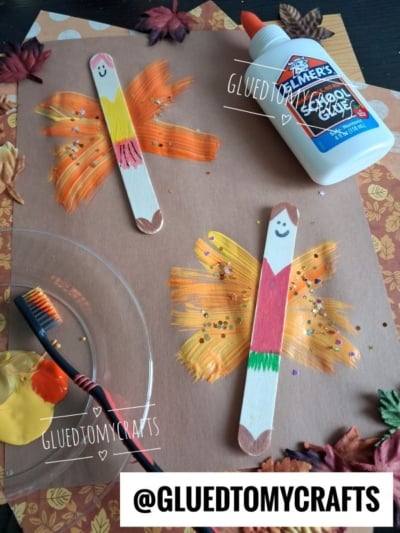
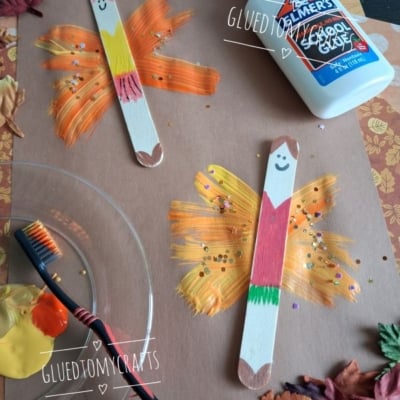
Two popsicle stick fairies with painted wings on brown paper, surrounded by fake leaves, a toothbrush with paint, and a bottle of Elmers glue. The popsicle sticks have smiling faces and colorful bodies.

There’s something magical about crafting when the leaves start to turn. The colors of fall – warm oranges, glowing yellows, and deep reds – make the perfect palette for a cozy afternoon of creativity with your little ones. This popsicle stick fairy craft brings all those autumn hues together in one delightful project, and it uses a secret tool you probably already have in your bathroom: a toothbrush!

Kids love the messy magic of splattering paint, and the textured fairy wings this technique creates look genuinely enchanting. Whether you’re a parent looking for a rainy-day activity, a teacher planning a seasonal art lesson, or a caregiver wanting some hands-on fun, this craft is simple, budget-friendly, and endlessly charming. Let’s make some fall fairies!

Craft Supplies:

Gather these supplies before you begin. Most of them are craft-drawer staples, so you may already have everything on hand.

  • Wooden jumbo popsicle sticks (one per fairy)
  • Acrylic paint in orange, yellow, red, green, brown, and pink
  • A clean UNUSED toothbrush (this is your wing-painting tool!)
  • Elmer’s washable school glue
  • Brown construction paper
  • Loose craft glitter or sequins
  • Markers
  • A paper plate paint palette

Directions:

Step 1: Paint Your Fairy’s Body and Face

Start by turning a plain popsicle stick into a cheerful little fairy. Lay the stick flat and work from top to bottom. Use markers to draw on faces, hair, outfits, shoes etc. Set the stick aside to dry completely before adding the face.

Step 2: Paint the Fairy Wings

Now for the fun part! This is where the toothbrush works its magic.

  1. Squeeze small dollops of orange and yellow acrylic paint onto your glass plate or palette.
  2. Dip the toothbrush bristles into the paint.
  3. On a sheet of brown construction paper, drag and flick the bristles outward to create a textured, feathery stroke.
  4. Make two strokes that cross in an X shape – this forms the two pairs of fairy wings. Let the edges stay frayed and wispy for that soft, magical look.

Encourage your kids to press firmly and sweep outward. The rougher and more textured, the better the wings will look!

Step 3: Glue the Fairy in Place

Wait until the painted wings are fully dry. Then flip your finished popsicle stick fairy over and apply a line of Elmer’s glue down the back. Press the stick vertically over the center of the X, right where the wings cross. Hold for a few seconds so it sticks firmly. Now your fairy has a body and a set of shimmering wings!

Step 4: Sprinkle on the Sparkle

Every fairy needs a little shimmer. While the paint is still wet, scatter star and hexagon glitter or sequins across the wings. Gold, bronze, and purple all catch the light beautifully against the orange and yellow paint. Gently press the sequins down so they stick, then shake off any extras.

Let everything dry, and your fall fairy is ready to flutter!

RELATED —> Paper Plate Pumpkin Fairy House Craft
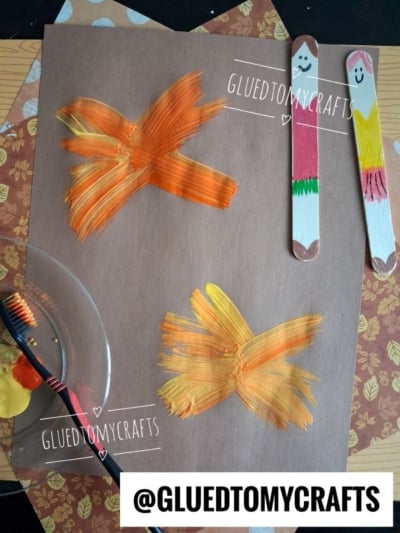
Brown paper with two orange-yellow painted X shapes, two decorated craft sticks with faces and clothes, a paintbrush beside a plate of yellow paint, and GLUEDTOMYCRAFTS watermarks on the image. Two butterfly crafts made from painted popsicle sticks and colorful paint on brown paper, with glue, leaves, glitter, and a paintbrush nearby. The popsicle sticks have smiling faces drawn on them. Two popsicle stick crafts with painted wings, glitter, and smiley faces on brown paper. Elmers glue, a paintbrush, yellow paint, and autumn leaves are nearby. @GLUEDTOMYCRAFTS is labeled on the image.

We’d love to see how your popsicle stick fall fairies turned out! Snap a photo of your finished craft and share it with us by tagging @GLUEDTOMYCRAFTS on all the major social media sites! These make wonderful keepsakes, fridge decorations, or even homemade gifts for grandparents.

Crafting together is about more than the final product. It’s about the giggles, the messy hands, and the proud smiles when your child holds up their creation. Not to mention, these make wonderful keepsakes, fridge decorations, or even homemade gifts for grandparents.

So grab those popsicle sticks, grab a few toothbrushes from Dollar Tree and let a little autumn magic take flight. Happy crafting, my friends!

A blue text on a white background, perfect for creating a charming the places you'll go keepsake.

Two popsicle stick fairies with painted wings on brown paper, surrounded by fake leaves, a toothbrush with paint, and a bottle of Elmers glue. The popsicle sticks have smiling faces and colorful bodies.
PRINT

Popsicle Stick & Toothbrush Painted Fall Fairy Craft Idea

Make magical fall fairies with popsicle sticks and toothbrush-painted wings! A fun, glittery autumn craft kids will love creating. Try it today!

Here’s your checklist of supplies to bring this craft to life:

  • Cardstock Paper
  • Craft Paint
  • Jumbo Popsicle Sticks
  • Loose Craft Glitter
  • Embellishments
  • School Glue
  • Toothbrush
  • Small Paper Plate
  • Sharpie Markers
  • Fall Book Recommendations - link to our Amazon shop

Prepare your creative haven by laying down a protective cover before the crafting magic begins!

Directions: 
Prevent your screen from going dark

  • Start by turning a plain popsicle stick into a cheerful little fairy. Lay the stick flat and work from top to bottom. Use markers to draw on faces, hair, outfits, shoes etc. Set the stick aside to dry completely before adding the face.
  • Now for the fun part! This is where the toothbrush works its magic.
  • Squeeze small dollops of orange and yellow acrylic paint onto your glass plate or palette.
  • Dip the toothbrush bristles into the paint.
  • On a sheet of brown construction paper, drag and flick the bristles outward to create a textured, feathery stroke.
  • Make two strokes that cross in an X shape - this forms the two pairs of fairy wings. Let the edges stay frayed and wispy for that soft, magical look.
  • Encourage your kids to press firmly and sweep outward. The rougher and more textured, the better the wings will look!
  • Wait until the painted wings are fully dry. Then flip your finished popsicle stick fairy over and apply a line of Elmer's glue down the back. Press the stick vertically over the center of the X, right where the wings cross. Hold for a few seconds so it sticks firmly. Now your fairy has a body and a set of shimmering wings!
  • Every fairy needs a little shimmer. While the paint is still wet, scatter star and hexagon glitter or sequins across the wings. Gold, bronze, and purple all catch the light beautifully against the orange and yellow paint. Gently press the sequins down so they stick, then shake off any extras.
  • Let everything dry, and your fall fairy is ready to flutter!

MINI-HEARTS-page-separator-logo-gluedtomycrafts

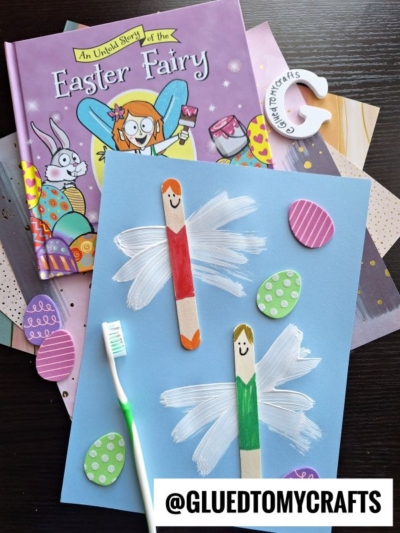
Craft supplies and a book titled An Unusual Story of the Easter Fairy are on a table. A toothbrush, craft sticks with fairy faces, paper wings, and oval decorations are arranged on blue paper—perfect for inspiring toothbrush painted craft ideas. @GLUEDTOMYCRAFTS is visible.

Grab our favorite books via our Amazon affiliate link! In our Amazon storefront you will find books, toys and craft supplies we absolutely love using for our Glued To My Crafts tutorials!

A blue text on a white background, perfect for creating a charming the places you'll go keepsake.
CLICK HERE TO PRINT THE DIRECTIONS FOR THIS CRAFT

If you've enjoyed our content or have any thoughts to share, we'd love to hear from you! Mention @gluedtomycrafts or tag #gluedtomycrafts on Instagram!


OUR PRIVACY POLICY

OUR COPYRIGHT POLICY

  • Email
  • Facebook
  • Instagram
  • Pinterest
  • Twitter
  • YouTube

Love our crafts?

Follow us on Google

Click & check the box to see us more in your search results!

LOOKING FOR SOMETHING?

EXPLORE OUR SITE:

© 2012–2026 Glued To My Crafts

© All Rights Reserved. All images, artwork, and visual materials contained herein are the exclusive property of the copyright holder and are protected under applicable copyright laws and international treaties. No individual, entity, or organization is authorized to reproduce, distribute, or use any of these images in any manner without express written consent from the copyright holder. The following actions are strictly prohibited: copying, pasting, saving, screenshotting, downloading, or otherwise distributing any images, in whole or in part, by any means or method. Furthermore, it is strictly forbidden to input, upload, submit, or process any of these images through any artificial intelligence system, generative model, machine learning algorithm, neural network, or similar technology for the purpose of creating derivative, modified, reproduced, or newly generated works of any kind. Any output, image, or material generated by artificial intelligence or comparable technology that is derived from, trained upon, or based in any way on these images is likewise subject to this prohibition. Claiming, presenting, or asserting any such AI-generated output as one's own original work is expressly prohibited and constitutes a violation of the copyright holder's rights. Any unauthorized use, reproduction, or exploitation of these images, whether by human or automated means, constitutes copyright infringement. Infringement may result in legal action, including but not limited to claims for damages, injunctive relief, and recovery of legal costs. All rights not expressly granted herein are reserved.

All activities should be supervised by an adult at all times. Please refer to our safety guidelines for more information.


Please note that all the content of the website, including printables, are for classroom and personal use only. This means that any digital item you download from our site can be used for non-commercial use only. We kindly request that you do not reproduce or sell our creations. We appreciate your understanding and cooperation in respecting our content and intellectual property rights.

Accessibility Adjustments

Powered by OneTap

How long do you want to hide the toolbar?
Hide Toolbar Duration
Select your accessibility profile
Vision Impaired Mode
Enhances website's visuals
Seizure Safe Profile
Clear flashes & reduces color
ADHD Friendly Mode
Focused browsing, distraction-free
Blindness Mode
Reduces distractions, improves focus
Epilepsy Safe Mode
Dims colors and stops blinking
Content Modules
Font Size

Default

Line Height

Default

Color Modules
Orientation Modules