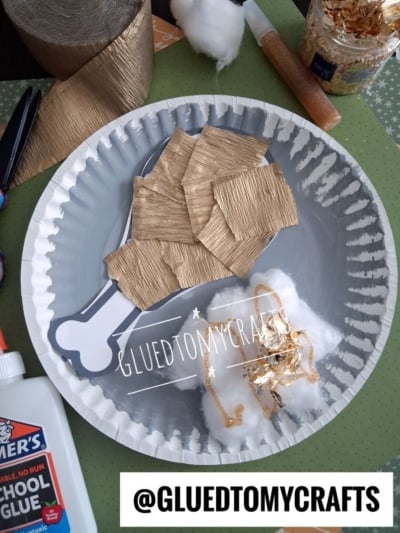
Thanksgiving dinner is the star of the season, so why not let the kids serve up their own? This paper plate turkey leg and cotton ball mashed potato craft turns simple supplies into a fun, festive “meal” that looks good enough to eat (but please don’t!).
Kids will love tearing crinkly paper, squishing fluffy cotton balls, and drizzling sparkly “gravy” all over their plates. Grown-ups will love how easy it is to set up. Best of all, we made a free printable turkey leg bone template so you can skip the fussy drawing and get right to the fun.
This craft works great at the kitchen table, in the classroom, or at the kids’ table while the real turkey roasts. Let’s get crafting!
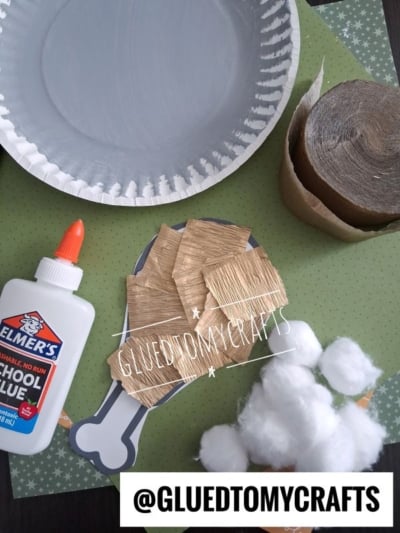
Craft Supplies:
Here’s everything you need to make one Thanksgiving dinner plate:
- White paper plate (the kind with a ridged rim works best)
- Grey paint and a paintbrush
- Brown or gold metallic crepe paper
- Elmer’s School Glue (washable glue makes cleanup easy)
- White cotton balls
- Gold glitter glue
- Gold foil flakes
- Scissors
- Free printable turkey leg bone template – password is GLUEDTOMYCRAFTS2026
Helpful extras: a smock or old T-shirt, a paper towel or wet wipe, and a tray or newspaper to protect your table.
Directions:
Step 1: Paint the Plate Grey
Start by painting the center of your paper plate grey. This gives it the look of a real dinner plate. Kids can leave the rim white or brush a little grey over the ridges for extra texture.
Set the plate aside to dry. While you wait, move on to the next step.
Tip: A thin coat dries faster. If you’re short on time, a hair dryer on a cool setting can speed things up.
Step 2: Print and Cut Out the Turkey Leg Bone Template
Print our free turkey leg template on regular printer paper or cardstock. Cardstock is a little sturdier and holds up better under glue.
Cut out one of the drumstick shapes. Younger kids may need a grown-up to help with the curves, while older kids can usually handle this on their own.
Step 3: Tear and Glue the Crepe Paper “Meat”
Now for the fun part! Tear the brown or gold metallic crepe paper into small squares, about one inch wide. They don’t need to be perfect. In fact, a little messy makes the turkey look more “roasted.”
Squeeze a layer of Elmer’s glue onto the meaty part of the drumstick. Leave the bone end bare. Then have your child press the crepe paper squares onto the glue, overlapping them as they go, until the whole leg is covered.
The layers catch the light and give your turkey leg a golden, crispy look.
Tip: For older kids who want neater edges, they can cut the squares with scissors instead of tearing them.
Step 4: Glue the Turkey Leg Onto the Plate
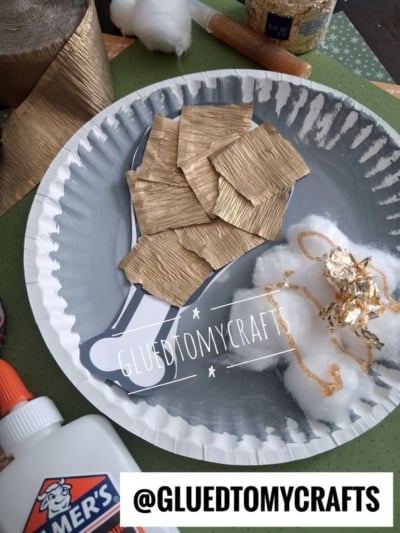
Once the paint is dry, glue the finished turkey leg onto one side of the plate. Placing it at a slight angle makes it look like it was just served.
Step 5: Add the Cotton Ball Mashed Potatoes
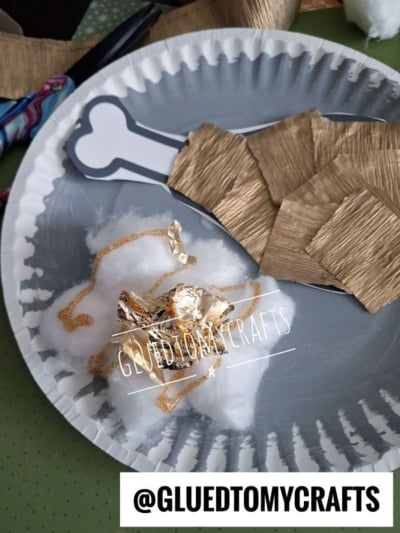
Squeeze a puddle of glue onto the empty side of the plate. Pile on a handful of white cotton balls, pressing them gently into the glue. Pull a few apart slightly to make them extra fluffy, just like a big scoop of mashed potatoes.
Step 6: Drizzle on the Glitter Glue Gravy
Grab the gold glitter glue and swirl it right over the top of the cotton balls. This is your “gravy,” and kids usually love this step the most. A little goes a long way, but there’s no wrong amount on Thanksgiving!
Step 7: Top It Off With Gold Foil “Butter”
While the glitter glue is still wet, sprinkle or press a small pinch of gold foil flakes onto the center of the mashed potatoes. It looks just like a melting pat of butter.
Let the whole turkey leg plate dry flat for a few hours, or overnight if you used a lot of glitter glue.
And that’s it! Your Thanksgiving dinner is served.
RELATED —> Potato Masher Stamped Waffles For Santa
Skip the guesswork and grab our free printable turkey leg bone template! It’s ready to print, easy to cut, and sized just right for a standard paper plate. Print one for each child, or make a whole stack for your classroom or holiday gathering.
Click the download link in the supply list to get your free template and start crafting up this paper plate Thanksgiving craft today!
We’d love to see your little chefs’ creations! Share a photo of your Thanksgiving dinner plates and tag us at @GluedToMyCrafts. Your kids’ turkey legs might just inspire someone else’s holiday fun.
Happy crafting, and Happy Thanksgiving from all of us at Glued To My Crafts! 🦃