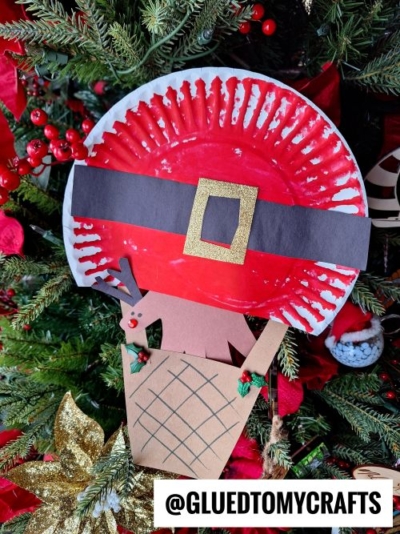
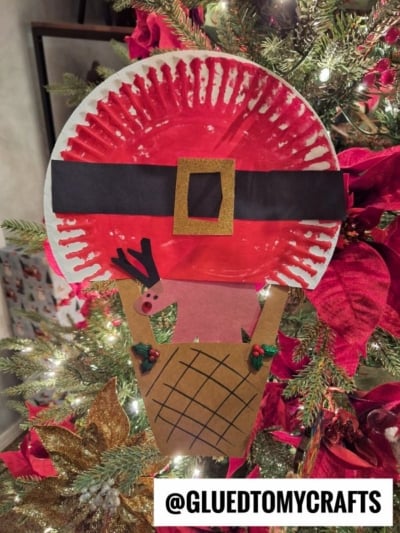
Santa has traded his sleigh for something new this year. Picture a bright red hot air balloon wearing Santa’s famous black belt and shiny gold buckle, floating through the sky with a very special passenger. Peeking out of the woven basket is Rudolph himself, red nose glowing and ready for adventure.
This paper plate Christmas hot air balloon is a cheerful holiday craft kids will love making and you’ll love displaying. It uses simple supplies you probably already have, takes about an hour from start to finish, and works well for kids ages 4 and up. Younger crafters can handle the painting and gluing, and older kids can take charge of the cutting and details.
It’s ideal for a classroom holiday party, a cozy afternoon at home, or a homeschool art lesson. When it’s done, you’ll have a sweet decoration that looks adorable tucked into the branches of your Christmas tree.
Craft Supplies:
- 1 large, white paper plate
- Red paint (tempera or washable acrylic works well)
- Paintbrush or sponge
- Black construction paper
- Brown construction paper (light brown for Rudolph, dark brown for antlers)
- Gold glitter cardstock
- Light brown cardstock (for the basket)
- Thin strips of brown paper (for the ropes)
- Black marker
- 1 red rhinestone or gemstone (for Rudolph’s nose)
- Glue (a glue stick plus liquid school glue or tacky glue)
- Scissors
Helpful extras: a pencil for tracing, newspaper or a plastic tablecloth to protect your table, and a smock or old t-shirt for messy painters.
Directions:
Step 1: Cut and Paint the Plate Red
First things first – cut off a small piece from the large paper plate to give the paint a more “hot air balloon” design. Discard that excess piece.
Next, cover your workspace. Have your child paint their paper plate bright red.
Set the plate aside to dry completely, about 15 to 20 minutes. This is a great time to prep the other pieces.
Step 2: Add Santa’s Black Belt
Cut a wide strip of black construction paper, about 1.5 to 2 inches tall and long enough to stretch across the plate. Once the paint is dry, glue the strip straight across the middle of the plate.
Trim any extra paper that hangs past the edges so the belt follows the curve of the balloon.
Step 3: Make the Gold Glitter Buckle
Cut a small rectangle from the gold glitter cardstock, slightly taller than your black belt. Next, cut a smaller rectangle out of the center to create a frame shape.
Here’s an easy way to do it: fold the gold rectangle in half, snip a small rectangle from the folded edge, and unfold. You’ll have a perfect buckle every time.
Glue the buckle in the center of the belt. That sparkle is what makes the whole balloon shine.
Step 4: Cut and Decorate the Wicker Basket
Cut a trapezoid from light brown cardstock. Make the top edge wider than the bottom, so it looks like a classic hot air balloon basket. A good size is about 4 inches across the top and 3 inches across the bottom, with a height of about 2.5 inches.
Now for the fun part. Using the black marker, draw diagonal lines going one direction across the basket. Then draw diagonal lines going the other way to create a crisscross pattern. This simple trick makes the cardstock look just like woven wicker.
Step 5: Create Rudolph
Trace and cut out your child’s handprint from the brown construction paper. The thumb will become the head.
Next, cut two small antlers from dark brown construction paper. A branching “Y” shape with a couple of extra prongs works perfectly. Glue the antlers to the top of Rudolph’s head.
Use the black marker to draw on eyes and a little smile. Finally, glue the red rhinestone onto the tip of his snout. Liquid glue or tacky glue holds gems best, so give it a few minutes to set.
Now Rudolph is ready to fly.
Step 6: Attach the Rope Connectors
Cut two thin strips of brown paper, about 0.25 inches wide and 2 to 3 inches long. These are the ropes connecting the basket to the balloon.
Glue the top of each strip to the bottom edge of the paper plate, one on the left and one on the right. Leave the bottom ends free for now.
Step 7: Assemble Your Hot Air Balloon
Time to bring it all together:
- Add the Handprint Rudolph to the basket. Glue the bottom of Rudolph’s neck to the back of the basket so his head and antlers peek out over the top edge.
- Connect the basket. Glue the loose ends of the rope strips to the top corners of the basket, either on the front or behind the basket.
- Add the holly. Glue one holly leaf decoration with red berries on each top corner of the basket. They add a festive pop of green and help cover the spots where the ropes connect.
Let everything dry flat for about 30 minutes before hanging or displaying.
RELATED —> Coffee Filter Reindeer Craft Idea For Christmas
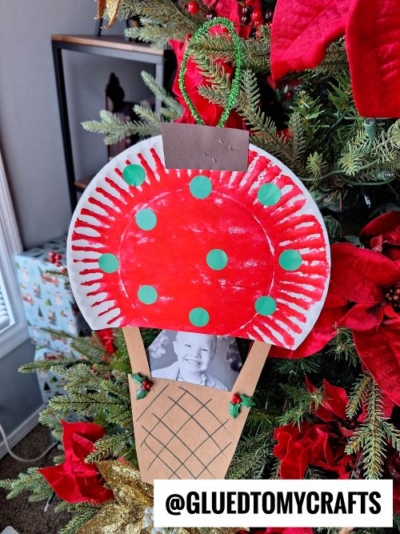
Once the balloon is finished, invite your kids to tell you the story of the reindeer’s big flight. Where is he headed? Who is he delivering gifts to? You can even write the story down and tape it to the back of the craft for a sweet holiday memory.
Make one for each child, create a whole fleet for your classroom, or craft a few extras to give to grandparents. Every balloon will look a little different, and that’s exactly what makes them special.
Happy crafting, and may your holidays be merry, bright, and full of sparkle! 🎄🎈
