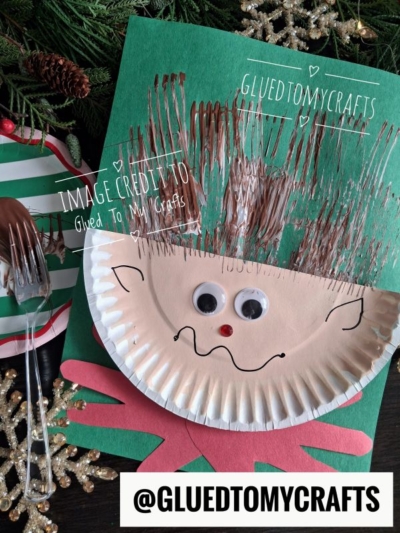
Grab a plastic fork and some paint – this adorable Christmas elf craft is easier than it looks and way more fun than it sounds. Kids use a fork to drag paint into wild, spiky hair, then press their own hands to create the elf’s pointed collar. The result is a cheerful paper plate elf that’s part holiday decoration, part keepsake – because those little handprints won’t stay little for long.
The best part is the hair. Kids drag a plain plastic fork through paint, and it leaves spiky, textured strands that look great no matter how they turn out. It’s mess-friendly, forgiving, and a lot of fun to do!
Craft Supplies:
- 1 sheet of green cardstock (this is the background)
- 1 paper plate, cut in half
- Brown paint and white paint for the hair
- Peach paint, or any skin tone your child likes
- 1 plastic fork
- 2 large googly eyes
- 1 small red rhinestone or gem for the nose
- Black marker
- Glue (a glue stick for paper and craft glue for the gem and eyes)
- 1 sheet of red paper for the handprint collar
- Pencil and scissors
- A paintbrush and a scrap plate or tray for paint
Helpful extras: a smock or old T-shirt, paper towels, and baby wipes for painty fingers.
Directions:
- Cut the paper plate in half straight across. You’ll use one half for the elf’s face. Save the other half for a second elf, or use it as a paint palette.
- Paint the front of your half plate with peach paint.
- Set the plate aside to dry completely.
- Next up – lay the green cardstock flat on your table.
- Squeeze some brown paint onto a scrap plate. Add a small dab of white beside it. Don’t mix them all the way. The streaks of white give the hair lovely texture.
- Dip the fork tines into the paint.
- Press the fork onto the upper half of the cardstock and drag it upward in short, quick strokes.
- Repeat across the top of the paper, overlapping strokes and changing angles a little. Cover an area about as wide as your paper plate. The messier it looks, the better. Elves are known for wild hair! Let the paint dry while you work on the face.
- Tip: Leave a little unpainted space below the hair. That’s where the plate face will sit, and it should overlap the bottom edge of the hair.
- Now for the keepsake part! Have your child place one hand flat on the red paper with fingers spread wide. Trace around the hand with a pencil.
- Repeat to make a second handprint. You can trace the same hand twice or one of each.
- Cut out both handprints.
- Now to bring the elf to life! Once the paper plate face is dry, grab the black marker and draw on the face. Pointed ears: Hold the plate with the flat, cut edge at the top. On the left and right curved edges, draw a simple pointed ear shape. A sideways triangle with a soft curve works well. Squiggly smile: Draw a wavy line in the lower middle of the face. Add a small dot at each end for cheeks. Wiggly lines give the elf personality, so shaky hands are perfect here.
- Glue two googly eyes near the center of the plate. Then glue the red gem just below and between them for a shiny elf nose.
- Time to put all the layers together! Add the collar. Place the two handprints near the bottom of the green cardstock with the palms overlapping in the center and the fingers fanning outward. The fingers form the pointy points of a classic elf collar. Glue them down.
- Add the face. Put glue on the back of the plate. Press it onto the cardstock with the flat edge at the top, so it overlaps the bottom of the fork-painted hair and the palm area of the handprint collar.
- Press and dry. Smooth everything down and let it dry flat. That’s it! Your elf is ready for the fridge, the classroom wall, or a spot on the mantel.
RELATED —> Potato Masher Stamped Elves Craft Idea For Christmas
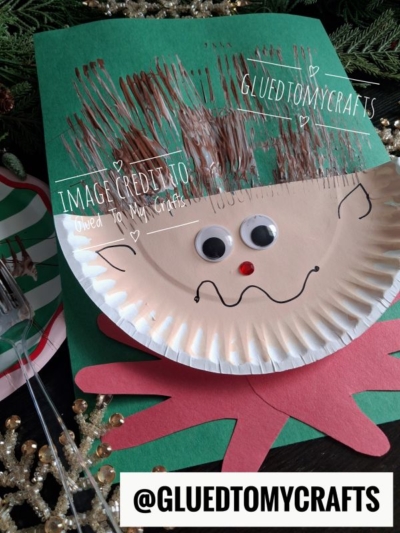
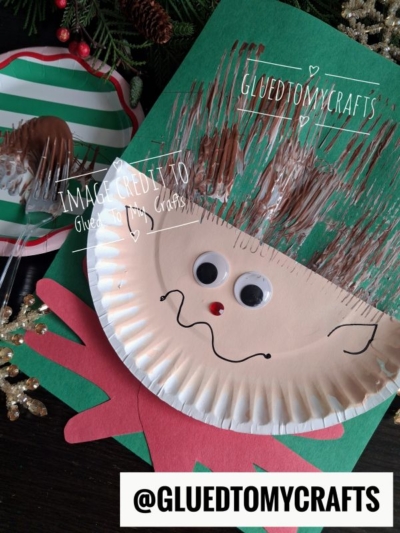
This little elf brings plenty of holiday cheer, but the handprint collar is what makes it special. Hands grow fast, and crafts like this one keep a small record of them each year. Make one every December and you’ll have a fun collection to look back on.
Pull out the forks, set out the paint, and have fun making this one together. Merry crafting!

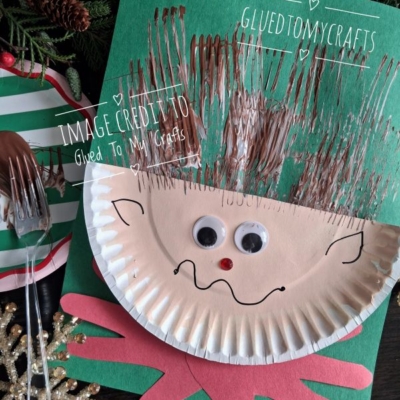
Fork Painted Christmas Elf Craft Idea
This festive fork painted elf craft is the perfect way to get your kids into the holiday spirit!
Here’s your checklist of supplies to bring this craft to life:
- Large Paper Plate
- Craft Paint
- Cardstock Paper
- Embellishments
Prepare your creative haven by laying down a protective cover before the crafting magic begins!
Directions:
- Cut the paper plate in half straight across. You'll use one half for the elf's face. Save the other half for a second elf, or use it as a paint palette.
- Paint the front of your half plate with peach paint.
- Set the plate aside to dry completely.
- Next up - lay the green cardstock flat on your table.
- Squeeze some brown paint onto a scrap plate. Add a small dab of white beside it. Don't mix them all the way. The streaks of white give the hair lovely texture.
- Dip the fork tines into the paint.
- Press the fork onto the upper half of the cardstock and drag it upward in short, quick strokes.
- Repeat across the top of the paper, overlapping strokes and changing angles a little. Cover an area about as wide as your paper plate. The messier it looks, the better. Elves are known for wild hair! Let the paint dry while you work on the face.
- Tip: Leave a little unpainted space below the hair. That's where the plate face will sit, and it should overlap the bottom edge of the hair.
- Now for the keepsake part! Have your child place one hand flat on the red paper with fingers spread wide. Trace around the hand with a pencil.
- Repeat to make a second handprint. You can trace the same hand twice or one of each.
- Cut out both handprints.
- Now to bring the elf to life! Once the paper plate face is dry, grab the black marker and draw on the face. Pointed ears: Hold the plate with the flat, cut edge at the top. On the left and right curved edges, draw a simple pointed ear shape. A sideways triangle with a soft curve works well. Squiggly smile: Draw a wavy line in the lower middle of the face. Add a small dot at each end for cheeks. Wiggly lines give the elf personality, so shaky hands are perfect here.
- Glue two googly eyes near the center of the plate. Then glue the red gem just below and between them for a shiny elf nose.
- Time to put all the layers together! Add the collar. Place the two handprints near the bottom of the green cardstock with the palms overlapping in the center and the fingers fanning outward. The fingers form the pointy points of a classic elf collar. Glue them down.
- Add the face. Put glue on the back of the plate. Press it onto the cardstock with the flat edge at the top, so it overlaps the bottom of the fork-painted hair and the palm area of the handprint collar.
- Press and dry. Smooth everything down and let it dry flat. That's it! Your elf is ready for the fridge, the classroom wall, or a spot on the mantel.

Grab our favorite books via our Amazon affiliate link! In our Amazon storefront you will find books, toys and craft supplies we absolutely love using for our Glued To My Crafts tutorials!
If you've enjoyed our content or have any thoughts to share, we'd love to hear from you! Mention @gluedtomycrafts or tag #gluedtomycrafts on Instagram!