Some Halloween crafts last a week. This one lasts for years.
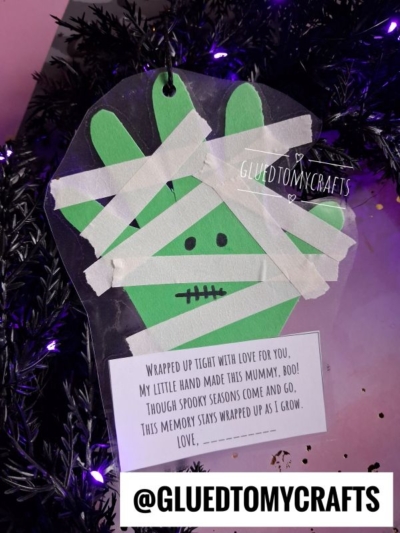
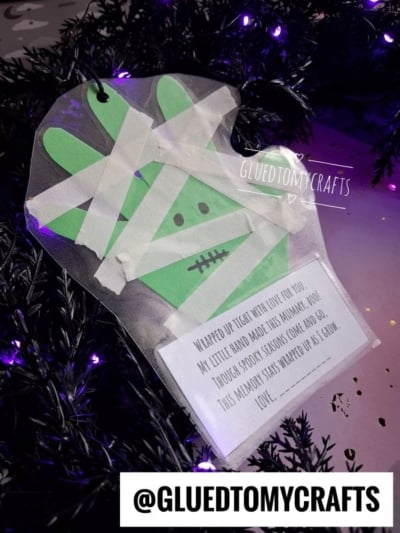
This handprint mummy ornament turns your child’s tiny hand into a sweet, slightly spooky little mummy, complete with googly-style dot eyes, a stitched mouth, and “bandages” made from masking tape. Tucked underneath is a short poem that makes it a true keepsake. The whole thing gets laminated together, so it holds up to little hands, classroom walls, and many Halloweens to come.
We love this craft because it’s simple enough for preschoolers, fun for older kids, and meaningful for the grown-ups who get to keep it. Next October, when you pull it out of the decoration bin, you’ll see just how much that little hand has grown.
Craft Supplies:
- Green cardstock (for the handprint)
- White cardstock {for the printable}
- A pencil and scissors
- A black marker (optional, for leaf veins)
- Thin Masking Tape
- Clear contact paper
- A hole punch and a piece of ribbon or raffia
- Free Mummy Poem Printable – from box.com – password is GLUEDTOMYCRAFTS2026
Directions:
Step 1: Trace Your Child’s Handprint
Place your child’s hand flat on a sheet of green cardstock. Spread those fingers out a little wider than usual – a slightly open hand gives your mummy a fuller, more dramatic shape. Trace carefully around the hand and fingers with a pencil.
Step 2: Cut Out the Handprint
Carefully cut along your traced line with scissors. You should have a clean hand shape, all set to become a spooky little mummy.
Step 3: Add the Mummy Details
Now it’s time to bring your mummy to life. Use a black marker to draw two small dot eyes near the center of the palm, then add a short horizontal line below them with tiny vertical marks crossing it to look like a stitched-shut mouth.
Next, tear or cut strips of off-white masking tape and crisscross them across the handprint at different angles to mimic mummy bandages. Leave some of the green cardstock peeking through, and let the eyes and mouth peek out from under the wrappings for that classic mummy look. Trim or fold any excess tape around the back edge to keep things neat.
Step 4: Add the Poem Tag
Print out the poem card and trim out one of the tags. Write your child’s name on the “Love, ___” line – or let them sign it themselves for an extra special touch. Place the tag on the handprint design, right along the wrist area or centered at the base of the palm, wherever it looks best to you.
A small dot of glue stick on the back of the card helps hold it in place before sealing.
Step 5: Seal It Up
Lay a sheet of contact paper or a laminating pouch over the entire design, sticky or seal side facing in. Smooth it down with your fingers, working from the center outward to push out any air bubbles.
Once it’s sealed, trim around the shape of the mummy, leaving a small clear border all the way around so nothing shifts or peels out over time.
Step 6: Punch a Hole and Add a Hanger
Use a hole punch to make a hole near the top center of the ornament – right above the middle finger tip works perfectly. Thread a piece of ribbon or raffia through the hole and tie the ends into a loop. Your handprint mummy keepsake ornament is ready to hang!
RELATED —> Paper Bag Mummy Craft Idea For Halloween
Happy crafting, and have a wonderfully wrapped-up Halloween! We hope this little mummy brings as much joy to the grown-ups who receive it as it does to the tiny hands that made it. Whether it ends up on a wreath, a spooky Halloween tree, or tucked into a memory box, know that you’ve created something truly special – a little piece of childhood, sealed up and saved forever. Here’s to spooky seasons, sweet memories, and crafts that stand the test of time. 🎃
