Create a fun and easy torn paper mummy craft with your kids this Halloween! Perfect for little hands and spooky creativity!
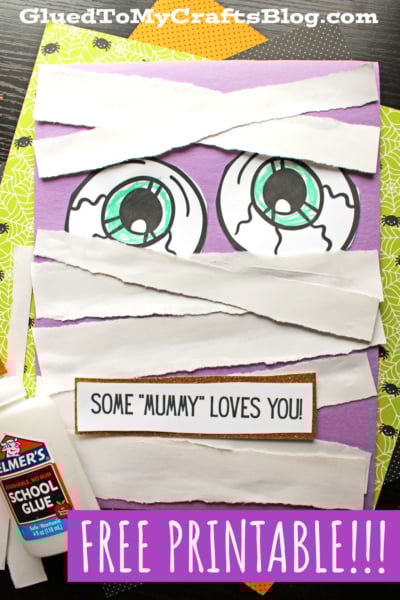
Halloween is just around the corner, and what better way to get into the spooky spirit than with a fun and easy craft project for kids? This torn paper mummy craft is perfect for little hands and big imaginations. Plus, we’ve included a free printable to make it even easier to create your very own mummy masterpiece. Let’s get started!

Discover how to make a torn paper mummy. Gather your supplies and enjoy a fun, creative crafting session with kids!
Craft Supplies:
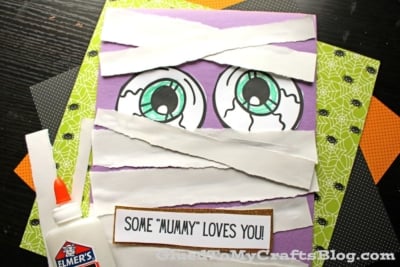
Before we dive into the steps, gather these simple supplies:
- White Construction Paper {the wraps}
- Choice of Color Construction Paper
- Cardstock Paper
- Mummy Card Printable – on our landing page
- Crayons, Markers or Coloring Pencils
- Craft Scissors
- School Glue
- Embellishments
Directions:
Now that your materials are ready, it’s time to bring your MUMMY to life. Follow these easy steps and enjoy watching your kids’ creativity bloom.
- Start by downloading and printing the FREE “Some MUMMY Loves You” printable (linked above) onto a sheet of white cardstock. This will be the base for your craft.
- Let the kids color the two eyeball designs and the accompanying text piece from the printable. Once they’re done, carefully cut out these pieces. (Younger kids may need help with the cutting.)
- Take a sheet of colored construction paper and glue the two eyeball cutouts in the center. Set the text piece aside for now – we’ll add it at the end.
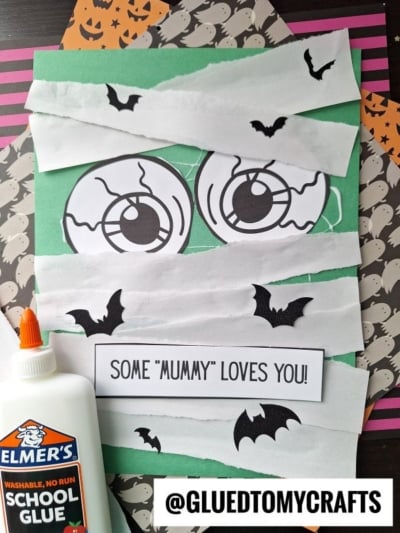
- Help the kids tear white construction paper into strips. The uneven, jagged edges will give the mummy a more authentic and spooky wrapped look. This part is always a hit with kids—it’s messy and fun!
- Apply a generous layer of school glue across the construction paper background. Have the kids press their torn paper strips onto the glue, overlapping them slightly to create the wrapped mummy effect. Keep adding strips until the entire mummy is covered and they’re happy with the design.
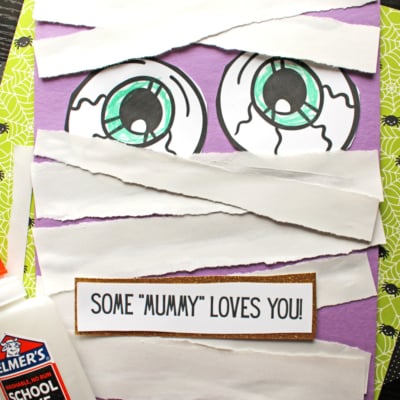
- Once the mummy is fully wrapped, attach the “Some MUMMY Loves You” text cutout anywhere on the design. You can place it at the bottom, the top, or even off to the side – get creative!
- Allow the finished “torn paper mummy” masterpiece to dry completely. Once it’s dry, display it proudly on the fridge, a bulletin board, or even in a window for Halloween!
- Don’t forget to snap a photo of your child’s spooky mummy craft and share it with the hashtag #GluedToMyCrafts or tag us on social media. We’d love to see their amazing artwork and celebrate their creativity!
RELATED —> Paper Pumpkin Mummy Craft Idea
This torn paper mummy craft is not only easy but also a great way to develop fine motor skills. Tearing paper, gluing, and arranging the strips are all excellent activities for little hands. Plus, the end result is a cute and spooky mummy that kids will be proud to show off!
We’d love to see your little ones’ mummy masterpieces! Share your photos on social media and tag us with #GluedToMyCrafts. Who knows? Your creation might be featured on our page!

Torn Paper Mummy Craft Idea for Kids to Make This Halloween
Create a fun and easy torn paper mummy craft with your kids this Halloween! Perfect for little hands and spooky creativity!
Here’s your checklist of supplies to bring this craft to life:
- School Glue
Prepare your creative haven by laying down a protective cover before the crafting magic begins!
Directions:
- Start by downloading and printing the FREE "Some MUMMY Loves You" printable (linked above) onto a sheet of white cardstock. This will be the base for your craft.
- Let the kids color the two eyeball designs and the accompanying text piece from the printable. Once they’re done, carefully cut out these pieces. (Younger kids may need help with the cutting.)
- Take a sheet of colored construction paper and glue the two eyeball cutouts in the center. Set the text piece aside for now - we’ll add it at the end.
- Help the kids tear white construction paper into strips. The uneven, jagged edges will give the mummy a more authentic and spooky wrapped look. This part is always a hit with kids—it’s messy and fun!
- Apply a generous layer of school glue across the construction paper background. Have the kids press their torn paper strips onto the glue, overlapping them slightly to create the wrapped mummy effect. Keep adding strips until the entire mummy is covered and they’re happy with the design.
- Once the mummy is fully wrapped, attach the "Some MUMMY Loves You" text cutout anywhere on the design. You can place it at the bottom, the top, or even off to the side - get creative!
- Allow the finished "torn paper mummy" masterpiece to dry completely. Once it’s dry, display it proudly on the fridge, a bulletin board, or even in a window for Halloween!
- Don’t forget to snap a photo of your child’s spooky mummy craft and share it with the hashtag #GluedToMyCrafts or tag us on social media. We’d love to see their amazing artwork and celebrate their creativity!


NEED MORE HELP DOWNLOADING OUR FREE PRINTABLES? PLEASE REFER TO OUR FAQ PAGE
If you've enjoyed our content or have any thoughts to share, we'd love to hear from you! Mention @gluedtomycrafts or tag #gluedtomycrafts on Instagram!