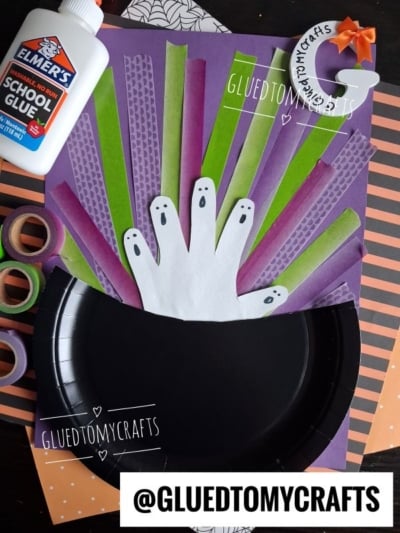
There’s something magical about a craft that turns everyday supplies into spooky-season fun. This washi tape witch cauldron is one of those projects that kids will want to make again and again. The best part? Those five little ghosts rising out of the cauldron are made from your child’s very own handprint, so you’ll have a keepsake worth saving long after the candy is gone.
Whether you’re a parent looking for a rainy afternoon activity or a teacher planning your October classroom crafts, this one checks all the boxes. It’s colorful, easy, and forgiving. There’s no “wrong” way to do it, which makes it perfect for little hands. Let’s get crafting!
Craft Supplies:
Gather up these materials before you begin:
- Purple cardstock (1 sheet, for your background)
- Black paper plate (1, for the cauldron)
- White cardstock (1 sheet, for the handprint ghosts)
- Washi tape in green, purple, and magenta (a few rolls, patterned or solid)
- Elmer’s school glue
- Black marker
- Scissors (kid-safe if little ones are helping)
- Pencil (for tracing)
That’s it! Now let’s put it all together.
Directions:
Step 1: Make the Bubbling Brew
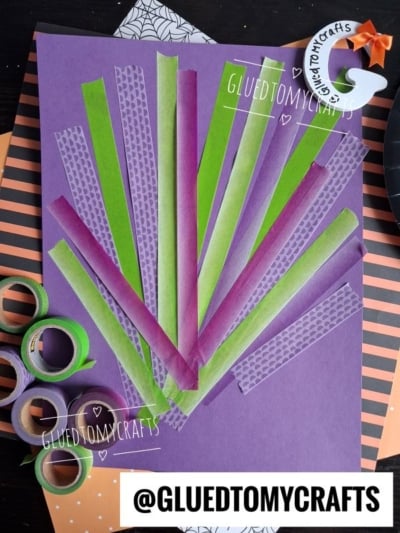
Grab your purple cardstock and lay it flat in front of you. Pick your favorite spot along the bottom-center edge. This will be the center point where all your washi tape “steam” fans out.
Tear or cut strips of washi tape in green, purple, and magenta. Start placing them so they radiate upward and outward from that bottom-center point, like sunbeams or a peacock’s tail. Mix up the colors and patterns as you go for a fun, bubbly look.
Don’t stress about keeping them perfectly even. A little wonkiness makes the “brew” look like it’s really bubbling! Keep adding strips until you’ve filled out a nice fan shape across the top half of your page.
Step 2: Create the Cauldron
Take your black paper plate and cut it into a shape of a cauldron. Add a line of Elmer’s glue along the back of the paper plate and press it firmly onto the cardstock, right at the bottom of the decorate paper. Hold it in place for a few seconds so it sticks nice and flat.
Step 3: Trace the Handprint
Here comes the fun part. Have your child spread their fingers wide and place their hand flat on the white cardstock. Using a pencil, carefully trace around their hand and fingers.
Once you’ve got the outline, cut it out along the line. This handprint will become your spooky crew of ghosts, and the five fingers make five perfect little spirits.
Tip: If your child is wiggly, trace quickly and don’t worry about a perfect outline. Ghosts are supposed to look a little floaty anyway!
Step 4: Give Your Ghosts Their Faces
Now grab your black marker. On each finger of the handprint, draw a simple ghost face:
- Two small dots for the eyes
- One tall oval for the open, spooky “boooo” mouth
Repeat on all five fingers so each ghost gets its own face. Some kids love making every ghost look different. Maybe one is surprised, another looks silly, and one is downright scared! Let their imagination lead the way.
Step 5: Assemble Your Masterpiece
Time to bring it all together. Position your handprint so the ghosts look like they’re floating up and out of the cauldron. Tuck the wrist end of the handprint behind the top edge of the paper plate.
Add a little glue to the back of the wrist section and press it in place behind the cauldron. Now those five ghostly fingers rise up through all that colorful bubbling brew!
Let everything dry for a few minutes, and your spooky scene is complete.
RELATED —> Crepe Paper Witch Cauldron Craft
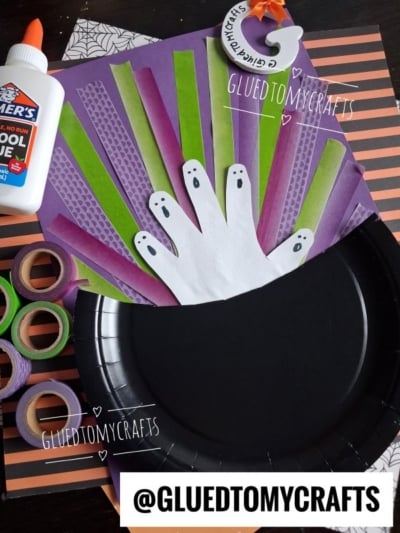
This little cauldron is more than a fun afternoon. It’s a snapshot of your child’s hand at this exact age, turned into something festive and sweet. Pop it on the fridge, hang it in the classroom, or tuck it away in a keepsake box for years to come.
We’d love to see how yours turns out! Snap a photo and tag us @GluedToMyCrafts so we can cheer on your tiny ghost crew.
Happy crafting, and happy haunting! 🎃

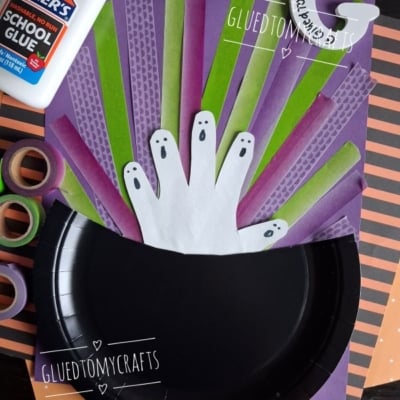
Paper Plate and Washi Tape Witch Cauldron Craft Idea For Halloween
Here’s your checklist of supplies to bring this craft to life:
- Cardstock Paper
- Washi Tape
- Large Paper Plate
- Embellishments
- School Glue
- Pencil/Marker
Prepare your creative haven by laying down a protective cover before the crafting magic begins!
Directions:
- Grab your purple cardstock and lay it flat in front of you. Pick your favorite spot along the bottom-center edge. This will be the center point where all your washi tape "steam" fans out.
- Tear or cut strips of washi tape in green, purple, and magenta. Start placing them so they radiate upward and outward from that bottom-center point, like sunbeams or a peacock's tail. Mix up the colors and patterns as you go for a fun, bubbly look.
- Don't stress about keeping them perfectly even. A little wonkiness makes the "brew" look like it's really bubbling! Keep adding strips until you've filled out a nice fan shape across the top half of your page.
- Take your black paper plate and cut it into a shape of a cauldron. Add a line of Elmer's glue along the back of the paper plate and press it firmly onto the cardstock, right at the bottom of the decorate paper. Hold it in place for a few seconds so it sticks nice and flat.
- Here comes the fun part. Have your child spread their fingers wide and place their hand flat on the white cardstock. Using a pencil, carefully trace around their hand and fingers.
- Once you've got the outline, cut it out along the line. This handprint will become your spooky crew of ghosts, and the five fingers make five perfect little spirits.
- Tip: If your child is wiggly, trace quickly and don't worry about a perfect outline. Ghosts are supposed to look a little floaty anyway!
- Now grab your black marker. On each finger of the handprint, draw a simple ghost face:
- Two small dots for the eyes
- One tall oval for the open, spooky "boooo" mouth
- Repeat on all five fingers so each ghost gets its own face. Some kids love making every ghost look different. Maybe one is surprised, another looks silly, and one is downright scared! Let their imagination lead the way.
- Time to bring it all together. Position your handprint so the ghosts look like they're floating up and out of the cauldron. Tuck the wrist end of the handprint behind the top edge of the paper plate.
- Add a little glue to the back of the wrist section and press it in place behind the cauldron. Now those five ghostly fingers rise up through all that colorful bubbling brew!
- Let everything dry for a few minutes, and your spooky scene is complete.

Grab our favorite books via our Amazon affiliate link! In our Amazon storefront you will find books, toys and craft supplies we absolutely love using for our Glued To My Crafts tutorials!