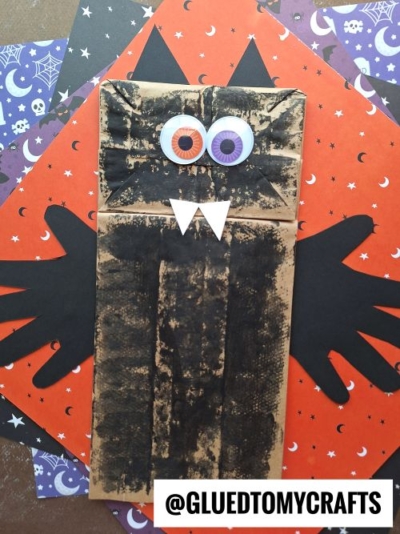
Whether you’re a parent looking for a rainy afternoon activity, a teacher planning a Halloween class project, or just someone who loves a good DIY, this paper bag bat tutorial hits the sweet spot! Little ones get to paint, cut out their their handprints, and glue on goofy eyes. You get a craft that costs almost nothing and doubles as a keepsake. Let’s make some bats!
Craft Supplies:
Gather these supplies before you start. Most of them are probably already in your craft drawer.
- 1 brown paper lunch bag
- Black paint (washable is best for little hands)
- Black construction paper
- White construction paper
- Googly eyes – two per craft
- Scissors
- Glue or a glue stick
- A paintbrush or sponge
- A pencil for tracing
That’s it. Nothing fancy, nothing expensive.
Directions:
Step 1: Paint the Bag Black
Lay your paper bag flat on a covered surface. Using your brush or a sponge, paint the whole bag black. Don’t worry about full coverage. Leaving a little brown paper peeking through actually gives your bat a cool, textured look. Dab the paint on for extra texture if you like.
Set the bag aside to dry completely before moving on. This is a great time to prep the other pieces.
Step 2: Cut Out the Handprint Wings
Have your child place their hand flat on the black construction paper, fingers spread wide. Trace around it with a pencil, then cut out the shape. Repeat for the other hand to get both wings.
Step 3: Make the Triangular Ears
Cut two small triangles from the black paper. These are your bat’s ears.
Step 4: Cut the White Paper Fangs
Cut two little triangles from the white paper. These will be the fangs.
Step 5: Attach the Eyes
Grab your googly eyes or your paper eyes. If you’re going for a colorful, cartoon look, use paper circles with one orange iris and one purple iris. Add tiny radial lines around each pupil for a fun, wide-awake expression. Glue both eyes onto the folded top portion of the bag, which serves as the bat’s head.
Step 6: Assemble Your Bat
Now bring it all together:
- With the bag standing upright, the folded flap at the top is the head and the longer section below is the body.
- Glue the two ears to the top of the head, pointing upward.
- Glue the white fangs just under the fold, pointing down like a little mouth.
- Flip the bag over and glue one handprint wing to each side of the back, letting them stretch outward.
- Double-check that everything is stuck down, then let the glue set.
And just like that, you’ve got a bat! Prop it up or hang it wherever you want a touch of Halloween charm.
RELATED —> Pom Pom Stamped Bat Craft Idea For Halloween
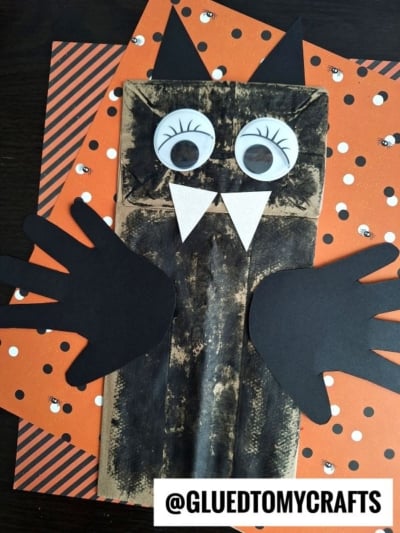
This bat craft proves you don’t need a big budget or fancy materials to make something memorable. Just a paper bag, some construction paper, a pair of scissors, and a couple of eager hands. Give it a try this Halloween season, and watch your kids light up as their creations come to life.
Happy crafting, and have a spook-tacular time!

Paper Bag Halloween Bat Craft Idea
Here’s your checklist of supplies to bring this craft to life:
- Brown Paper Bag
- Craft Paint
- Cardstock Paper
- Wiggle Eyes
- Embellishments
- School Glue
Prepare your creative haven by laying down a protective cover before the crafting magic begins!
Directions:
- Lay your paper bag flat on a covered surface. Using your brush or a sponge, paint the whole bag black. Don't worry about full coverage. Leaving a little brown paper peeking through actually gives your bat a cool, textured look. Dab the paint on for extra texture if you like.
- Set the bag aside to dry completely before moving on. This is a great time to prep the other pieces.
- Have your child place their hand flat on the black construction paper, fingers spread wide. Trace around it with a pencil, then cut out the shape. Repeat for the other hand to get both wings.
- Cut two small triangles from the black paper. These are your bat's ears.
- Cut two little triangles from the white paper. These will be the fangs.
- Grab your googly eyes or your paper eyes. If you're going for a colorful, cartoon look, use paper circles with one orange iris and one purple iris. Add tiny radial lines around each pupil for a fun, wide-awake expression. Glue both eyes onto the folded top portion of the bag, which serves as the bat's head.
- Now bring it all together: With the bag standing upright, the folded flap at the top is the head and the longer section below is the body.
- Glue the two ears to the top of the head, pointing upward.
- Glue the white fangs just under the fold, pointing down like a little mouth.
- Flip the bag over and glue one handprint wing to each side of the back, letting them stretch outward.
- Double-check that everything is stuck down, then let the glue set.
- And just like that, you've got a bat! Prop it up or hang it wherever you want a touch of Halloween charm.

Grab our favorite books via our Amazon affiliate link! In our Amazon storefront you will find books, toys and craft supplies we absolutely love using for our Glued To My Crafts tutorials!