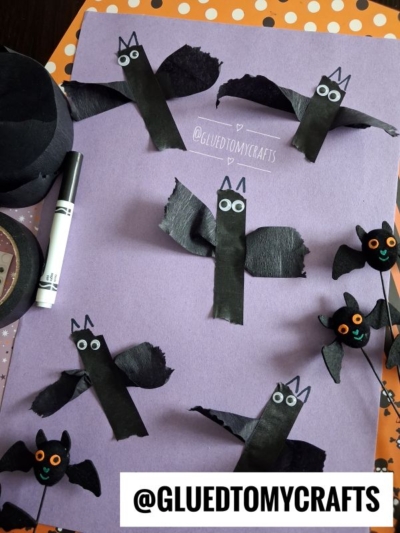
There’s something wonderfully spooky about bats. The way they swoop through the twilight sky, those little pointy ears, the flutter of dark wings against the moon. Kids get a kick out of them every October, so why not bring a few friendly ones indoors?
This craft is one of my favorite easy Halloween projects. It uses supplies you probably already have stashed in a drawer, and it comes together in just a few minutes. Best of all, there’s hardly any mess to clean up afterward. Just torn crepe paper, a bit of tape, and some googly eyes on bright purple paper for a fun, not-too-scary bat colony.
Whether you’re a parent looking for a rainy afternoon activity, a teacher planning a Halloween party, or a caregiver wanting a fuss-free project, these little bats are ready to fly. Let’s make some!
Craft Supplies:
Gather these simple items before you start:
- Purple construction paper (one sheet per child works great as the “night sky” background)
- Black crepe paper streamers (for those flappy little wings)
- Black painter’s tape or masking tape (this becomes the bat’s body)
- Googly eyes (the smaller, the cuter)
- A black marker (for drawing pointy bat ears)
That’s it! Five simple supplies and you’re set.
Directions:
Follow these easy steps, and feel free to let the kids take the lead wherever they can.
- Pull a length of black crepe paper off the roll and tear it into short strips, roughly two to three inches long. Don’t worry about making them perfect. Those rough, torn edges give the wings a soft, papery, fluttery look that makes each bat feel one of a kind.
- Lay your purple construction paper flat. Set a pair of crepe paper strips side by side, leaving a little gap in the middle for the body. Gently pinch or crinkle the center of each strip to give the wings some texture and lift, like they’re mid-flap.
- Tear off a strip of black tape about three inches long. Press it down vertically, right over the center of the crepe paper wings. This tape becomes the bat’s body and holds both wings in place at the same time. Smooth it down with a fingertip so everything sticks nicely.
- Now for the fun finishing touches! Stick two googly eyes near the top of the tape body so your bat can see where it’s flying. Then grab your black marker and draw two little pointy ears reaching up from the top of the head. A quick “M” shape does the trick every time.
- Repeat the steps to add a whole colony of bats across your purple paper. Three, four, five, or more! Angle them in different directions so it looks like they’re swooping through the night sky. A busy page of little bats makes such a cheerful, spooky scene.
RELATED —> Paper Plate & Handprint Bat Craft
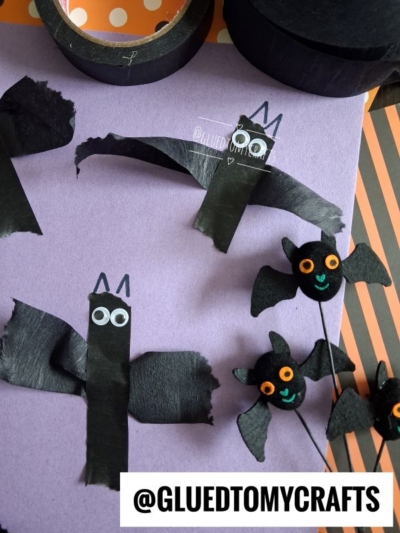
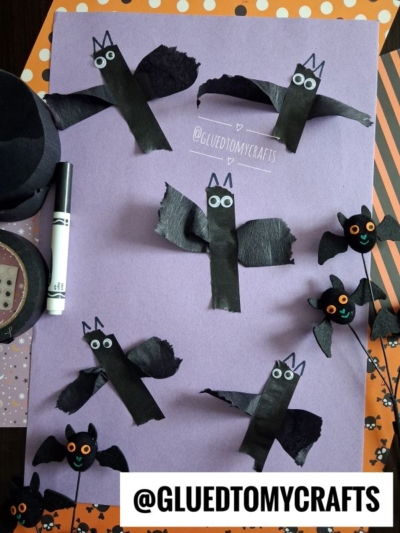
And there you have it, a whole colony of friendly bats made from bits of torn paper, a little tape, and a couple of googly eyes. Simple supplies, big imagination, hardly any mess. That’s the kind of craft I love sharing.
Hang your finished painter’s tape bat art on the fridge, tape it to a window, or use it to decorate a Halloween bulletin board. However you display them, these bats are sure to add a little playful spook to your day.
If you make this project, we’d love to see it! Snap a photo and tag us @GluedToMyCrafts so we can cheer on your creative crew. Happy crafting, my friends!

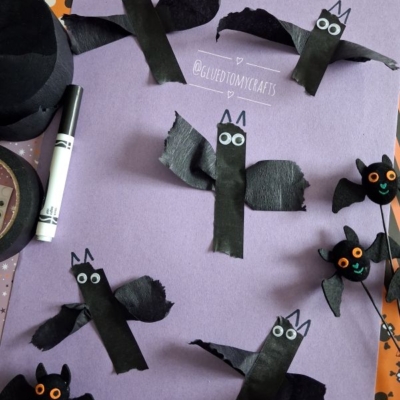
Crepe Paper Bat Craft Idea For Halloween
Make adorable Halloween bats with just five simple supplies — black crepe paper, tape, googly eyes, a marker, and purple construction paper! This easy, mess-free craft is perfect for kids of all ages and comes together in minutes. Great for home, classrooms, or Halloween parties.
Here’s your checklist of supplies to bring this craft to life:
- Construction Paper
- Crepe Paper
- Wiggle Eyes
Prepare your creative haven by laying down a protective cover before the crafting magic begins!
Directions:
- Pull a length of black crepe paper off the roll and tear it into short strips, roughly two to three inches long. Don't worry about making them perfect. Those rough, torn edges give the wings a soft, papery, fluttery look that makes each bat feel one of a kind.
- Lay your purple construction paper flat. Set a pair of crepe paper strips side by side, leaving a little gap in the middle for the body. Gently pinch or crinkle the center of each strip to give the wings some texture and lift, like they're mid-flap.
- Tear off a strip of black tape about three inches long. Press it down vertically, right over the center of the crepe paper wings. This tape becomes the bat's body and holds both wings in place at the same time. Smooth it down with a fingertip so everything sticks nicely.
- Now for the fun finishing touches! Stick two googly eyes near the top of the tape body so your bat can see where it's flying. Then grab your black marker and draw two little pointy ears reaching up from the top of the head. A quick "M" shape does the trick every time.
- Repeat the steps to add a whole colony of bats across your purple paper. Three, four, five, or more! Angle them in different directions so it looks like they're swooping through the night sky. A busy page of little bats makes such a cheerful, spooky scene.


Grab our favorite books via our Amazon affiliate link! In our Amazon storefront you will find books, toys and craft supplies we absolutely love using for our Glued To My Crafts tutorials!
If you've enjoyed our content or have any thoughts to share, we'd love to hear from you! Mention @gluedtomycrafts or tag #gluedtomycrafts on Instagram!