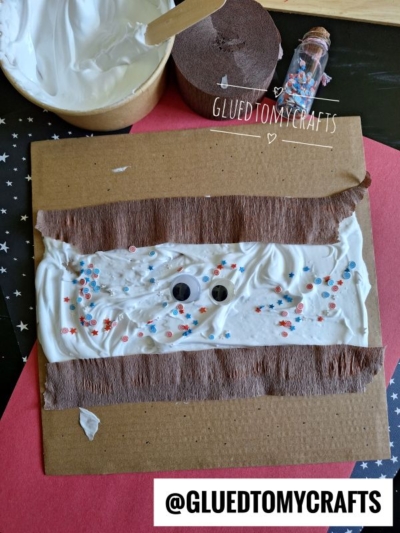
Summer and s’mores just belong together, don’t they? There’s something about that gooey marshmallow, the crunchy graham cracker, and a cozy campfire that makes the whole season feel a little sweeter. But what if your kids could make their very own s’more character without lighting a single match or getting sticky fingers?
That’s exactly what we’re whipping up today. This Cardboard and Puffy Paint S’mores craft is squishy, silly, and so much fun to make. The best part? It uses a magic puffy paint that puffs up and dries with a fluffy, marshmallow-like texture. Add a couple of googly eyes and some festive sprinkles, and you’ve got a smiley little s’more character that’s perfect for summer.
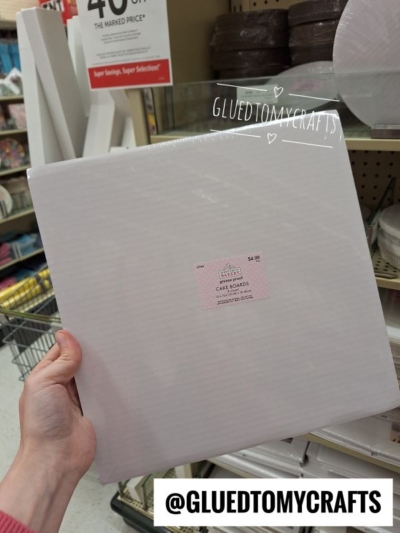
Craft Supplies:
Gather these supplies before you start. Most of them you probably already have around the house.
- Brown cardboard or cake boards – for the base of your s’more
- Brown crepe paper – these become the “chocolate”
- Elmer’s Glue-All – the secret to puffy paint that holds together
- Shaving cream – the fluffy half of the puffy paint magic
- Googly eyes – two big ones to give your s’more some personality
- A craft stick – for mixing and spreading
- A bowl – to make your puffy paint in
Directions:
Please use age appropriate materials and always have adult supervision. This craft is NOT meant to be eaten.
Step 1: Mix Up the Puffy Paint
Grab your bowl and squeeze in some Elmer’s Glue-All. Then add a generous helping of shaving cream. A good starting point is about equal parts of each. Use your craft stick to stir everything together until it’s smooth and fluffy. The mixture should look thick and creamy, almost like whipped marshmallow. This is the part kids go wild for, so let them do the stirring!
Step 2: Spread the “Marshmallow”
Scoop up your puffy paint with the craft stick and spread a thick layer right in the middle, to give the look of two graham cracker strips. Don’t smooth it out too much. Those bumpy peaks and waves are what make it look like a fluffy, melty marshmallow. The thicker, the better!
Step 3: Add the “Chocolate”
Cut two strips of brown crepe paper to fit across your cardboard base. Lay one strip near the top and one near the bottom of the puffy paint, leaving a nice gap in the middle. These crinkly brown strips are the melted “chocolate” that hold your s’more together.
Step 4: Bring It to Life
While the puffy paint is still wet, press two googly eyes into the center. If desired, add some loose craft glitter or sprinkles. The sprinkles stick right into the paint and add a fun, festive pop of color.
Step 5: Let It Dry
Set your puffy paint covered s’more somewhere safe and let it dry completely. As it dries, the puffy paint puffs up even more and turns wonderfully squishy to the touch. This can take a few hours, so it’s a great craft to start in the morning and admire later in the day.
Helpful Tips for Little Crafters
- Cover your workspace. Lay down newspaper or a plastic tablecloth. Puffy paint is fun, but it can get drippy.
- Wear an apron or old shirt. Shaving cream wipes off easily, but better safe than sorry.
- Let kids experiment. Want more sprinkles? Bigger eyes? A double-decker s’more? Encourage them to make it their own.
- Try different colors. Brown paint stirred into the puffy paint can look like a toasted top.
- Don’t rush the drying. The longer it dries, the puffier and squishier it gets.
RELATED —> Fingerprint S’mores Craft Idea For Kids
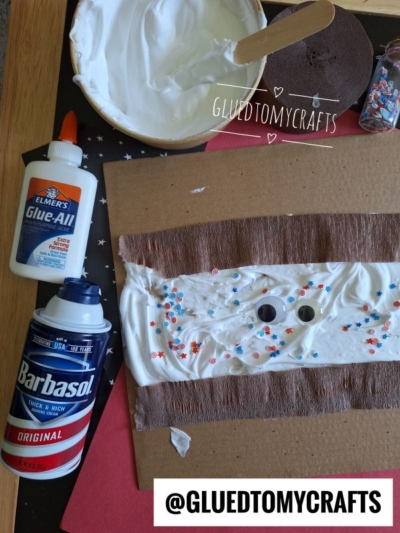
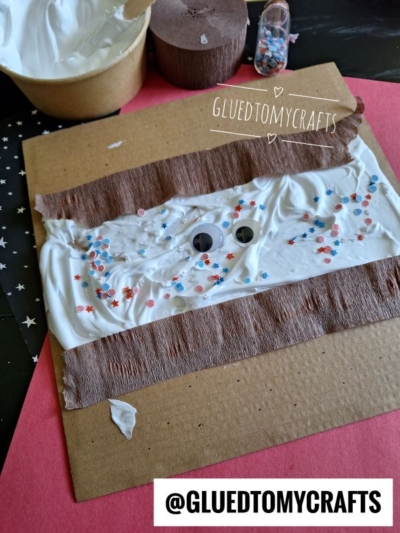
And there you have it: a goofy, grinning s’more character that’s perfect for summer fun. Hang your finished puffy paint smores cardboard piece on the fridge, line a few up on a shelf, or use them to decorate for a backyard campout. No matter how they turn out, every squishy little s’more is a winner.
So grab your supplies, round up the kids, and get ready for a s’more good craft that’s just as sweet as the real thing, minus the sticky fingers. Happy crafting, my friends!
RELATED —> Potato Masher Stamped S’mores Craft Idea For Kids

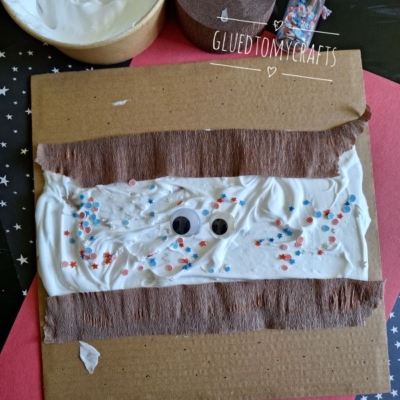
Puffy Paint and Cardboard Smores Craft Idea
Here’s your checklist of supplies to bring this craft to life:
- Large Piece of Cardboard
- Loose Craft Glitter
- Crepe Paper
- Wiggle Eyes
- School Glue
- Shaving Cream
Prepare your creative haven by laying down a protective cover before the crafting magic begins!
Directions:
- Grab your bowl and squeeze in some Elmer's Glue-All. Then add a generous helping of shaving cream. A good starting point is about equal parts of each. Use your craft stick to stir everything together until it's smooth and fluffy. The mixture should look thick and creamy, almost like whipped marshmallow. This is the part kids go wild for, so let them do the stirring!
- Scoop up your puffy paint with the craft stick and spread a thick layer right in the middle, to give the look of two graham cracker strips. Don't smooth it out too much. Those bumpy peaks and waves are what make it look like a fluffy, melty marshmallow. The thicker, the better!
- Cut two strips of brown crepe paper to fit across your cardboard base. Lay one strip near the top and one near the bottom of the puffy paint, leaving a nice gap in the middle. These crinkly brown strips are the melted "chocolate" that hold your s'more together.
- While the puffy paint is still wet, press two googly eyes into the center. If desired, add some loose craft glitter or sprinkles. The sprinkles stick right into the paint and add a fun, festive pop of color.
- Set your s'more somewhere safe and let it dry completely. As it dries, the puffy paint puffs up even more and turns wonderfully squishy to the touch. This can take a few hours, so it's a great craft to start in the morning and admire later in the day.

Grab our favorite books via our Amazon affiliate link! In our Amazon storefront you will find books, toys and craft supplies we absolutely love using for our Glued To My Crafts tutorials!