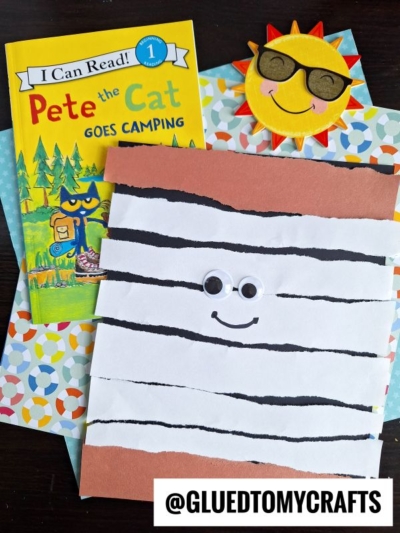
Summer nights bring to mind crackling fires, starry skies, and warm, gooey s’mores. You can bring that campfire magic indoors with a fun, hands-on activity. This torn paper s’mores craft perfectly captures the joy of camping without the sticky mess. It pairs wonderfully with storytime, specifically the beloved children’s book Pete the Cat Goes Camping.
When you combine a great book with an engaging craft, you help children build connections between the stories they read and the world around them!
Supplies You Need for the Torn Paper S’more
You likely already have most of these materials in your craft closet. Gathering the supplies takes just a few minutes.
Here is what you need:
- Cardstock or construction paper: You will need black paper for the background, brown paper for the graham crackers, and white paper for the marshmallow.
- Glue stick or school glue: A standard glue stick works perfectly for attaching the torn paper pieces.
- Googly eyes: Grab two plastic googly eyes to give your s’more a cute, friendly face.
- Markers or crayons: You need a marker or crayon to draw a smile on.
Step-by-Step Torn Paper S’mores Craft Instructions
Creating this craft focuses entirely on the process. Let the kids take the lead and enjoy the tactile experience of ripping and gluing the paper.
Step 1: Prep the Background
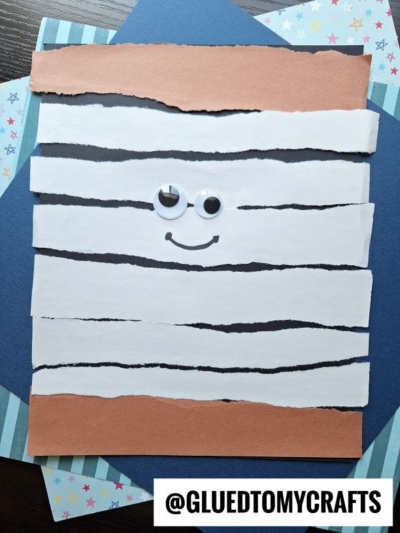
Start by selecting a sturdy background. A half-sheet of black cardstock works wonderfully. The black paper creates a nighttime campfire feel and makes the white and brown paper colors pop.
Step 2: Tear the Graham Crackers
Hand your child the brown construction paper. Instruct them to tear off TWO long strips. Explain that these brown clusters represent the top and bottom graham crackers of their s’more. Help them glue them in place {one on top and one on bottom} to the black paper.
Step 3: Build the Marshmallow Center
Next, hand them the white construction paper. Have them tear this paper into similar small strips and chunks. The white pieces will act as the fluffy, sweet marshmallow filling.
Instruct the kids to glue the white pieces right in the middle of the black paper, bridging the gap between the top and bottom graham crackers. They can stack the white pieces thickly to make an extra gooey marshmallow.
Step 4: Bring Your S’more to Life
Now it is time to add personality to the craft. Help your child attach two googly eyes right in the center of the white marshmallow section.
Finally, grab a black marker. Draw a little curved smile directly under the googly eyes, right in the center of the white paper strips. This simple addition turns a basic paper craft into a cheerful, smiling campfire friend.
RELATED —> Potato Masher Stamped S’mores Craft Idea For Kids
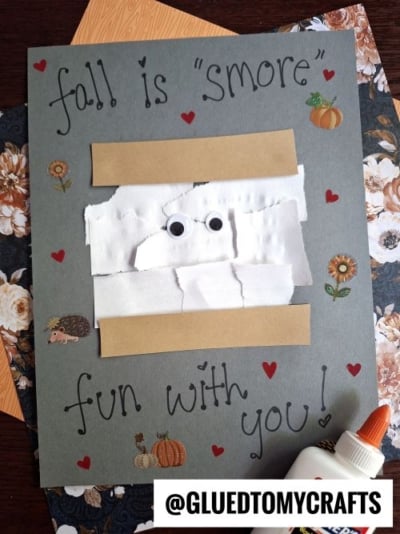
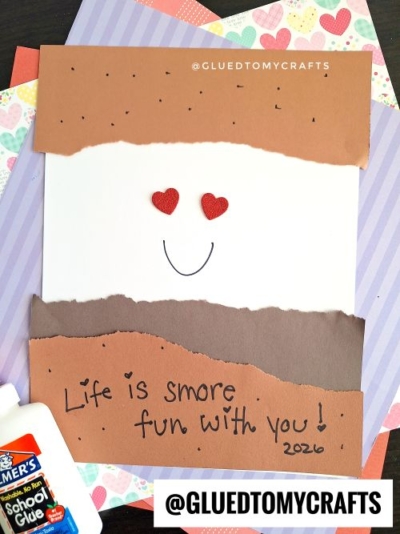
You do not need an actual campfire to enjoy the magic of s’mores. With some colorful paper, a glue stick, and a great book like Pete the Cat Goes Camping, you can create an engaging afternoon activity right at your kitchen table.
Gather your supplies, clear a workspace, and invite your little ones to start tearing paper. Display their smiling s’mores crafts on the fridge or a bulletin board to celebrate their creativity and hard work. Happy crafting!

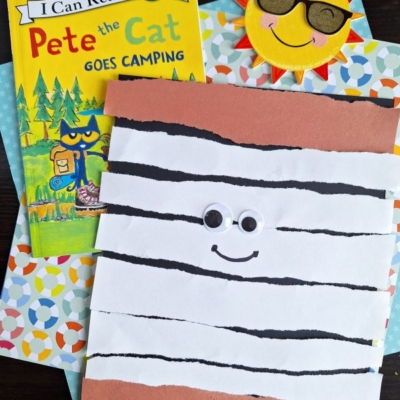
Torn Paper S'mores Craft Idea For Kids
Here’s your checklist of supplies to bring this craft to life:
- Construction Paper
- Wiggle Eyes
- Embellishments
- School Glue
Prepare your creative haven by laying down a protective cover before the crafting magic begins!
Directions:
- Start by selecting a sturdy background. A half-sheet of black cardstock works wonderfully. The black paper creates a nighttime campfire feel and makes the white and brown paper colors pop.
- Hand your child the brown construction paper. Instruct them to tear off TWO long strips. Explain that these brown clusters represent the top and bottom graham crackers of their s'more. Help them glue them in place {one on top and one on bottom} to the black paper.
- Next, hand them the white construction paper. Have them tear this paper into similar small strips and chunks. The white pieces will act as the fluffy, sweet marshmallow filling.
- Instruct the kids to glue the white pieces right in the middle of the black paper, bridging the gap between the top and bottom graham crackers. They can stack the white pieces thickly to make an extra gooey marshmallow.
- Now it is time to add personality to the craft. Help your child attach two googly eyes right in the center of the white marshmallow section.
- Finally, grab a black marker. Draw a little curved smile directly under the googly eyes, right in the center of the white paper strips. This simple addition turns a basic paper craft into a cheerful, smiling campfire friend.

Grab our favorite books via our Amazon affiliate link! In our Amazon storefront you will find books, toys and craft supplies we absolutely love using for our Glued To My Crafts tutorials!