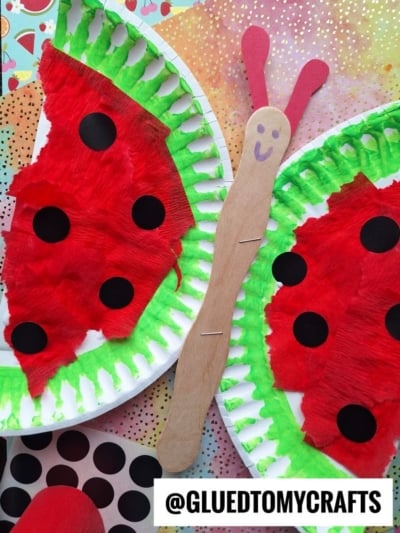
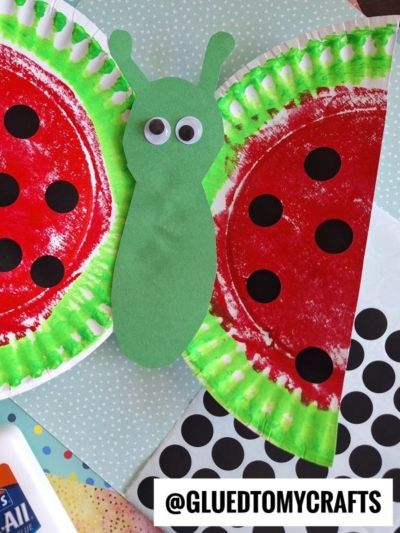
Summer brings sunny days, warm weather, and the perfect excuse to break out your favorite craft supplies. If you need a bright, cheerful activity to keep little hands busy, this paper plate watermelon butterfly craft is a fantastic choice. It brings together two of the best parts of the season: sweet watermelons and beautiful butterflies.
Craft Supplies:
Before you start, gather your craft supplies. Setting everything out on a covered table makes the process smoother for everyone involved.
- White paper plates: The standard, inexpensive paper plates work best.
- Red crepe paper: You can also use red tissue paper or red construction paper.
- Green paint or markers: For creating the watermelon rind.
- Wooden craft sticks: Standard popsicle sticks work perfectly for the body.
- Black paper or stickers: For the watermelon seeds. A black marker works too.
- Red or pink paper: To cut out the butterfly’s antennae.
- Liquid school glue: A glue stick can work, but liquid glue holds the textured paper better.
- Scissors: Kid-safe scissors if they are helping with the cutting.
- A stapler: This is optional, but it helps secure the wings to the body quickly.
Directions:
Follow these simple steps to build your sweet summer butterfly.
- Start by taking one white paper plate and cutting it straight down the middle to create two equal halves. These two halves will become your butterfly wings.
- Take your green paint or a thick green marker and color the outer curved rim of both plate halves. This creates the green rind of your watermelon slices.
- Next, it is time to fill in the center of the fruit. Tear your red crepe paper into small squares or thin strips.
- Squirt a generous amount of liquid school glue over the white center of the plate halves. Have your little crafters press the crinkled red paper into the glue until the entire white area is covered. The ruffled texture of the crepe paper adds a wonderful 3D effect to the craft.
- A watermelon is not complete without its seeds! Cut small circles out of black craft paper, or use black circle stickers. Glue five or six black circles onto the red crepe paper of each wing. If you want to skip the cutting, you can simply draw the seeds on with a thick black marker once the glue dries.
- Grab a wooden craft stick to serve as the butterfly’s body. Use a marker to draw a cheerful smiley face near the top of the stick.
- Cut two small, rounded strips from your red or pink paper to act as the antennae.
- Glue these to the very top of the wooden stick, right above the face.
- Once all your separate pieces are completely dry, it is time to put the butterfly together. Run a line of liquid glue down the straight edges of your paper plate halves and press them onto the back of the wooden craft stick. If you want a more secure hold that dries instantly, use a stapler to attach the wings directly to the wooden stick.
- Add any other embellishments you see fit.
- When done decorating, allow it to dry completely before displaying it proudly for all to see!
RELATED —> Handprint Watermelon Card For Summer
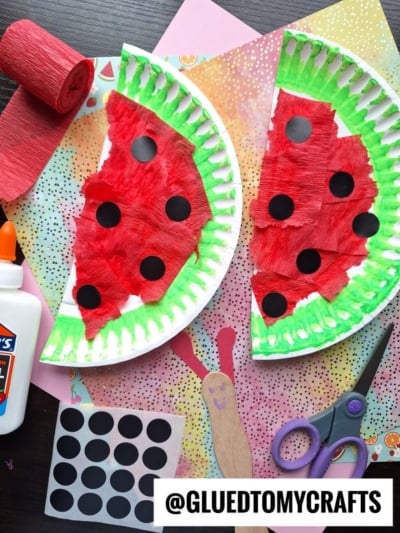
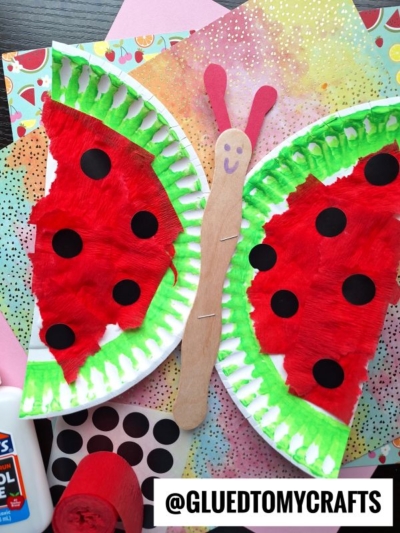
We hope you and your kids have a wonderful time putting together this paper plate watermelon butterfly craft. It is a wonderful way to celebrate the bright colors of summer while spending quality time together.
If you are looking for even more ways to stay creative this season, explore our website for more fun, easy, and affordable craft ideas. Grab your glue, keep crafting, and enjoy your summer!
RELATED —> Puffy Paint Watermelon Slice Craft Idea

Paper Plate Watermelon Butterfly Craft for Kids
Create a fun and easy summer craft with our Paper Plate Watermelon Butterfly tutorial! Perfect for kids, parents, and teachers. Get step-by-step instructions now!
Here’s your checklist of supplies to bring this craft to life:
- Large Paper Plate
- Crepe Paper
- Coding Dots
- Cardstock Paper
- Jumbo Popsicle Sticks
- Embellishments
Prepare your creative haven by laying down a protective cover before the crafting magic begins!
Directions:
- Start by taking one white paper plate and cutting it straight down the middle to create two equal halves. These two halves will become your butterfly wings.
- Take your green paint or a thick green marker and color the outer curved rim of both plate halves. This creates the green rind of your watermelon slices.
- Next, it is time to fill in the center of the fruit. Tear your red crepe paper into small squares or thin strips.
- Squirt a generous amount of liquid school glue over the white center of the plate halves. Have your little crafters press the crinkled red paper into the glue until the entire white area is covered. The ruffled texture of the crepe paper adds a wonderful 3D effect to the craft.
- A watermelon is not complete without its seeds! Cut small circles out of black craft paper, or use black circle stickers. Glue five or six black circles onto the red crepe paper of each wing. If you want to skip the cutting, you can simply draw the seeds on with a thick black marker once the glue dries.
- Grab a wooden craft stick to serve as the butterfly's body. Use a marker to draw a cheerful smiley face near the top of the stick.
- Cut two small, rounded strips from your red or pink paper to act as the antennae.
- Glue these to the very top of the wooden stick, right above the face.
- Once all your separate pieces are completely dry, it is time to put the butterfly together. Run a line of liquid glue down the straight edges of your paper plate halves and press them onto the back of the wooden craft stick. If you want a more secure hold that dries instantly, use a stapler to attach the wings directly to the wooden stick.
- Add any other embellishments you see fit.
- When done decorating, allow it to dry completely before displaying it proudly for all to see!

Grab our favorite books via our Amazon affiliate link! In our Amazon storefront you will find books, toys and craft supplies we absolutely love using for our Glued To My Crafts tutorials!
If you've enjoyed our content or have any thoughts to share, we'd love to hear from you! Mention @gluedtomycrafts or tag #gluedtomycrafts on Instagram!