Make an easy paper plate groundhog puppet craft for Groundhog's Day! This fun, educational activity is perfect for kids. Get the step-by-step tutorial now.
February 2nd brings a fun and quirky tradition that kids absolutely love. Groundhog’s Day offers a wonderful opportunity to teach children about weather prediction, changing seasons, and animal behavior. We have put together a simple, engaging paper plate groundhog puppet craft that pairs perfectly with storytime.
This hands-on activity helps develop fine motor skills while sparking imaginative play. It requires minimal supplies, making it an ideal project for parents, teachers, and caregivers. You probably already have most of the materials in your craft closet.
Craft Supplies:
You probably already have most of these simple supplies in your craft bin. To make a complete set of four groundhog puppets, you will need:
- White paper plates: One or two standard, inexpensive paper plates with a ridged edge.
- Brown craft paint: Acrylic or washable school paint works perfectly.
- Paintbrushes: A medium brush for applying the brown paint.
- Cardstock or construction paper: Brown for the ears/nose and white for the teeth.
- Black dot stickers: These will become the noses.
- Large googly eyes: Eight total (two for each groundhog).
- Wooden craft sticks: Four jumbo popsicle sticks to act as the puppet handles.
- School glue: An Elmer’s washable glue stick or liquid school glue.
- Scissors: Kid-friendly scissors if they are helping with the cutting.
Directions:
Creating these adorable groundhog puppets takes just a few minutes of active crafting, plus a little drying time for the paint.
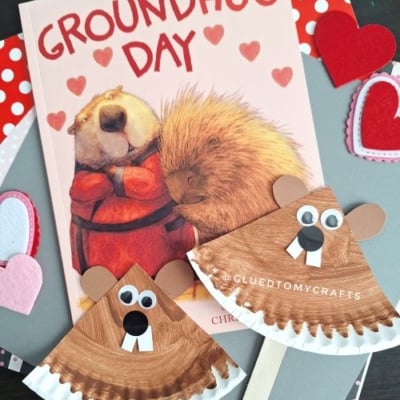
- Start by cutting a standard white paper plate into wedge shapes. You will want to cut the plate into thirds or fourths, like slices of a pie. The pointed end will be the top of the bear’s head, and the curved, ridged edge of the plate will serve as the bottom of the groundhog’s furry face.
- Have your little ones paint the paper plate wedges entirely brown. Encourage them to use thick, textured brushstrokes.
- Set the painted wedges aside to dry completely.
- While the paint dries, grab your scissors and colored paper.
- For each groundhog puppet, cut two small semi-circles out of the brown cardstock to serve as the ears.
- Cut one medium oval from the brown cardstock for the muzzle.
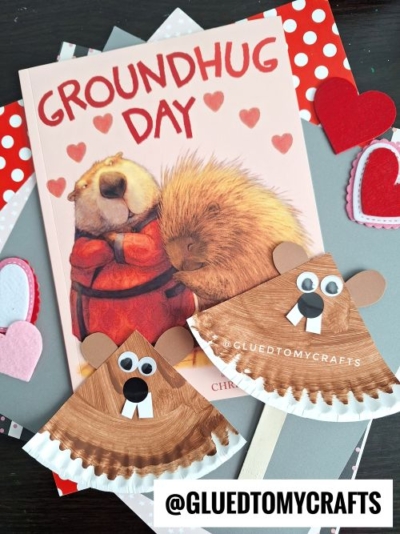
- Cut two small rectangles from the white cardstock for the buck teeth.
- Once the brown paint is dry to the touch, it is time to bring the groundhog’s to life. Use your glue stick to attach two brown ears to the back of the pointed top of each wedge.
- Next, glue two large googly eyes near the top point of the wedge, right below the ears.
- Finally, paste one large black dot sticker nose right in the center of the wedge, just below the eyes.
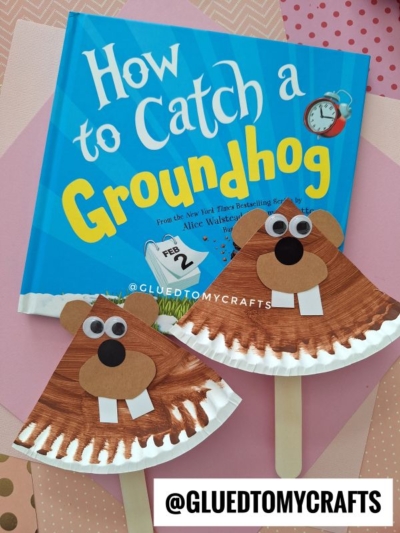
- Flip the assembled groundhog’s faces over. Apply a generous strip of glue to the top half of a wooden craft stick.
- Press the stick firmly against the back of the paper plate wedge, ensuring the bottom half of the stick hangs down below the ridged edge to create a handle.
- Allow the glue to set completely before using the puppets.
RELATED —> Paint Splat Groundhog Craft Idea For Kids

Crafting together creates wonderful memories and sparks creativity. We hope you and your little ones have a fantastic time building these charming groundhog puppets. Whether Phil predicts more snow or sunny days ahead, this indoor activity guarantees a fun afternoon.
We would absolutely love to see how your paper plate groundhog puppets turned out! Please share your photos with us and let us know if your groundhog saw its shadow. Be sure to explore the rest of our blog for even more easy, educational, and fun craft ideas to keep your kids entertained all year long.

Paper Plate Groundhog Puppet Craft Idea
Make an easy paper plate groundhog puppet craft for Groundhog's Day! This fun, educational activity is perfect for kids. Get the step-by-step tutorial now.
Here’s your checklist of supplies to bring this craft to life:
- School Glue
Prepare your creative haven by laying down a protective cover before the crafting magic begins!
Directions:
- Start by cutting a standard white paper plate into wedge shapes. You will want to cut the plate into thirds or fourths, like slices of a pie. The pointed end will be the top of the bear's head, and the curved, ridged edge of the plate will serve as the bottom of the groundhog's furry face.
- Have your little ones paint the paper plate wedges entirely brown. Encourage them to use thick, textured brushstrokes.
- Set the painted wedges aside to dry completely.
- While the paint dries, grab your scissors and colored paper.
- For each groundhog puppet, cut two small semi-circles out of the brown cardstock to serve as the ears.
- Cut one medium oval from the brown cardstock for the muzzle.
- Cut two small rectangles from the white cardstock for the buck teeth.
- Once the brown paint is dry to the touch, it is time to bring the groundhog's to life. Use your glue stick to attach two brown ears to the back of the pointed top of each wedge.
- Next, glue two large googly eyes near the top point of the wedge, right below the ears.
- Finally, paste one large black dot sticker nose right in the center of the wedge, just below the eyes.
- Flip the assembled groundhog's faces over. Apply a generous strip of glue to the top half of a wooden craft stick.
- Press the stick firmly against the back of the paper plate wedge, ensuring the bottom half of the stick hangs down below the ridged edge to create a handle.
- Allow the glue to set completely before using the puppets.
CLICK HERE TO PRINT THE DIRECTIONS FOR THIS CRAFT
If you've enjoyed our content or have any thoughts to share, we'd love to hear from you! Mention @gluedtomycrafts or tag #gluedtomycrafts on Instagram!