Create a fun Potato Masher Stamped Pie using craft supplies. Follow our easy steps for a colorful and creative project.
Are you searching for a super simple and delightful Thanksgiving craft for your kids? Look no further! Our potato masher stamped pumpkin pie craft tutorial is the perfect activity to keep little hands busy and get everyone into the festive spirit. It’s an easy, low-mess project that uses a common kitchen tool to create something unexpectedly adorable.
This craft is not only fun but also a great way for children to practice fine motor skills and creativity. Plus, we’ve made it even easier with a free printable template! You can bring this charming pumpkin pie slice to life with just a few simple supplies. Let’s gather our materials and get ready to make some sweet Thanksgiving memories.
Craft Supplies:
- Pumpkin Pie Printable – from our Thanksgiving Landing Page
- Cardstock Paper
- Crayons, Markers or Coloring Pencils
- Small Paper Plate
- Orange Craft Paint
- Potato Masher
- Loose Craft Glitter
- Cotton Balls
- School Glue
- Embellishments
Directions:
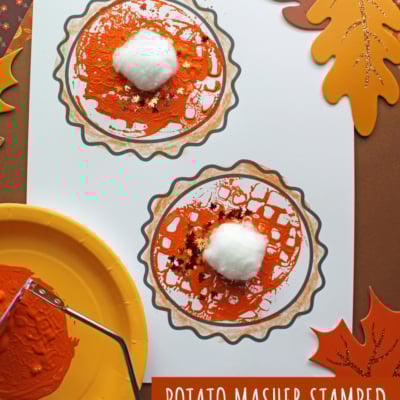
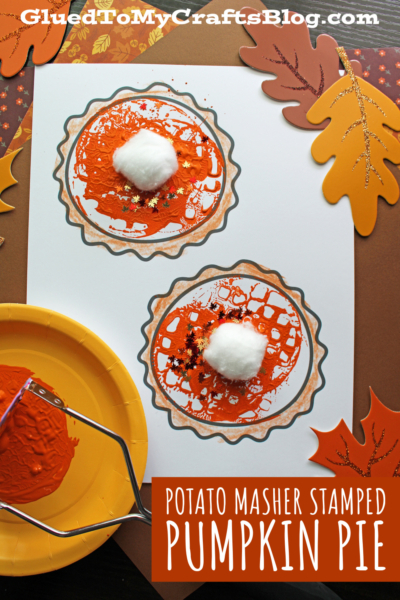
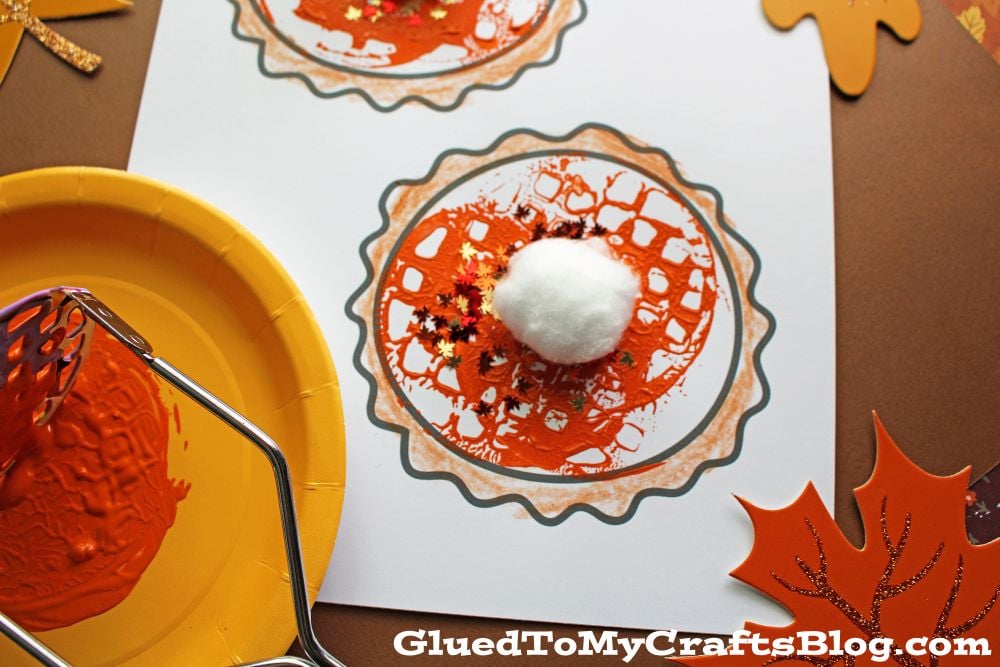
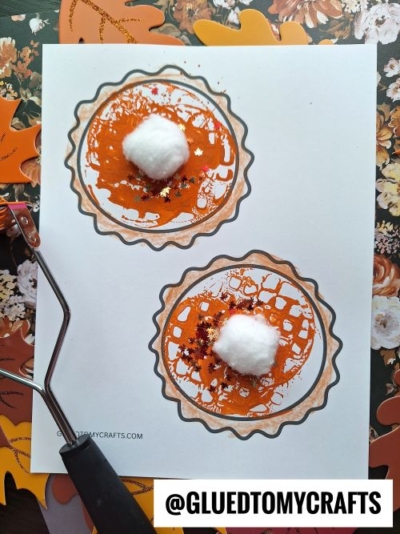
- Start by printing our free template onto a single sheet of cardstock paper. Then, use crayons, markers, or colored pencils to color in the crust portion of each pie shape.
- Pour a good amount of orange craft paint onto a paper plate. Dip your potato masher into the paint, making sure the bottom is completely covered.
- Firmly press the paint-covered masher onto the paper inside one of the pie shapes. Lift it up and repeat the process on the second pie to create the “filling.”
- While the orange paint is still wet, sprinkle some loose craft glitter over it for a touch of shimmer.
- To complete your pumpkin pies, glue a few cotton balls on top to look like whipped cream. Feel free to add any other fun embellishments you like.
- Once finished, set your craft aside to dry completely before putting it on display for everyone to admire.
RELATED —> Handprint Sweeter Than Pie Keepsake

And there you have it! A festive and adorable potato masher stamped pumpkin pie craft. Let the glue on the cotton ball dry completely, and then your new piece of Thanksgiving art is ready to be displayed. You can hang it on the fridge, use it as a decoration on the kids’ table, or even cut each design out & string a few together to make a festive garland.
This activity is a wonderful way to spend a fall afternoon creating something together as a family. We hope you and your little ones enjoy making this super easy Thanksgiving craft. Happy crafting, my friends!

Potato Masher Stamped Pumpkin Pie Craft Idea
Create a fun Potato Masher Stamped Pie using craft supplies. Follow our easy steps for a colorful and creative project.
Here’s your checklist of supplies to bring this craft to life:
Prepare your creative haven by laying down a protective cover before the crafting magic begins!
Directions:
- Start by printing our free template onto a single sheet of cardstock paper. Then, use crayons, markers, or colored pencils to color in the crust portion of each pie shape.
- Pour a good amount of orange craft paint onto a paper plate. Dip your potato masher into the paint, making sure the bottom is completely covered.
- Firmly press the paint-covered masher onto the paper inside one of the pie shapes. Lift it up and repeat the process on the second pie to create the "filling."
- While the orange paint is still wet, sprinkle some loose craft glitter over it for a touch of shimmer.
- To complete your pumpkin pies, glue a few cotton balls on top to look like whipped cream. Feel free to add any other fun embellishments you like.
- Once finished, set your craft aside to dry completely before putting it on display for everyone to admire.


NEED MORE HELP DOWNLOADING OUR FREE PRINTABLES? PLEASE REFER TO OUR FAQ PAGE
If you've enjoyed our content or have any thoughts to share, we'd love to hear from you! Mention @gluedtomycrafts or tag #gluedtomycrafts on Instagram!