If you’re looking for a creative and meaningful DIY craft project, creating a button covered flag wooden frame may be the perfect option for you.
Whether you’re decorating your home, making personalized gifts, or simply indulging in a fun craft session, this project combines rustic charm with vibrant flair. The best part? Even beginner crafters can tackle this with ease!
This step-by-step guide will walk you through creating a button covered flag wooden frame from start to finish. You’ll learn how to design it, assemble the materials, and execute your idea into a beautiful piece of wall art. Let’s get started.

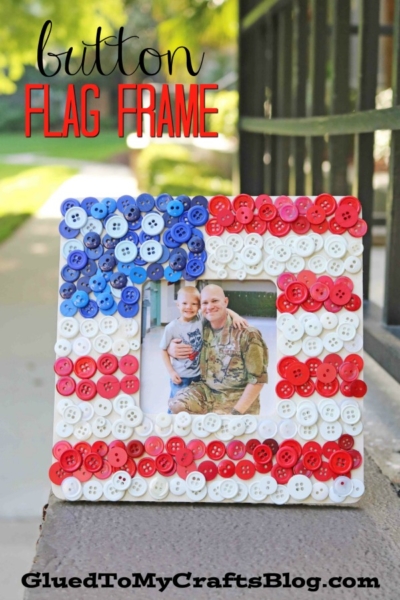
Display your patriotism with this one-of-a-kind wooden flag frame, beautifully adorned with vibrant red, white, and blue buttons!
Craft Supplies:
- Large Square Wood Frame
- Red Craft Buttons
- White Craft Buttons
- Blue Craft Buttons
- Glue Gun or Thick Tacky Glue
Directions:
- The process is simple, but it requires a bit of patience! Start by envisioning a flag design on your frame. You can even use light pencil marks to outline the sections for better guidance.
- Work in sections (I recommend starting with the blue area). Begin gluing buttons onto the frame in neat rows. A helpful tip: apply glue and buttons in lines first, then go back later to fill in any gaps with a second layer of buttons for a fuller look.
- Take your time and work in stages to avoid feeling overwhelmed. I personally tackled the blue section first, took a break, and then returned to complete the red and white sections. It’s perfectly fine to take it slow—crafting should be enjoyable!
- Once your Button Flag Frame is fully covered, let it dry completely. Place it flat in a safe, undisturbed spot.
- When everything is dry, insert a favorite picture and display your finished masterpiece with pride!
RELATED —> Gnome of the Brave Keepsake

The best thing about a button covered flag wooden frame is how customizable it is. Personalize the design to represent your aesthetic, commemorate a special event, or honor a loved one’s heritage. Whatever your inspiration, the finished product will be a reflection of your creativity and effort.
Be sure to also check out our Popsicle Stick Button Flag craft tutorial, to pair with today’s post!
