Summer brings long afternoons, bright sunshine, and plenty of free time for creativity. When the weather gets too hot for outdoor play, setting up an indoor art station keeps little minds active and engaged. If you want a fresh, ocean-themed project for your children, we have a wonderful idea.
This potato masher stamped crabs craft offers a fantastic way for kids to create textured, colorful art. By raiding your kitchen drawers for painting tools, you can turn an ordinary afternoon into an exciting underwater adventure. This tactile experience is perfect for parents, teachers, and caregivers who want a low-prep, highly engaging activity.
Gathering Your Craft Supplies:
You probably already have most of these items in your house. Here is exactly what you need to set up your summer stamping station:
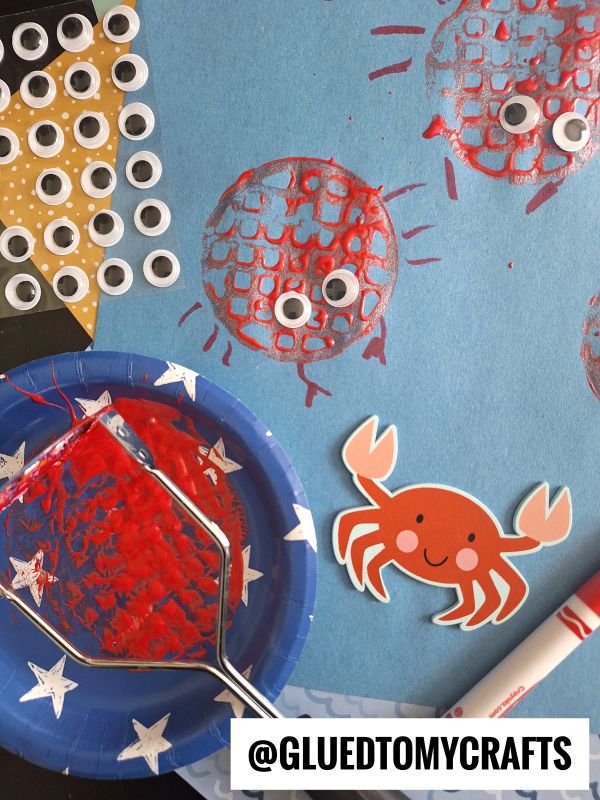
- A Potato Masher: Look for a metal or plastic masher with a grid or zig-zag pattern. The spaces in the tool create the wonderful texture for the crab shell.
- Red Craft Paint: Washable tempera paint works best.
- A Paper Plate: You need a shallow, flat surface to act as your paint palette.
- Light Blue Construction Paper: This will serve as your bright ocean background.
- Googly Eyes: Grab a sheet of self-adhesive googly eyes. Different sizes add silly, expressive character to the crabs.
- Markers: A red washable marker for drawing the legs and claws.
Step-by-Step Instructions:
Ready to make some art? Follow these simple steps to guide your kids through this fun summer craft.
Step 1: Prep the Ocean Canvas
- Start by placing the light blue construction paper on a flat surface. If you want to contain the mess, tape the edges down to the table using painter’s tape, or place the paper inside a shallow cardboard box. Squeeze a generous puddle of red washable paint onto your paper plate.
Step 2: Load the Masher
- Hand the potato masher to your child and show them how to press it flat into the red paint. Encourage them to wiggle it just a little bit to ensure the entire grid gets completely coated. Lift the masher and gently tap it once on the side of the plate to remove any heavy drips.
Step 3: Stamp the Crab Bodies
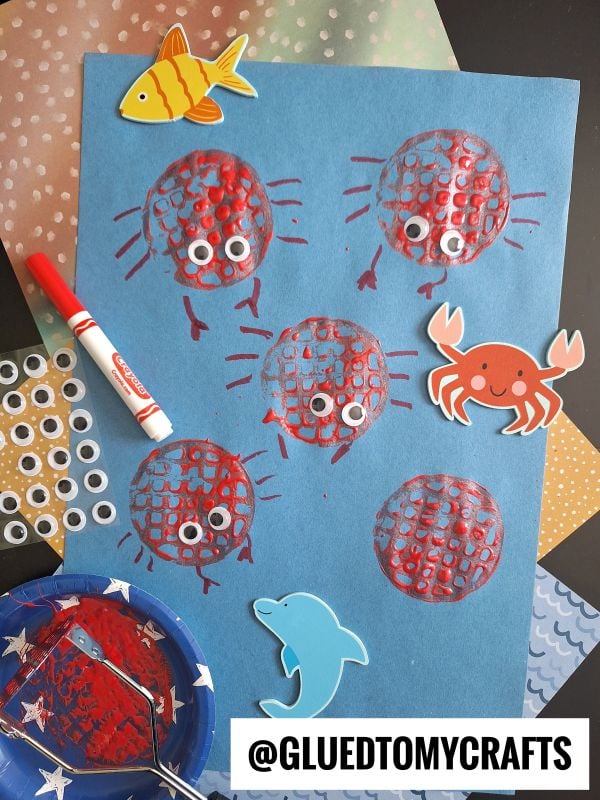
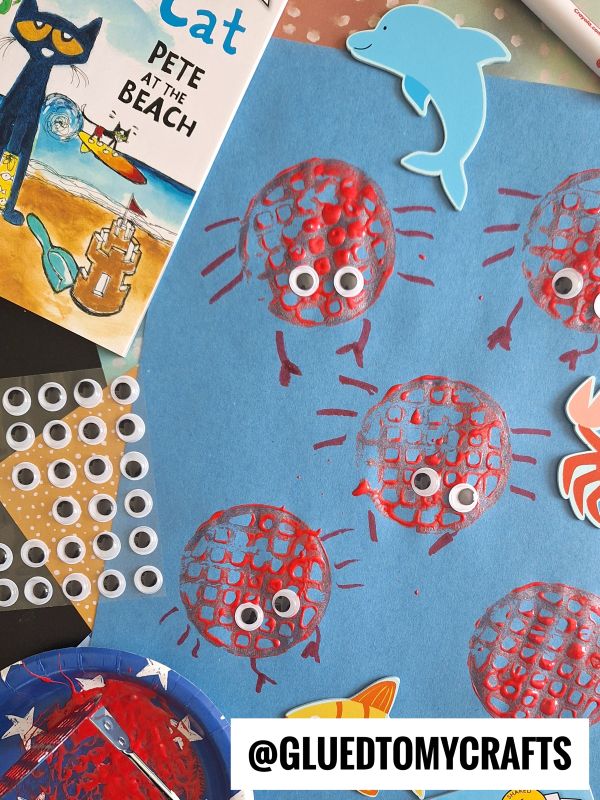
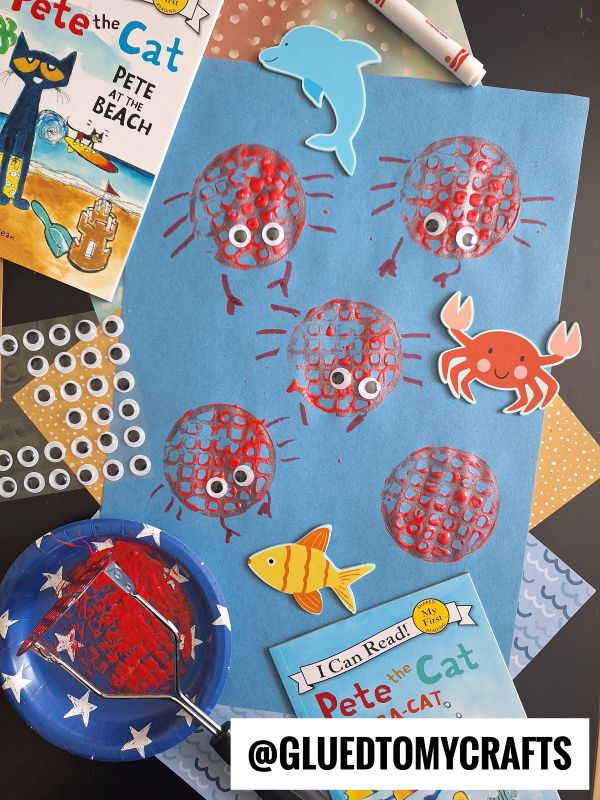
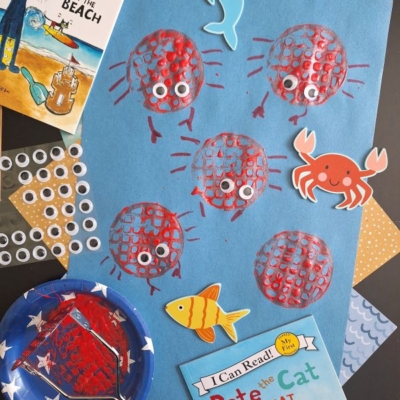
- Now comes the best part. Have your child press the paint-covered masher firmly onto the blue paper. When they lift it straight up, they will see a perfect, textured circle. This grid-like pattern mimics a bumpy crab shell. Let them stamp as many crab bodies as they want across their blue ocean background.
Step 4: Let the Paint Dry
- Because the paint can get quite thick from the stamping tool, you will need to let the artwork dry completely before adding the final details. Take this time to wash the potato masher and clean up the paint plate. You can even read a book about ocean life while you wait for the paint to set.
Step 5: Add the Googly Eyes
- Once the red paint is completely dry to the touch, it is time to give your crabs some personality. Help your child peel and stick two googly eyes onto the top edge of each stamped circle. If you do not have self-adhesive eyes, a small dot of school glue works just fine.
Step 6: Draw the Legs and Claws
- Hand your child the red marker. Show them how to draw three little legs on each side of the stamped circle. Then, have them draw two lines at the top near the eyes and add little “C” shapes to make the crab claws. When done decorating, display it proudly for all to see!
RELATED —> Cupcake Liner and Handprint Hermit Crab
This potato masher stamped crabs craft brings the magic of the beach right into your living room. It combines sensory play, motor skill practice, and creative expression into one easy project.
We encourage you to set up this tactile art experience for your little ones this week. Once your kids finish their beautiful underwater scenes, display them proudly on the refrigerator or a bulletin board. Gather your supplies, clear off the kitchen table, and get ready for a fun-filled afternoon of summer stamping!

Potato Masher Stamped Crabs Craft Idea
Keep kids entertained this summer with a fun, tactile potato masher stamped crabs craft. Discover how to create ocean-themed art using simple kitchen tools!
Here’s your checklist of supplies to bring this craft to life:
- Cardstock Paper
- Craft Paint
- Wiggle Eyes
- Embellishments
Prepare your creative haven by laying down a protective cover before the crafting magic begins!
Directions:
- Start by placing the light blue construction paper on a flat surface. If you want to contain the mess, tape the edges down to the table using painter's tape, or place the paper inside a shallow cardboard box. Squeeze a generous puddle of red washable paint onto your paper plate.
- Hand the potato masher to your child and show them how to press it flat into the red paint. Encourage them to wiggle it just a little bit to ensure the entire grid gets completely coated. Lift the masher and gently tap it once on the side of the plate to remove any heavy drips.
- Now comes the best part. Have your child press the paint-covered masher firmly onto the blue paper. When they lift it straight up, they will see a perfect, textured circle. This grid-like pattern mimics a bumpy crab shell. Let them stamp as many crab bodies as they want across their blue ocean background.
- Because the paint can get quite thick from the stamping tool, you will need to let the artwork dry completely before adding the final details. Take this time to wash the potato masher and clean up the paint plate. You can even read a book about ocean life while you wait for the paint to set.
- Once the red paint is completely dry to the touch, it is time to give your crabs some personality. Help your child peel and stick two googly eyes onto the top edge of each stamped circle. If you do not have self-adhesive eyes, a small dot of school glue works just fine.
- Hand your child the red marker. Show them how to draw three little legs on each side of the stamped circle. Then, have them draw two lines at the top near the eyes and add little "C" shapes to make the crab claws. When done decorating, display it proudly for all to see!
CLICK HERE TO PRINT THE DIRECTIONS FOR THIS CRAFT
If you've enjoyed our content or have any thoughts to share, we'd love to hear from you! Mention @gluedtomycrafts or tag #gluedtomycrafts on Instagram!