Spring is finally in the air! The flowers are blooming, the rain showers are watering the gardens, and the garden critters are waking up. It is the perfect time to get creative with your kids and celebrate the season with a hands-on art project.
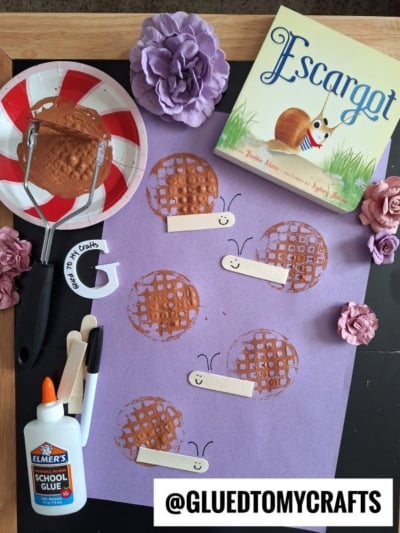
If you are looking for a unique way to paint without regular brushes, this activity is for you. We are raiding the kitchen drawer to create adorable textures! This potato masher snail craft is incredibly simple, low-mess, and pairs wonderfully with a spring story time. In fact, if you have the book Escargot by Dashka Slater, this craft is the perfect companion activity.
In this tutorial, you will learn how to transform a common kitchen utensil into an art tool to make textured snail shells. Let’s get stamping!
Supplies You Will Need
Before you gather the kids, grab these simple materials. You likely have most of them in your craft stash or kitchen already.
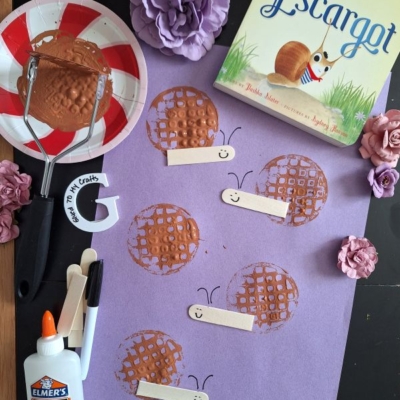
- Potato Masher: Look for one with a waffle or grid pattern on the bottom. Round mashers work best for snail shells.
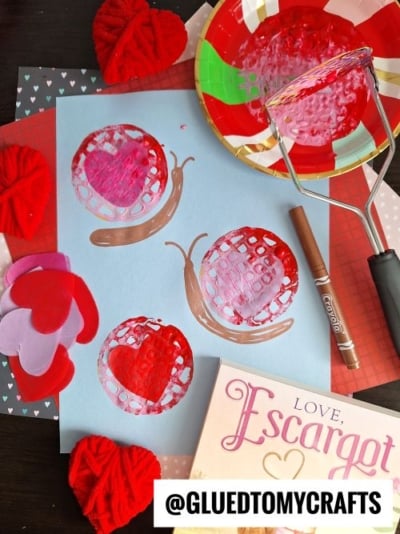
- Craft Paint: We used brown for a natural look, but bright spring colors work too.
- Cardstock Paper: Light purple, green, or blue work great as a background.
- Wooden Craft Sticks: Jumbo popsicle stick size.
- Scissors: To cut the craft sticks in half.
- School Glue: A standard bottle of white glue is perfect.
- Black Marker: A Sharpie or black coloring marker to draw faces.
- Paper Plate: To use as a paint palette.
- Baby Wipes: Essential for quick cleanup of sticky fingers and messy mashers.
Step-by-Step Directions
This project moves quickly, which is great for short attention spans. Here is how to build your snail garden.
1. Prepare Your Paint Station
Start by squirting a generous amount of craft paint onto your paper plate. You want a puddle wide enough to fit the bottom of your potato masher. If the paint is too thick, you can add a tiny drop of water to thin it out, but usually, straight from the bottle works best for stamping.
2. Stamp the Snail Shells
Lay your sheet of cardstock on a flat surface. Dip the bottom of the potato masher into the paint. Make sure the entire grid is coated.
Press the masher firmly onto the cardstock. Lift it straight up to avoid smearing the design. You should see a cool, grid-like circle that looks just like a textured snail shell! Repeat this step to make as many shells as you want on the paper. Leave enough room below each circle for the snail’s body.
3. Create the Snail Bodies
While the paint dries, turn your attention to the wooden craft sticks. Use your craft scissors to cut them in half. These will serve as the bodies for your snails.
Using your black marker, draw a simple smiley face near the top of each stick. Let your kids get creative with the expressions – some snails can be happy, sleepy, or surprised!
4. Assemble the Snails
Once the stamped paint is dry to the touch (acrylic paint usually takes about 10–15 minutes), it is time to assemble.
Apply a line of school glue to the back of a craft stick. Place the stick on the paper so that the top of the “head” slightly overlaps the bottom of the stamped shell. Press down firmly.
Repeat this for every stamped shell on your paper.
5. Let It Dry
Allow the glue to dry completely before displaying your masterpiece. This ensures the heavy wooden sticks stay attached to the paper.
RELATED —> Paper Plate & Paint Splat Snails

This potato masher snail craft is a fantastic way to develop fine motor skills while celebrating the arrival of spring. Whether you are a teacher looking for a classroom activity or a parent needing a rainy day solution, this project delivers big smiles with minimal effort.
We would love to see your colony of snails! If you make this craft, snap a picture and tag us on social media. Happy crafting!

Potato Masher Snail Craft: A Fun Spring Art Project
Here’s your checklist of supplies to bring this craft to life:
Prepare your creative haven by laying down a protective cover before the crafting magic begins!
Directions:
- Start by squirting a generous amount of craft paint onto your paper plate. You want a puddle wide enough to fit the bottom of your potato masher. If the paint is too thick, you can add a tiny drop of water to thin it out, but usually, straight from the bottle works best for stamping.
- Lay your sheet of cardstock on a flat surface. Dip the bottom of the potato masher into the paint. Make sure the entire grid is coated.
- Press the masher firmly onto the cardstock. Lift it straight up to avoid smearing the design. You should see a cool, grid-like circle that looks just like a textured snail shell! Repeat this step to make as many shells as you want on the paper. Leave enough room below each circle for the snail's body.
- While the paint dries, turn your attention to the wooden craft sticks. Use your craft scissors to cut them in half. These will serve as the bodies for your snails.
- Using your black marker, draw a simple smiley face near the top of each stick. Let your kids get creative with the expressions - some snails can be happy, sleepy, or surprised!
- Once the stamped paint is dry to the touch (acrylic paint usually takes about 10–15 minutes), it is time to assemble.
- Apply a line of school glue to the back of a craft stick. Place the stick on the paper so that the top of the "head" slightly overlaps the bottom of the stamped shell. Press down firmly.
- Repeat this for every stamped shell on your paper.
- Allow the glue to dry completely before displaying your masterpiece. This ensures the heavy wooden sticks stay attached to the paper.
CLICK HERE TO PRINT THE DIRECTIONS FOR THIS CRAFT