
Crafting with children should be fun, simple, and low-stress. If you have a spare pool noodle and a few bottles of paint, you already have everything you need for a fantastic afternoon activity.
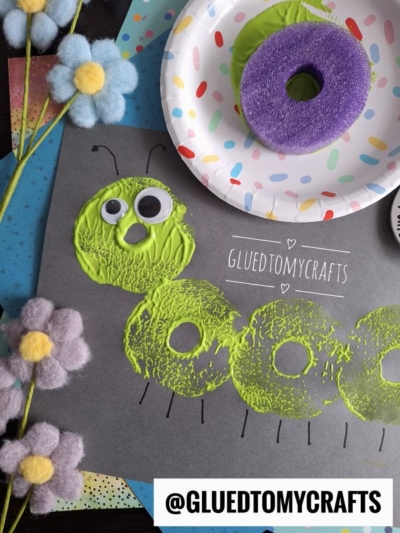
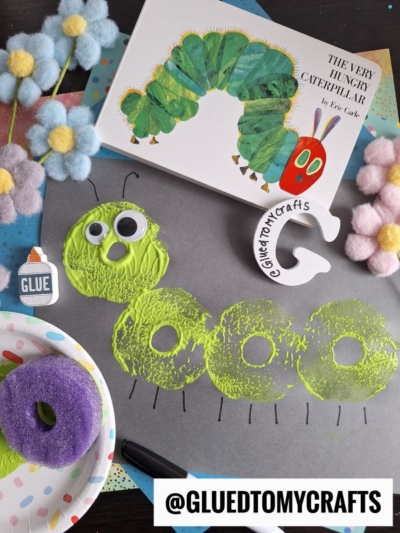
This pool noodle stamped caterpillar craft brings a beloved children’s book to life. Inspired by Eric Carle’s classic, The Very Hungry Caterpillar, this project allows toddlers and preschoolers to explore shapes, colors, and textures. Kids love dipping the foam rings into bright paint, and parents love how easy it is to set up and clean up.
Materials You Need
Gather these simple supplies before you begin. You likely have most of them tucked away in your craft bin right now.
- One pool noodle: Any color works, as you only use it as a stamp. Cut a few slices about two inches thick.
- Acrylic or washable tempera paint: You need bright red for the head and light green for the body.
- Heavy paper: White cardstock or thick construction paper works best to hold the wet paint.
- Paper plates: Use these as easy, disposable paint palettes.
- Googly eyes: Grab a pair of medium-sized eyes for the caterpillar’s face.
- School glue: To secure the eyes in place.
- Markers: A green marker or crayon to draw the antennae and legs.
Step-by-Step Instructions
Ready to start stamping? Follow these simple steps to help your kids create their very own hungry caterpillars.
Step 1: Prep Your Paint Stations
Squirt a generous circle of red paint onto one paper plate and a circle of green paint onto another. Hand your child the pool noodle slices. Show them how the circular foam rings look just like the segments of a caterpillar’s body.
Step 2: Stamp the Caterpillar’s Head
Have your child take one pool noodle ring and dip one flat end firmly into the red paint. Make sure the paint coats the entire foam circle. Next, help them press the painted foam onto the far left side of the white paper. Lift the noodle straight up to reveal a bright red circle with a hollow white center. This forms the caterpillar’s head.
Step 3: Create the Body Segments
Take a clean pool noodle slice and dip it into the green paint. Starting right next to the red head, stamp a green circle. You can overlap the circles slightly to make the body look connected. Repeat this process two, three, or even four times, moving toward the right side of the paper. Let your child decide how long their caterpillar will grow. You can stamp the body in a straight line or make it wiggle down the page.
Step 4: Let the Paint Dry
Set the paper aside for a few minutes. Acrylic and tempera paints usually dry fairly quickly on thick cardstock. Waiting until the paint dries prevents smudging during the final detailing steps.
Step 5: Add the Final Details
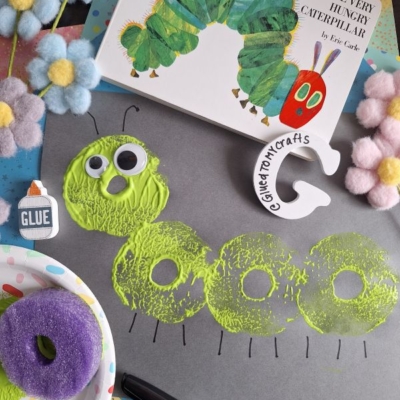
Once the paint feels dry to the touch, it is time to bring the caterpillar to life. Glue two googly eyes onto the red head section. Grab your green marker and draw two little antennae sprouting from the top of the head. Finally, draw tiny “L” shaped legs under each green body segment.
RELATED —> Potato Masher Caterpillar Craft Idea
The best part of kids’ crafts is watching them take a simple idea and make it entirely their own. Do not worry if their caterpillar ends up with ten eyes, or if they decide to use purple and gold paint instead of red and green.
Ask them what their caterpillar ate for lunch today, or see if they want to draw some apples, pears, and plums around the edges of the paper. Keep the focus on the fun process of stamping and creating rather than achieving a perfect final product. Grab your pool noodles, pour some paint, and enjoy a wonderful, messy, and memorable afternoon of crafting together! Happy crafting, my friends!

Pool Noodle Stamped Caterpillar Craft for Kids
Here’s your checklist of supplies to bring this craft to life:
- School Glue
- Pool Noodle Slice
Prepare your creative haven by laying down a protective cover before the crafting magic begins!
Directions:
- Squirt a generous circle of red paint onto one paper plate and a circle of green paint onto another. Hand your child the pool noodle slices. Show them how the circular foam rings look just like the segments of a caterpillar's body.
- Have your child take one pool noodle ring and dip one flat end firmly into the red paint. Make sure the paint coats the entire foam circle. Next, help them press the painted foam onto the far left side of the white paper. Lift the noodle straight up to reveal a bright red circle with a hollow white center. This forms the caterpillar's head.
- Take a clean pool noodle slice and dip it into the green paint. Starting right next to the red head, stamp a green circle. You can overlap the circles slightly to make the body look connected. Repeat this process two, three, or even four times, moving toward the right side of the paper. Let your child decide how long their caterpillar will grow. You can stamp the body in a straight line or make it wiggle down the page.
- Set the paper aside for a few minutes. Acrylic and tempera paints usually dry fairly quickly on thick cardstock. Waiting until the paint dries prevents smudging during the final detailing steps.
- Once the paint feels dry to the touch, it is time to bring the caterpillar to life. Glue two googly eyes onto the red head section. Grab your green marker and draw two little antennae sprouting from the top of the head. Finally, draw tiny "L" shaped legs under each green body segment.
Grab our favorite books via our Amazon affiliate link! In our Amazon storefront you will find books, toys and craft supplies we absolutely love using for our Glued To My Crafts tutorials!