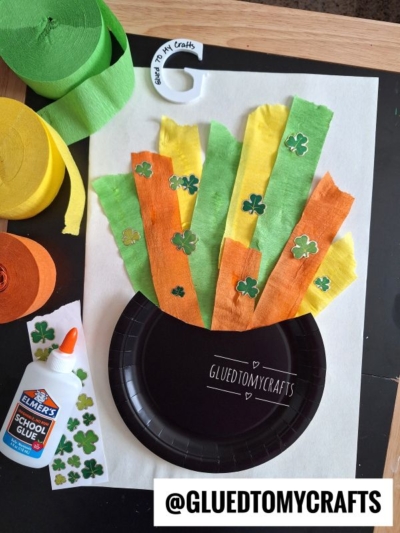
Get ready for some St. Patrick’s Day fun with a simple and colorful craft! This Leprechaun Cauldron project is a fantastic way for kids to celebrate the holiday. Using everyday craft supplies, you can help your little ones create their very own pot of gold at the end of a rainbow.
It’s an easy activity that combines cutting, gluing, and decorating, making it perfect for developing fine motor skills while sparking imagination. Let’s gather our supplies and make a magical masterpiece!
Materials You’ll Need
Before you start this enchanting project, gather these simple materials. Most of these are likely already in your craft bin.
- One black paper plate
- One sheet of extra larger construction paper
- School glue
- Scissors
- Crepe paper in various rainbow colors (red, orange, yellow, green, blue, purple)
- Shamrock stickers or other festive embellishments
Step-by-Step Instructions
Follow these easy steps to bring your leprechaun cauldron to life.
Step 1: Prepare Your Cauldron
First, grab your scissors and black paper plate. This will become the leprechaun’s cauldron. Simply cut a small sliver off to create the “opening” of the cauldron. Discard the excess piece.
Step 2: Create the Rainbow
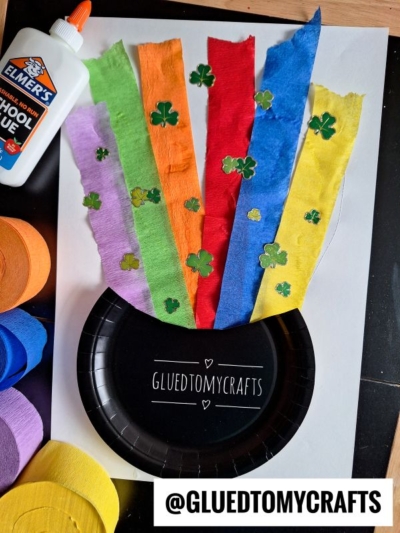
Now it’s time to make the magical rainbow that bursts from the cauldron. Take your rolls of colored crepe paper. Cut several long strips from each color. Don’t worry about making them perfectly straight; wavy and crinkled edges add to the charm! Aim for strips that are about one to two inches wide.
Step 3: Assemble Your Craft
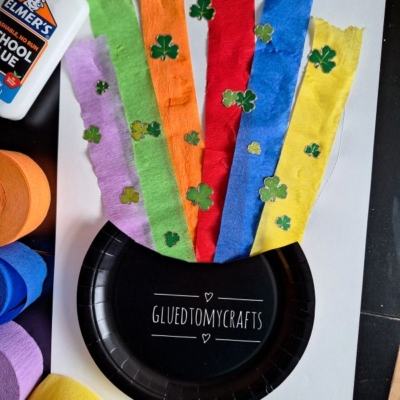
Start by laying out a large sheet of construction paper down as your background. Arrange the crepe paper strips out so they fan out from the spot where you want the cauldron to sit. Glue each strip down flat onto the paper, with the bottoms of the strips grouped together. Once you’ve secured all the strips, take your half paper plate and glue it on top of the ends of the crepe paper to form the cauldron, covering the base of the rainbow. Press firmly and allow the glue to set.
Step 4: Add Some Lucky Charms
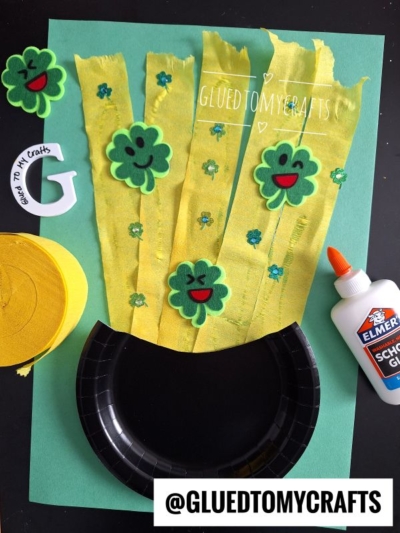
Once the glue on your rainbow has dried a bit, it’s time to decorate! This is where your child’s creativity can truly shine. Use your shamrock stickers or other green and gold embellishments to decorate the rainbow. You can scatter them all over the crepe paper strips, creating the look of a magical explosion of luck from the pot.
Step 5: Let It Dry
Find a safe place to let your creation dry completely. Since you’re using school glue on paper, it may take a little while for everything to set. Once it’s fully dry, your Paper Plate Leprechaun Cauldron is ready to be displayed!
RELATED —> Paint Splat Leprechaun Cauldron Craft
You did it! You now have a beautiful and festive piece of St. Patrick’s Day art. This craft is perfect for hanging on the fridge, displaying in a window, or giving as a cheerful gift.
We encourage you to let your creativity run wild. Try adding glitter for extra sparkle or cotton balls to create clouds at the top of the rainbow. Have fun with it! We would love to see your unique leprechaun cauldrons. Share a photo of your finished craft on social media to spread the St. Patrick’s Day cheer with friends and family.

Paper Plate Leprechaun Cauldron Craft
Here’s your checklist of supplies to bring this craft to life:
- Construction Paper
- Large Paper Plate
- Crepe Paper
- Embellishments
- School Glue
Prepare your creative haven by laying down a protective cover before the crafting magic begins!
Directions:
- First, grab your scissors and black paper plate. This will become the leprechaun's cauldron. Simply cut a small sliver off to create the "opening" of the cauldron. Discard the excess piece.
- Now it's time to make the magical rainbow that bursts from the cauldron. Take your rolls of colored crepe paper. Cut several long strips from each color. Don't worry about making them perfectly straight; wavy and crinkled edges add to the charm! Aim for strips that are about one to two inches wide.
- Start by laying out a large sheet of construction paper down as your background. Arrange the crepe paper strips out so they fan out from the spot where you want the cauldron to sit. Glue each strip down flat onto the paper, with the bottoms of the strips grouped together. Once you've secured all the strips, take your half paper plate and glue it on top of the ends of the crepe paper to form the cauldron, covering the base of the rainbow. Press firmly and allow the glue to set.
- Once the glue on your rainbow has dried a bit, it’s time to decorate! This is where your child's creativity can truly shine. Use your shamrock stickers or other green and gold embellishments to decorate the rainbow. You can scatter them all over the crepe paper strips, creating the look of a magical explosion of luck from the pot.
- Find a safe place to let your creation dry completely. Since you're using school glue on paper, it may take a little while for everything to set. Once it's fully dry, your Paper Plate Leprechaun Cauldron is ready to be displayed!
CLICK HERE TO PRINT THE DIRECTIONS FOR THIS CRAFT