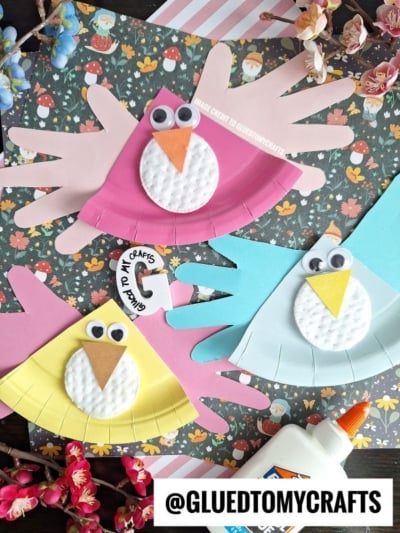
Bring a touch of springtime fun to your crafting table with these adorable paper plate birds! Perfect for kids and adults alike, this craft is simple, colorful, and a great way to celebrate the season.
Supplies You’ll Need:
- Large paper plates (one plate makes FOUR birds)
- Googly eyes (two per bird)
- Cotton rounds or white felt circles (one per bird)
- Colored construction paper or cardstock {for wings and beaks}
- Scissors
- Glue (Elmer’s glue works great!)
- Paint (optional, for coloring the paper plates)
Step-by-Step Instructions:
-
Prepare the Bird Body:
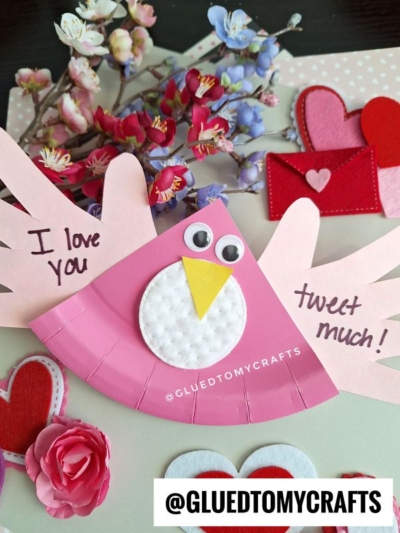
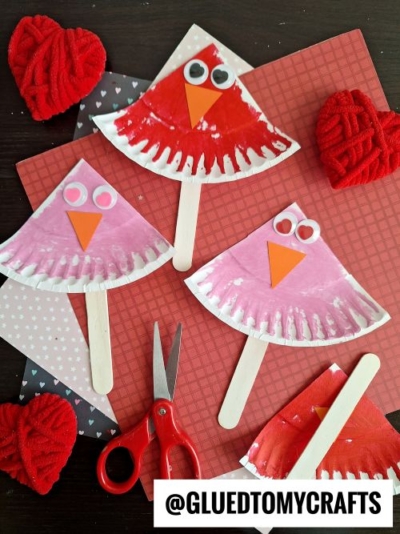
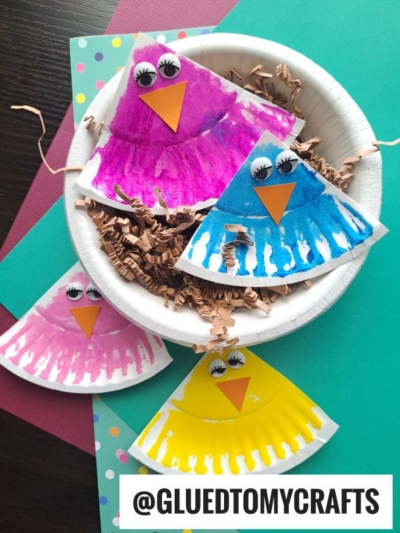
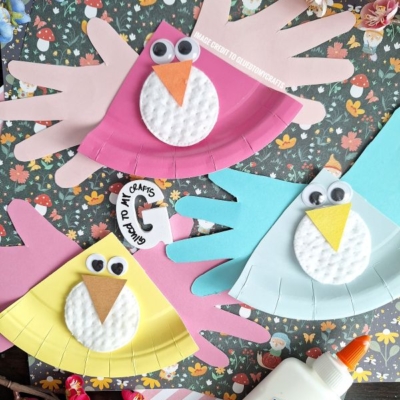
- Cut a paper plate into quarters. Each quarter will serve as the body of one bird.
- If desired {and if not using pre-colored paper plates} paint the paper plate quarters in bright spring colors (pink, yellow, blue, etc.) and let them dry.
-
Add the Bird’s Chest:
- Glue a cotton round or a white felt circle onto the center of the paper plate quarter. This will be the bird’s chest.
-
Create the Wings:
- Trace your hand (or your child’s hands) onto colored construction paper or cardstock.
- Cut out the handprint{s} and glue them both to the sides of the paper plate to form the bird’s wings.
-
Attach the Beak:
- Cut a small triangle from orange or yellow construction paper.
- Glue the triangle just below the cotton round to create the bird’s beak.
-
Add the Eyes:
- Glue two googly eyes above the beak for a fun and lively expression.
-
Decorate and Display:
- Add any extra embellishments, like glitter, stickers, or artificial flowers, to make your bird unique.
- Display your finished birds or hang them up as cheerful decorations!
RELATED —> Potato Stamped Bird Craft Idea For Kids
These charming birds are a delightful way to welcome spring and make for a fun family activity. Happy crafting! 🐦🌸

Paper Plate & Handprint Bird Craft Idea For Spring
Create fun paper plate bird crafts with easy step-by-step instructions. Perfect for kids and endless creative fun!
Here’s your checklist of supplies to bring this craft to life:
- School Glue
Prepare your creative haven by laying down a protective cover before the crafting magic begins!
Directions:
- Cut a paper plate into quarters. Each quarter will serve as the body of one bird.
- If desired {and if not using pre-colored paper plates} paint the paper plate quarters in bright spring colors (pink, yellow, blue, etc.) and let them dry.
- Glue a cotton round or a white felt circle onto the center of the paper plate quarter. This will be the bird’s chest.
- Trace your hand (or your child’s hands) onto colored construction paper or cardstock.
- Cut out the handprint{s} and glue them both to the sides of the paper plate to form the bird’s wings.
- Cut a small triangle from orange or yellow construction paper.
- Glue the triangle just below the cotton round to create the bird’s beak.
- Glue two googly eyes above the beak for a fun and lively expression.
- Add any extra embellishments, like glitter, stickers, or artificial flowers, to make your bird unique.
- Display your finished birds or hang them up as cheerful decorations!
Grab our favorite books via our Amazon affiliate link! In our Amazon storefront you will find books, toys and craft supplies we absolutely love using for our Glued To My Crafts tutorials!
If you've enjoyed our content or have any thoughts to share, we'd love to hear from you! Mention @gluedtomycrafts or tag #gluedtomycrafts on Instagram!