
Brighten up your spring with this fun and easy polka dot covered tulip craft! Perfect for kids and adults alike, this project uses simple materials to create a colorful tulip that’s sure to bring a smile!
Materials Needed:
- White paper plate {one per craft}
- Dot stickers (various colors)
- Green craft stick (or popsicle stick)
- Green construction paper
- Scissors
- Glue
Instructions:
-
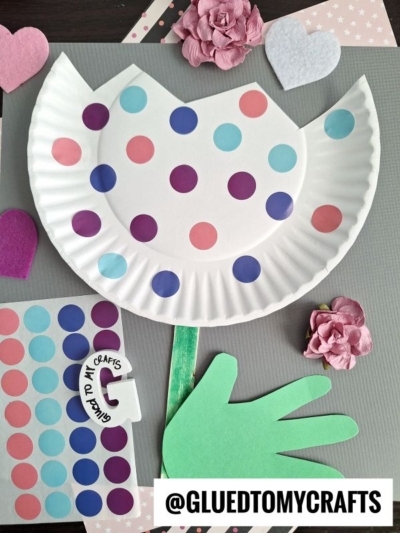
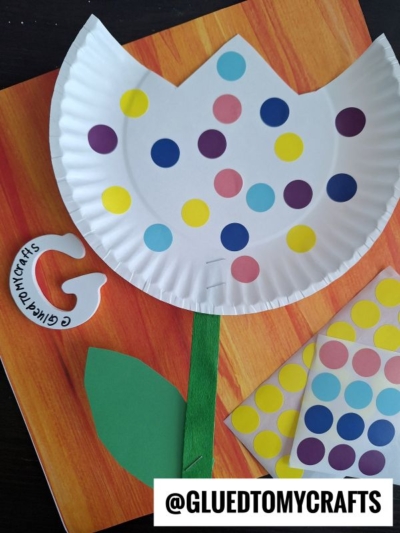
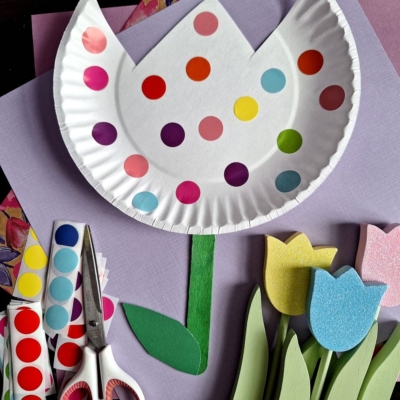
Create the Tulip Shape:
- Take a white paper plate and cut out sections from the rim to form petal-like peaks, giving it a tulip or flower shape.
-
Decorate the Tulip:
- Use colorful dot stickers to decorate the surface of the paper plate. Scatter them randomly or create a pattern – get creative!
-
Add the Stem and Leaf:
- Glue a green craft stick to the bottom of the paper plate to act as the stem.
- Cut a leaf shape from green construction paper and attach it to the side of the stem.
-
Show It Off:
- Let the glue dry, and your paper plate tulip is ready to display! You can hang it on the wall, use it as a table decoration, or even gift it to someone special.
RELATED —> Clothespin Tulip Flower Craft Idea
This Paper Plate & Dot Sticker Tulip is a simple yet cheerful way to celebrate the season. Gather your supplies, let your creativity bloom, and enjoy making these colorful tulips with your loved ones. Happy crafting! 🌸

Paper Plate Tulip Craft Idea For Spring
Learn how to make a beautiful paper plate tulip with stickers and craft supplies. Create and showcase your colorful flower this spring season!
Here’s your checklist of supplies to bring this craft to life:
Prepare your creative haven by laying down a protective cover before the crafting magic begins!
Directions:
- Take a white paper plate and cut out sections from the rim to form petal-like peaks, giving it a tulip or flower shape.
- Use colorful dot stickers to decorate the surface of the paper plate. Scatter them randomly or create a pattern - get creative!
- Glue a green craft stick to the bottom of the paper plate to act as the stem.
- Cut a leaf shape from green construction paper and attach it to the side of the stem.
- Let the glue dry, and your paper plate tulip is ready to display! You can hang it on the wall, use it as a table decoration, or even gift it to someone special.
Grab our favorite books via our Amazon affiliate link! In our Amazon storefront you will find books, toys and craft supplies we absolutely love using for our Glued To My Crafts tutorials!
If you've enjoyed our content or have any thoughts to share, we'd love to hear from you! Mention @gluedtomycrafts or tag #gluedtomycrafts on Instagram!