There’s something magical about turning simple craft supplies into an adorable work of art. This paper mosaic owl face craft is the perfect way for kids to have fun with colors, shapes, and creativity.
Whether you’re looking for a rainy day project or a unique art activity, this craft invites young artists to snip, glue, and design their own wise owl—no special skills required.
Get ready to dive into a hands-on project that encourages imagination and brings a burst of woodland charm into your home or classroom.
Materials You Need for Your Owl Face
You do not need expensive supplies to make this craft look amazing. Here is the simple materials list:
- Dark brown cardstock: You need a sturdy piece for the background base.
- Construction paper: Grab sheets in light brown, white, green, bright orange, and black.
- School glue: A standard bottle of washable liquid glue works best.
- Metallic gold marker: Use this to draw the guidelines for the eyes.
- Scissors or a paper trimmer: For cutting out the mosaic tiles.
- Small bowls: Use ceramic or plastic bowls to sort the paper squares by color.
RELATED —> Tissue Paper & Paper Plate Cupcake Craft
Step-by-Step Instructions: How to Make a Paper Mosaic Owl
Follow these simple steps to help your kids build their own wise little owl.
Step 1: Prepare the Background Base
Start with a large sheet of dark brown cardstock. You want a heavy paper because liquid glue can easily warp thin construction paper. Place the paper horizontally on your crafting table. This gives you plenty of room for those big, expressive owl eyes.
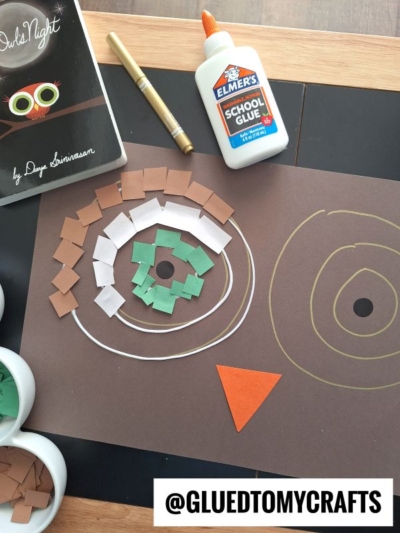
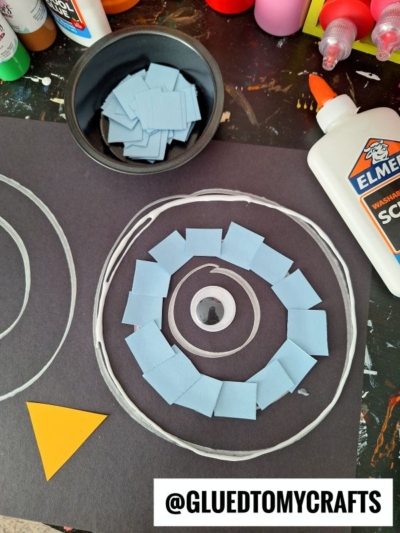
Step 2: Draw the Eye Guidelines
Grab your metallic gold marker. On the dark brown cardstock, draw two large circles side-by-side. These will serve as the outer edge of the owl’s eyes. Inside those circles, draw slightly smaller circles. Continue drawing concentric circles until you reach the center. These gold lines act as a map for your kids, showing them exactly where to place their glue and paper squares.
Step 3: Cut the Mosaic Tiles
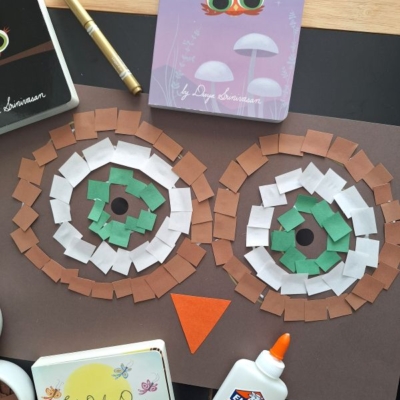
Now it is time to make the mosaic pieces. Take your light brown, white, and green construction paper. Cut these sheets into long strips, and then snip those strips into small, uniform squares. You will also need to cut two larger black circles for the pupils and a large orange triangle for the beak. Sort the small squares into small bowls by color. This keeps your workspace organized and makes it much easier for little hands to grab the color they need.
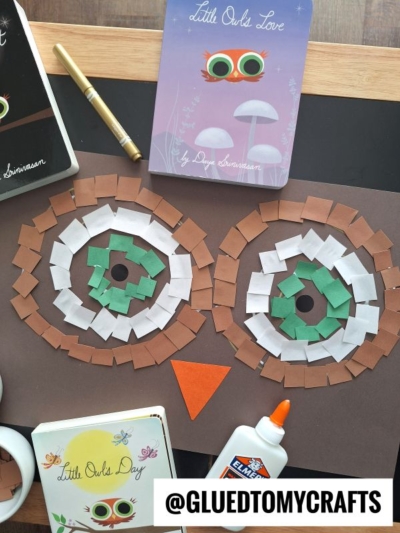
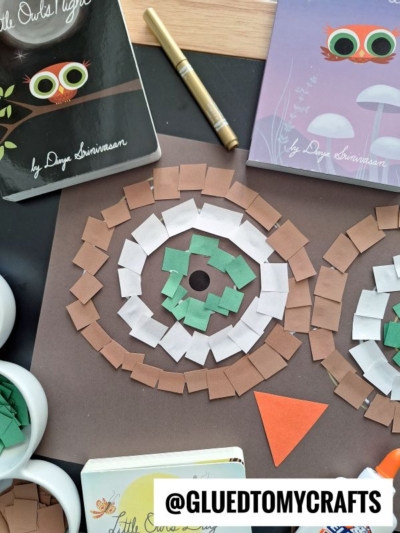
Step 4: Build the Mosaic Eyes
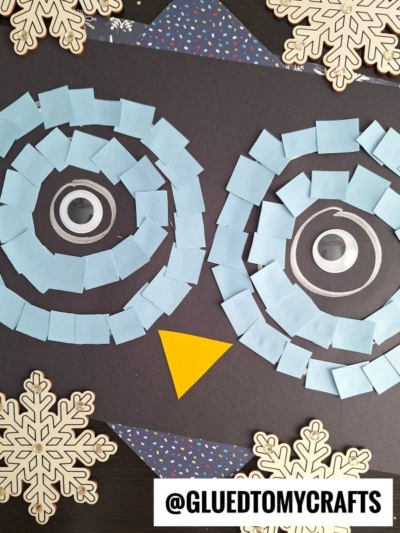
Apply a thin line of liquid glue along the outermost gold circle. Have your child place the light brown squares along this line. Next, add glue to the middle circle and place the white squares. Move to the inner circle and place the green squares. Finally, glue the solid black circle right in the center to complete the pupil. Repeat this exact process for the second eye.
Step 5: Add the Beak
Once both eyes are fully assembled, it is time to give your owl its beak. Take the bright orange triangle you cut out earlier. Apply a layer of glue to the back and press it down onto the cardstock, right between and slightly below the two big eyes. Press firmly so it sticks. Let the entire project dry flat for a few hours before you hang it up.
RELATED —> DIY Mosaic Star Ornaments with Air Dry Clay
We absolutely love seeing how your kids bring these projects to life! Once your paper mosaic owl face is completely dry, hang it proudly on the fridge or the classroom bulletin board.
Did you try this craft at home? Snap a photo of your child’s finished artwork and share it with us on social media! Tag us so we can see those beautiful mosaic eyes. If you are hungry for more fun activities, browse our blog to explore more literature-based craft ideas to keep your kids learning and creating all year long.

Paper Mosaic Owl Face Craft Tutorial for Kids
Here’s your checklist of supplies to bring this craft to life:
- Construction Paper
- Dot Stickers
- School Glue
Prepare your creative haven by laying down a protective cover before the crafting magic begins!
Directions:
- Start with a large sheet of dark brown cardstock. You want a heavy paper because liquid glue can easily warp thin construction paper. Place the paper horizontally on your crafting table. This gives you plenty of room for those big, expressive owl eyes.
- Grab your metallic gold marker. On the dark brown cardstock, draw two large circles side-by-side. These will serve as the outer edge of the owl's eyes. Inside those circles, draw slightly smaller circles. Continue drawing concentric circles until you reach the center. These gold lines act as a map for your kids, showing them exactly where to place their glue and paper squares.
- Now it is time to make the mosaic pieces. Take your light brown, white, and green construction paper. Cut these sheets into long strips, and then snip those strips into small, uniform squares. You will also need to cut two larger black circles for the pupils and a large orange triangle for the beak. Sort the small squares into small bowls by color. This keeps your workspace organized and makes it much easier for little hands to grab the color they need.
- Apply a thin line of liquid glue along the outermost gold circle. Have your child place the light brown squares along this line. Next, add glue to the middle circle and place the white squares. Move to the inner circle and place the green squares. Finally, glue the solid black circle right in the center to complete the pupil. Repeat this exact process for the second eye.
- Once both eyes are fully assembled, it is time to give your owl its beak. Take the bright orange triangle you cut out earlier. Apply a layer of glue to the back and press it down onto the cardstock, right between and slightly below the two big eyes. Press firmly so it sticks. Let the entire project dry flat for a few hours before you hang it up.
CLICK HERE TO PRINT THE DIRECTIONS FOR THIS CRAFT