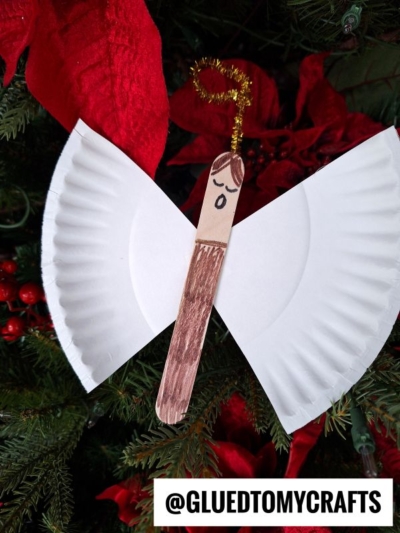
Are you looking for a simple, budget-friendly holiday project to keep the kids entertained? Crafting during the holidays brings families together and helps children develop essential skills. This popsicle stick & paper plate angel craft is the perfect solution. It uses basic supplies you likely already have around the house, making it a stress-free activity for cold winter afternoons.
Whether you are a teacher planning a classroom activity, a parent looking for a weekend project, or a DIY enthusiast wanting to add handmade charm to your Christmas tree, this angel craft checks all the boxes. You can pull it together in minutes, and the results are absolutely adorable.
Materials Needed:
Before we dive into the assembly process, gather your supplies. You can easily find these items in your craft bin or at a local dollar store.
Here is what you need:
- Jumbo popsicle sticks: These serve as the main body and face of the angel. Jumbo sticks provide more surface area for kids to color.
- White paper plates: Small or standard-sized fluted paper plates work best. The ridged edges give the wings a great feathery texture.
- Markers: You need a marker for the hair and face, plus any colors you want to use for the angel’s clothing.
- Gold tinsel pipe cleaners: These create the shiny halo and double as a loop for hanging the ornament.
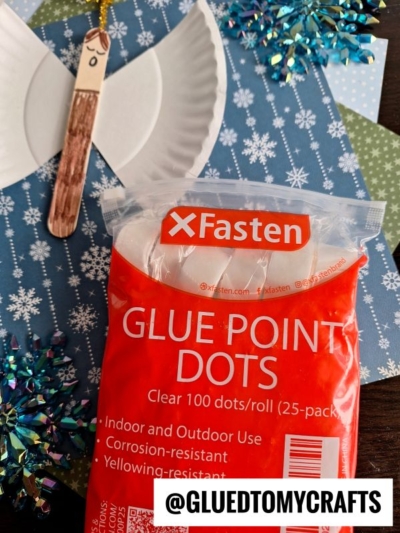
- Adhesive: Double-sided tape, strong craft glue, or adhesive dots work perfectly to hold the pieces together.
- Scissors: You need these to cut the paper plates into wing shapes.
Step-by-Step Instructions:
Follow these simple steps to bring your little singing angel to life.
Step 1: Prep the Angel’s Body
Start by creating the angel’s clothing. Grab your jumbo popsicle stick and a marker. Choose a color for the angel’s robe. Color the bottom two-thirds of the popsicle stick completely. Leave the top third of the stick blank, as this will become the angel’s face.
Step 2: Draw the Angel’s Face
Next, give your angel a personality. Use a fine-tip marker to draw hair at the very top of the stick.
Below the hair, draw two small downward-curving arcs for closed, peaceful eyes. Finally, draw a small circle or an “O” shape for the mouth. This makes the angel look like it is singing a cheerful holiday carol.
Step 3: Create the Paper Plate Wings
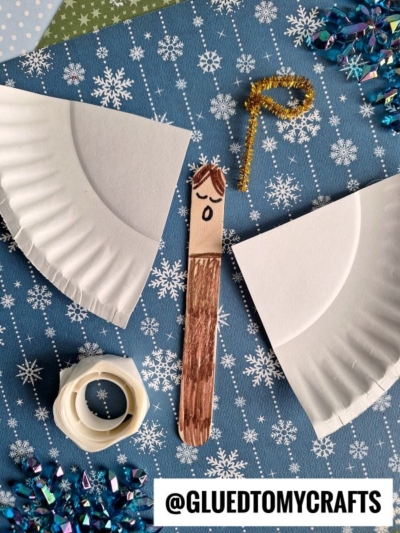
Grab your white paper plate and your scissors. Cut the paper plate directly in half. Then, take one of the halves and cut it in half again. You should now have two wedge-shaped pieces with a curved, fluted edge. These ridges perfectly mimic the texture of feathers.
If your kids want to decorate the wings, let them use markers, crayons, or glitter to add extra sparkle before moving to the next step.
Step 4: Make the Halo
Take your gold tinsel pipe cleaner and cut a small piece, about three to four inches long. Bend the top portion of the pipe cleaner into a small circle to form the halo. Leave a small straight “stem” extending straight down from the circle. This stem gives you a place to attach the halo to the popsicle stick.
Step 5: Assemble the Angel Craft
Now it is time to put everything together. Flip your decorated popsicle stick over so the face is pointing down.
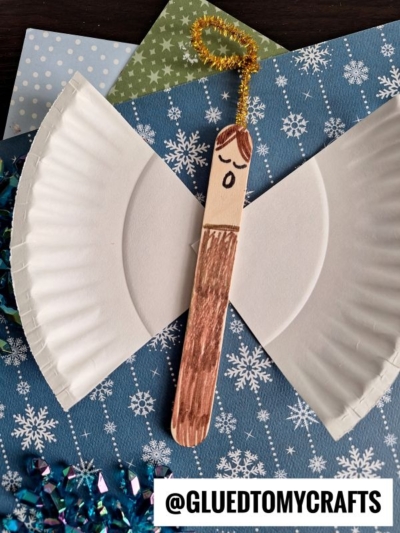
First, attach the wings. Apply your adhesive (glue dots or double-sided tape work great for an instant bond) to the straight edges of your paper plate wedges. Press them onto the back of the popsicle stick so the curved, fluted edges flare outward on the left and right sides.
Next, add the halo. Place a glue dot or a dab of craft glue on the back of the popsicle stick, near the top of the head. Press the straight stem of your pipe cleaner halo firmly into the adhesive. The gold circle should peek out perfectly above the angel’s head.
Allow the glue to dry completely if you used liquid craft glue. If you used tape or glue dots, your singing angel is ready to display immediately!
RELATED —> Cupcake Liner Angel Ornament
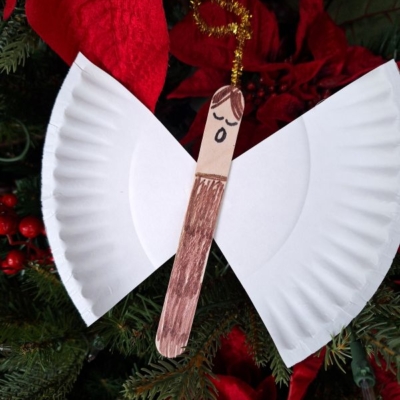
This paper plate & popsicle stick angel craft proves that you do not need expensive supplies to create beautiful holiday memories. With just a few basic items, you and your children can craft an entire choir of singing angels in a single afternoon.
So on that note, gather your materials, set up your crafting station, and enjoy spending creative time together. Be sure to experiment with different colors and decorations to make each angel truly unique. Happy crafting, my friends!

Easy Popsicle Stick Paper Plate Angel Craft for Kids
Here’s your checklist of supplies to bring this craft to life:
- Jumbo Popsicle Sticks
- Small Paper Plate
- Pipe Cleaner
- Embellishments
- School Glue
Prepare your creative haven by laying down a protective cover before the crafting magic begins!
Directions:
- Start by creating the angel's clothing. Grab your jumbo popsicle stick and a marker. Choose a color for the angel's robe. Color the bottom two-thirds of the popsicle stick completely. Leave the top third of the stick blank, as this will become the angel's face.
- Next, give your angel a personality. Use a fine-tip marker to draw hair at the very top of the stick.
- Below the hair, draw two small downward-curving arcs for closed, peaceful eyes. Finally, draw a small circle or an "O" shape for the mouth. This makes the angel look like it is singing a cheerful holiday carol.
- Grab your white paper plate and your scissors. Cut the paper plate directly in half. Then, take one of the halves and cut it in half again. You should now have two wedge-shaped pieces with a curved, fluted edge. These ridges perfectly mimic the texture of feathers.
- If your kids want to decorate the wings, let them use markers, crayons, or glitter to add extra sparkle before moving to the next step.
- Take your gold tinsel pipe cleaner and cut a small piece, about three to four inches long. Bend the top portion of the pipe cleaner into a small circle to form the halo. Leave a small straight "stem" extending straight down from the circle. This stem gives you a place to attach the halo to the popsicle stick.
- Now it is time to put everything together. Flip your decorated popsicle stick over so the face is pointing down.
- First, attach the wings. Apply your adhesive (glue dots or double-sided tape work great for an instant bond) to the straight edges of your paper plate wedges. Press them onto the back of the popsicle stick so the curved, fluted edges flare outward on the left and right sides.
- Next, add the halo. Place a glue dot or a dab of craft glue on the back of the popsicle stick, near the top of the head. Press the straight stem of your pipe cleaner halo firmly into the adhesive. The gold circle should peek out perfectly above the angel's head.
- Allow the glue to dry completely if you used liquid craft glue. If you used tape or glue dots, your singing angel is ready to display immediately!
CLICK HERE TO PRINT THE DIRECTIONS FOR THIS CRAFT