Glued To My Crafts

Join thousands of others who have gotten GLUED to our craft tutorials!

  • Home
  • About Us
  • Safety Guidelines
  • Seasonal Crafts
    • New Years
    • Valentine’s Day
    • St. Patrick’s Day
    • Spring
    • Easter
    • Mother’s Day
    • Summer
    • Father’s Day
    • Patriotic
    • Halloween
    • Thanksgiving
    • Fall
    • Winter
    • Christmas
    • Snowmen
    • Story Time
  • Monthly Themes
    • January Craft Ideas
    • February Craft Ideas
    • March Craft Ideas
    • April Craft Ideas
    • May Craft Ideas
    • June Craft Ideas
    • July Craft Ideas
    • August Craft Ideas
    • September Crafts
    • October Crafts
    • November Crafts
    • December Crafts
  • Amazon Storefront
  • Privacy Policy

Easy Cupcake Liner and Dot Sticker Butterfly Craft

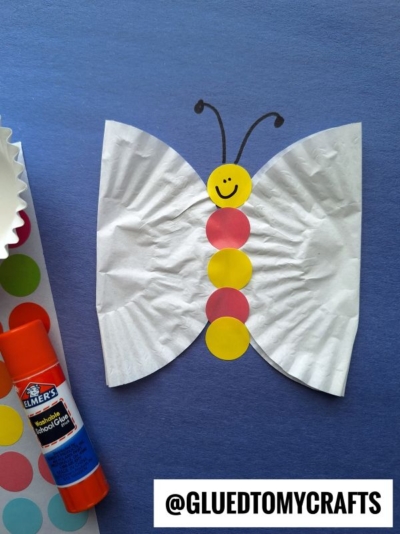
A butterfly craft made from white cupcake liners for wings and colorful paper circles for the body on a blue background. A glue stick and sticker sheet are beside it. The handle @GLUETOMYCRAFTS is at the bottom.

Spring brings warmer weather, blooming flowers, and the perfect excuse to get crafty with the kids. If you need a quick, mess-free activity to keep little hands busy, this cupcake liner and dot sticker butterfly craft is a guaranteed hit.

This project requires minimal prep and uses basic supplies you likely already have in your craft bin. It helps young children practice their fine motor skills while letting their creativity soar. Plus, the smiling butterfly faces are sure to brighten up your fridge or classroom bulletin board!

Materials You Need

Gather these simple supplies before you start crafting:

  • Dark construction paper: This serves as the background. Dark blue makes the bright butterfly colors pop!
  • Cupcake liners: Grab a mix of solid colors, white, or fun patterns like polka dots.
  • Colorful round dot stickers: You will use these for the butterfly bodies.
  • A washable glue stick: Perfect for keeping the mess to a minimum.
  • A black marker: Use this to draw the faces and antennae.

Step-by-Step Instructions

Ready to make some cheerful spring butterflies? Follow these simple steps:

Step 1: Prepare the Butterfly Wings

Start by taking two white cupcake liners and flattening them out with your hands. You want to smooth out the crinkles just enough so they lay flat on the table, but keep their ruffled edges. Apply a generous amount of glue to the back of each liner using your glue stick. Press them horizontally onto your background paper. Position them right next to each other so the inner edges slightly touch. These form the wide wings of your butterfly.

Step 2: Build the Colorful Body

Now it is time to use those bright dot stickers! Start slightly above the top center of your cupcake liners. Place your first sticker down to act as the butterfly’s head. Next, stick a second dot directly below the first one, letting it slightly overlap. Continue this pattern straight down the middle, where the two cupcake liners meet. A stack of five alternating colors makes a great, sturdy-looking body.

Step 3: Add the Happy Details

Grab your black marker to bring your butterfly to life. On the top sticker (the head), draw two little dots for eyes and a small curved line for a friendly smile. Next, draw two curved lines extending upward from the head to create the antennae. Add a tiny dot at the tip of each line for extra character.

RELATED —> Handprint & Popsicle Stick Butterfly Poem Keepsake
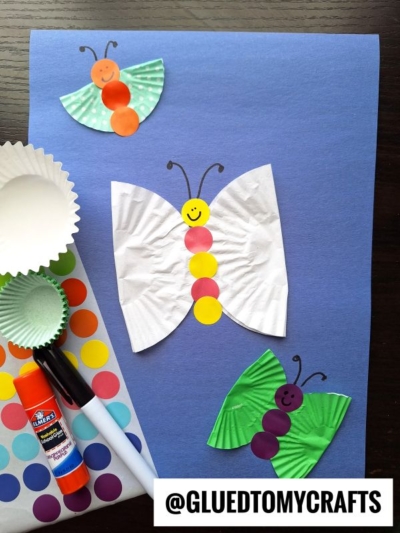
A craft project featuring paper butterflies made from cupcake liners and colorful stickers on a blue background, with a glue stick, marker, and sticker sheet nearby. Text reads @GLUEDTOMYCRAFTS.

Your wonderful dot sticker butterfly is now ready to display on the fridge or the classroom bulletin board! This craft is wonderfully adaptable. Let children experiment with different colored cupcake liners, or have them draw patterns on the white wings before gluing them down.

On that note, gather your materials, let your creativity take flight, and enjoy making art together! Happy crafting, my friends!

Stacey Glued To My Crafts website signature

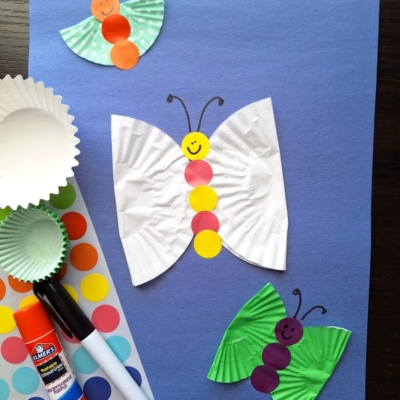
A craft project featuring paper butterflies made from cupcake liners and colorful stickers on a blue background, with a glue stick, marker, and sticker sheet nearby. Text reads @GLUEDTOMYCRAFTS.
PRINT

Cupcake Liner and Dot Sticker Butterfly Craft

Create cheerful spring butterflies using cupcake liners. Learn to craft adorable cupcake liner butterfly decorations easily.

Here’s your checklist of supplies to bring this craft to life:

  • Cupcake Liners
  • Dot Stickers
  • Cardstock Paper
  • Glue Stick
  • Sharpie Markers

Prepare your creative haven by laying down a protective cover before the crafting magic begins!

Directions: 
Prevent your screen from going dark

  • Start by taking two white cupcake liners and flattening them out with your hands. You want to smooth out the crinkles just enough so they lay flat on the table, but keep their ruffled edges. Apply a generous amount of glue to the back of each liner using your glue stick. Press them horizontally onto your background paper. Position them right next to each other so the inner edges slightly touch. These form the wide wings of your butterfly.
  • Now it is time to use those bright dot stickers! Start slightly above the top center of your cupcake liners. Place your first sticker down to act as the butterfly's head. Next, stick a second dot directly below the first one, letting it slightly overlap. Continue this pattern straight down the middle, where the two cupcake liners meet. A stack of five alternating colors makes a great, sturdy-looking body.
  • Grab your black marker to bring your butterfly to life. On the top sticker (the head), draw two little dots for eyes and a small curved line for a friendly smile. Next, draw two curved lines extending upward from the head to create the antennae. Add a tiny dot at the tip of each line for extra character.

MINI-HEARTS-page-separator-logo-gluedtomycrafts

Grab our favorite books via our Amazon affiliate link! In our Amazon storefront you will find books, toys and craft supplies we absolutely love using for our Glued To My Crafts tutorials!

A blue text on a white background, perfect for creating a charming the places you'll go keepsake.
CLICK HERE TO PRINT THE DIRECTIONS FOR THIS CRAFT

If you've enjoyed our content or have any thoughts to share, we'd love to hear from you! Mention @gluedtomycrafts or tag #gluedtomycrafts on Instagram!


OUR PRIVACY POLICY

OUR COPYRIGHT POLICY

  • Email
  • Facebook
  • Instagram
  • Pinterest
  • Twitter
  • YouTube

Love our crafts?

Follow us on Google

Click & check the box to see us more in your search results!

LOOKING FOR SOMETHING?

EXPLORE OUR SITE:

© 2012–2026 Glued To My Crafts

© All Rights Reserved. All images, artwork, and visual materials contained herein are the exclusive property of the copyright holder and are protected under applicable copyright laws and international treaties. No individual, entity, or organization is authorized to reproduce, distribute, or use any of these images in any manner without express written consent from the copyright holder. The following actions are strictly prohibited: copying, pasting, saving, screenshotting, downloading, or otherwise distributing any images, in whole or in part, by any means or method. Furthermore, it is strictly forbidden to input, upload, submit, or process any of these images through any artificial intelligence system, generative model, machine learning algorithm, neural network, or similar technology for the purpose of creating derivative, modified, reproduced, or newly generated works of any kind. Any output, image, or material generated by artificial intelligence or comparable technology that is derived from, trained upon, or based in any way on these images is likewise subject to this prohibition. Claiming, presenting, or asserting any such AI-generated output as one's own original work is expressly prohibited and constitutes a violation of the copyright holder's rights. Any unauthorized use, reproduction, or exploitation of these images, whether by human or automated means, constitutes copyright infringement. Infringement may result in legal action, including but not limited to claims for damages, injunctive relief, and recovery of legal costs. All rights not expressly granted herein are reserved.

All activities should be supervised by an adult at all times. Please refer to our safety guidelines for more information.


Please note that all the content of the website, including printables, are for classroom and personal use only. This means that any digital item you download from our site can be used for non-commercial use only. We kindly request that you do not reproduce or sell our creations. We appreciate your understanding and cooperation in respecting our content and intellectual property rights.

Accessibility Adjustments

Powered by OneTap

How long do you want to hide the toolbar?
Hide Toolbar Duration
Select your accessibility profile
Vision Impaired Mode
Enhances website's visuals
Seizure Safe Profile
Clear flashes & reduces color
ADHD Friendly Mode
Focused browsing, distraction-free
Blindness Mode
Reduces distractions, improves focus
Epilepsy Safe Mode
Dims colors and stops blinking
Content Modules
Font Size

Default

Line Height

Default

Color Modules
Orientation Modules