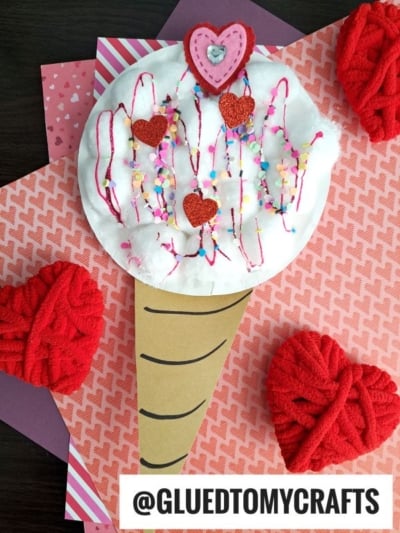
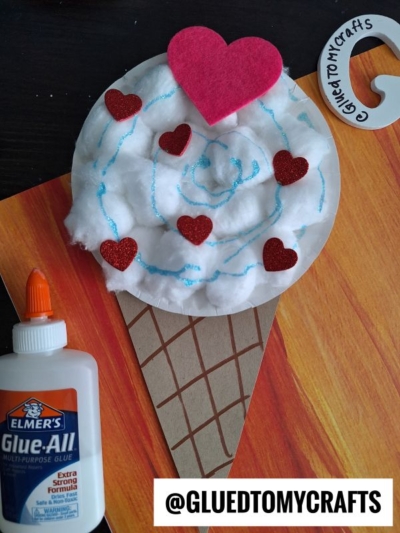
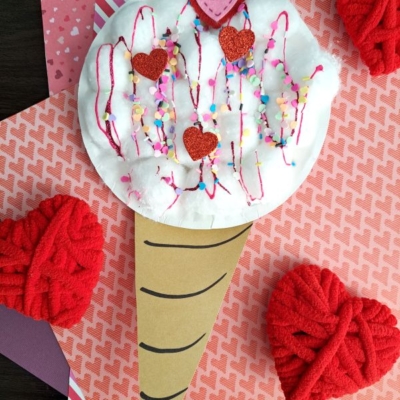
Are you looking for a fun and easy craft project to do with kids? This Cotton Ball & Paper Plate Ice Cream Cone Craft is perfect for Valentine’s Day or any day you want to add a little sweetness to your crafting! Using simple materials like cotton balls, paper plates, and craft paper, you can create a delightful ice cream cone decoration that’s as fun to make as it is to display.
Craft Supplies:
- Small, White Paper Plate
- Cotton Balls
- School Glue
- Stapler
- Brown Cardstock Paper
- Loose Craft Glitter
- Glitter Glue
- Scissors
- Black Marker
Directions:
- First things first – take your brown cardstock paper and cut a triangle “cone” shape out of it.
- Use the black marker to draw lines/give it some dimension.
- Now grab your small paper plate and scissors.
- Staple the cone shape to the unfinished paper plate.
- Next up – grab your school glue and cotton balls.
- Put a good layer of glue all over the paper plate.
- Have your child place the cotton balls on top of the wet glue, until the plate is completely covered.
- The final step – use you glitter glue and loose craft glitter to add the “sprinkles” all over the ice cream element. Don’t forget to add a “cherry” on top as well!
- When done, set aside to let it dry completely.
- Finally, when everything is set, display it proudly for ALL to see!
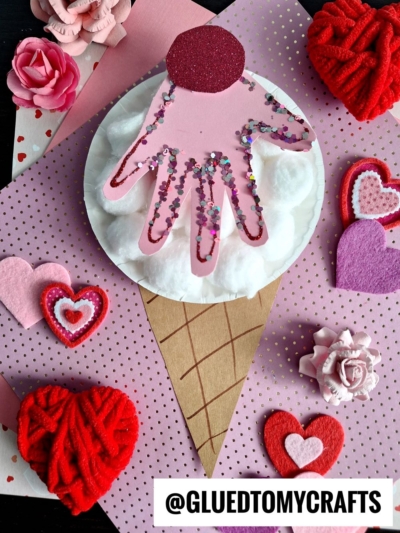
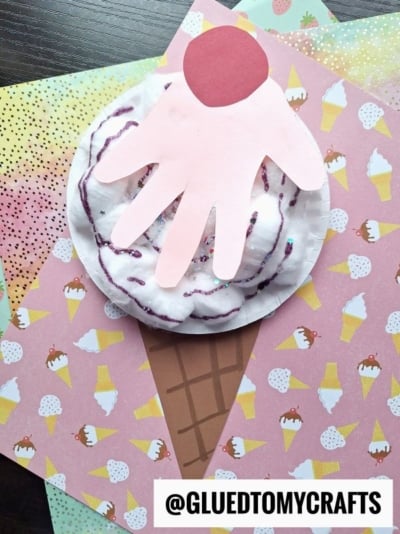
RELATED —> Handprint Valentine Ice Cream Keepsake
This Cotton Ball & Paper Plate Ice Cream Cone Craft is a delightful way to spend creative time with kids or add a handmade touch to your Valentine’s Day décor. With its fluffy texture, glittery accents, and heart-filled design, it’s sure to bring smiles all around. Happy crafting!

Paper Plate and Cotton Ball Ice Cream Cone Craft Idea
Create a fun and festive Cotton Ball & Paper Plate Ice Cream Cone Craft with this easy step-by-step tutorial. Perfect for kids and Valentine's Day crafting!
Here’s your checklist of supplies to bring this craft to life:
Prepare your creative haven by laying down a protective cover before the crafting magic begins!
Directions:
- First things first - take your brown cardstock paper and cut a triangle "cone" shape out of it.
- Use the black marker to draw lines/give it some dimension.
- Now grab your small paper plate and scissors.
- Staple the cone shape to the unfinished paper plate.
- Next up - grab your school glue and cotton balls.
- Put a good layer of glue all over the paper plate.
- Have your child place the cotton balls on top of the wet glue, until the plate is completely covered.
- The final step - use you glitter glue and loose craft glitter to add the "sprinkles" all over the ice cream element. Don't forget to add a "cherry" on top as well!
- When done, set aside to let it dry completely.
- Finally, when everything is set, display it proudly for ALL to see!
Grab our favorite books via our Amazon affiliate link! In our Amazon storefront you will find books, toys and craft supplies we absolutely love using for our Glued To My Crafts tutorials!
If you've enjoyed our content or have any thoughts to share, we'd love to hear from you! Mention @gluedtomycrafts or tag #gluedtomycrafts on Instagram!