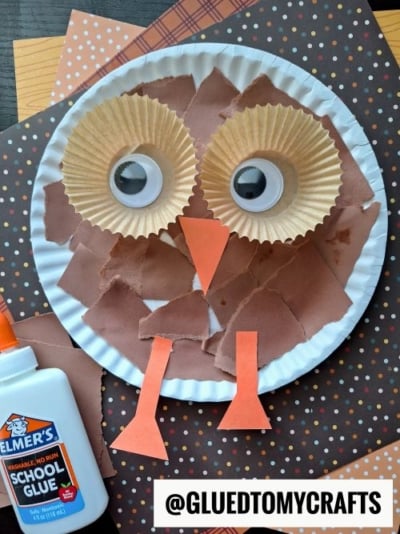
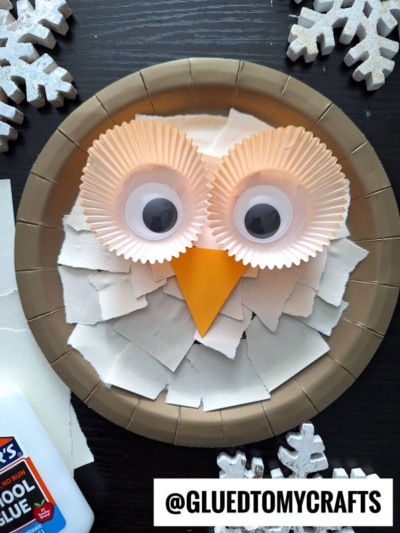
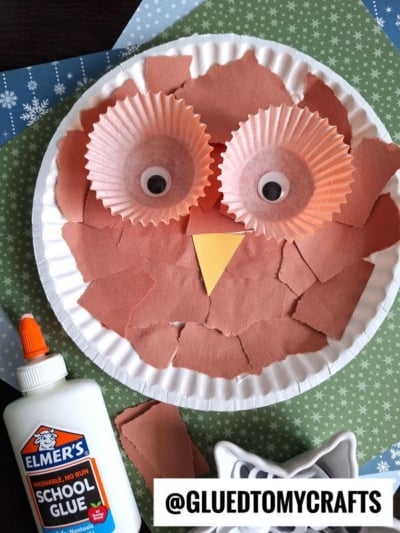
As the leaves turn brilliant shades of orange and gold and a crispness fills the air, it’s the perfect time to gather the family for a cozy afternoon of creativity. Our Paper Plate Owl craft is a wonderful way to celebrate the season. It’s a simple, charming project that transforms everyday household items into a delightful piece of autumn decor.
Using just a paper plate, some cupcake liners, and torn pieces of paper, you and your little ones can create a wide-eyed woodland friend. This activity is not only fun but also a fantastic way to develop fine motor skills while making lasting fall memories together.
What You’ll Need:
- A sturdy white paper plate
- Brown construction paper or a brown paper bag
- Two cupcake liners (orange, yellow, or white work great!)
- Two large googly eyes
- A small triangular piece of orange or yellow paper for the beak
- School glue
- Scissors
Let’s Get Crafting! Step-by-Step Instructions
Step 1: Prepare Your Feathers
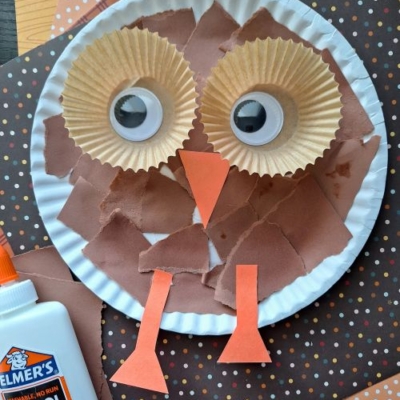
First, let’s make the owl’s fluffy feathers. Take your brown paper and begin tearing it into small, irregular pieces. Don’t worry about making them perfect—the different shapes and sizes will give your owl a wonderful, textured look. Create a nice little pile of torn paper pieces to work with. This is a great step for little hands to practice their motor skills!
Step 2: Cover the Body
Now, grab your paper plate. This will be the body of your owl. Apply a generous amount of school glue all over the front of the plate. Start placing your torn brown paper pieces onto the glue, overlapping them as you go. Continue layering the paper until the entire plate is covered, creating a cozy, feathery coat for your owl.
Step 3: Create the Eyes
While your owl’s body is drying, let’s make its big, bright eyes. Take your two cupcake liners and flatten them slightly. These will form the feathery circles around your owl’s eyes. Apply a dot of glue to the center of each cupcake liner and press a googly eye firmly onto it.
Step 4: Assemble Your Owl
Once the paper on the plate is mostly dry, it’s time to bring your owl to life. Decide where you want the eyes to go—usually in the upper half of the plate. Apply glue to the back of each cupcake liner and press them onto the paper plate.
Step 5: Add the Beak
Your owl needs a beak! Take the small triangular piece of orange or yellow paper. Place it on the plate just below and between the two cupcake liner eyes. A small dab of glue on the back will hold it perfectly in place.
Step 6: Let It Dry
Find a safe spot for your owl craft to dry completely. Once the glue has set, your adorable paper plate owl is ready to be displayed. You can prop it up on a shelf or even add a string to the back to hang it up as a festive fall decoration.
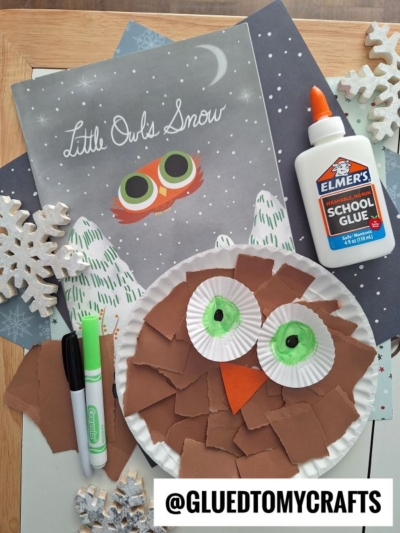
RELATED —> Popsicle Stick Owl Craft Idea For Fall
And there you have it – a sweet, wide-eyed owl to bring a touch of autumn charm into your home! We hope you enjoyed this simple and fun crafting experience. Projects like these are about more than just the final product; they’re about spending quality time together, making messes, and creating wonderful memories that last long after the glue has dried.
We would be thrilled to see your unique owl creations! Feel free to share a picture of your finished craft with us. If you had fun with this project, be sure to explore our other craft ideas for more seasonal inspiration and family-friendly activities. Happy crafting, my friends!

Paper Plate Owl w/Cupcake Liners and Torn Paper
Here’s your checklist of supplies to bring this craft to life:
Prepare your creative haven by laying down a protective cover before the crafting magic begins!
Directions:
- First, let's make the owl's fluffy feathers. Take your brown paper and begin tearing it into small, irregular pieces. Don't worry about making them perfect—the different shapes and sizes will give your owl a wonderful, textured look. Create a nice little pile of torn paper pieces to work with. This is a great step for little hands to practice their motor skills!
- Now, grab your paper plate. This will be the body of your owl. Apply a generous amount of school glue all over the front of the plate. Start placing your torn brown paper pieces onto the glue, overlapping them as you go. Continue layering the paper until the entire plate is covered, creating a cozy, feathery coat for your owl.
- While your owl's body is drying, let's make its big, bright eyes. Take your two cupcake liners and flatten them slightly. These will form the feathery circles around your owl's eyes. Apply a dot of glue to the center of each cupcake liner and press a googly eye firmly onto it.
- Once the paper on the plate is mostly dry, it's time to bring your owl to life. Decide where you want the eyes to go—usually in the upper half of the plate. Apply glue to the back of each cupcake liner and press them onto the paper plate.
- Your owl needs a beak! Take the small triangular piece of orange or yellow paper. Place it on the plate just below and between the two cupcake liner eyes. A small dab of glue on the back will hold it perfectly in place.
- Find a safe spot for your owl craft to dry completely. Once the glue has set, your adorable paper plate owl is ready to be displayed. You can prop it up on a shelf or even add a string to the back to hang it up as a festive fall decoration.
Grab our favorite books via our Amazon affiliate link! In our Amazon storefront you will find books, toys and craft supplies we absolutely love using for our Glued To My Crafts tutorials!