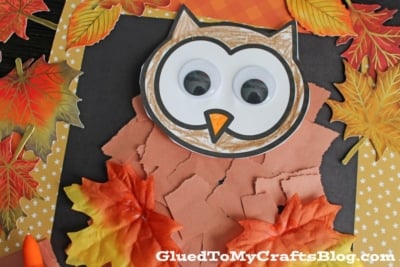
Create a cute torn paper owl craft with your kids. Follow our step-by-step instructions and download the free owl head template.


The arrival of fall brings a burst of colors and the perfect opportunity to engage kids in creative activities. One such delightful project to recreate is our “torn paper owl” tutorial. It’s a unique craft that combines fun, learning, and the beauty of autumn.
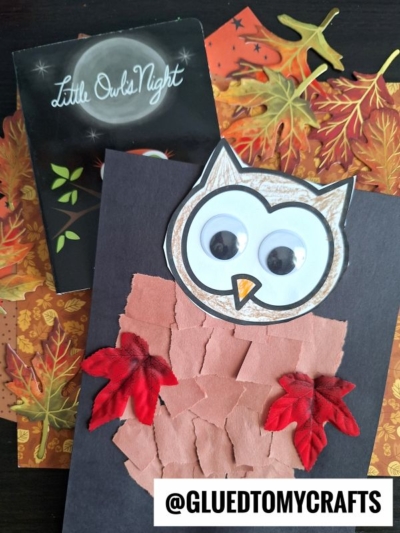
This blog post will guide you through the steps to create some adorable owls with leaf wings, while enjoying quality time with your children.

Torn paper crafts are not only enjoyable but also educational. They help kids develop fine motor skills, creativity, and patience. Unlike precise cutting, tearing paper offers a more forgiving approach, making it ideal for young children who are still mastering their coordination.
Craft Supplies:
Before starting the craft, gather all necessary materials. Here’s what you’ll need:
- Owl Head Printable – on our landing page
- White Cardstock Paper
- Construction Paper {2 sheets, 2 different colors}
- Crayons
- Scissors
- School Glue
- Extra Googly Eyes
- Decorative Leaves {2 per craft}
Having everything ready before you begin will make the crafting process smoother and more enjoyable for both you and the children.
Directions:
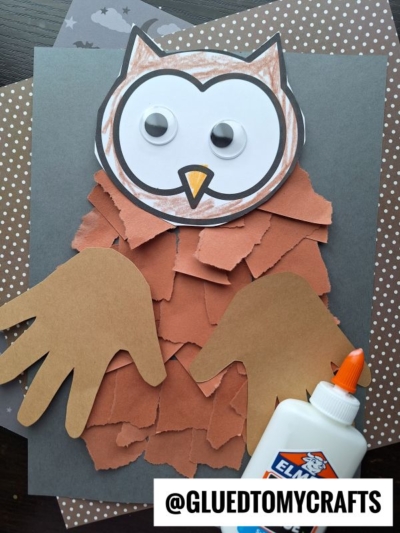
Creating a torn paper owl is simple and rewarding. Follow these steps to make your own adorable owl:
- First download and print out the FREE “owl head” template listed above, on a single piece of cardstock paper. One print will give you TWO opportunities to do this craft.
- Have kids color in ONE of the owl head shapes and help them trim it out with scissors.
- Now help your child cut/tear one of their pieces of construction paper {the color they chose for the owl’s body} into small pieces.
- Next grab the school glue and put a good amount of glue ALL over the remaining sheet of construction paper.
- Have children place their paper pieces on top of the glue {adding more glue if needed} until they have a “body’ shape they like.
- Follow that up by gluing down the owl’s head towards the top of the decorated paper.
- The final step is to add the two leaves for the owl’s wings and googly eyes so it can see.
- Once done decorating, set aside to let it all dry completely before displaying/gifting proudly!
- Don’t forget to share pictures of your adorable paper owl craft with us! #gluedtomycrafts
Feel free to incorporate other materials like felt, fabric scraps, or even natural elements like leaves and twigs. This can add different textures and make the project even more engaging.
RELATED —> Torn Paper Ghost
Once the owls are complete, encourage kids to create stories about their owls. Where do they live? What adventures do they have? Storytelling enhances language skills and helps children develop a narrative understanding. It also deepens their connection to their craft, turning a simple art project into a memorable experience.
Ready to get started? Gather your materials, set up your workspace, and let your child’s creativity soar. And if you both enjoyed this craft, be sure to check out more of our seasonal activities designed to bring families together through art and creativity. Happy crafting!

Torn Paper Owl Craft Idea For Fall
Create a cute torn paper owl craft with your kids. Follow our step-by-step instructions and download the free owl head template.
Here’s your checklist of supplies to bring this craft to life:
- School Glue
Prepare your creative haven by laying down a protective cover before the crafting magic begins!
Directions:
- First download and print out the FREE "owl head" template listed above, on a single piece of cardstock paper. One print will give you TWO opportunities to do this craft.
- Have kids color in ONE of the owl head shapes and help them trim it out with scissors.
- Now help your child cut/tear one of their pieces of construction paper {the color they chose for the owl's body} into small pieces.
- Next grab the school glue and put a good amount of glue ALL over the remaining sheet of construction paper.
- Have children place their paper pieces on top of the glue {adding more glue if needed} until they have a "body' shape they like.
- Follow that up by gluing down the owl's head towards the top of the decorated paper.
- The final step is to add the two leaves for the owl's wings and googly eyes so it can see.
- Once done decorating, set aside to let it all dry completely before displaying/gifting proudly!


NEED HELP DOWNLOADING OUR FREE PRINTABLES? PLEASE REFER TO OUR FAQ PAGE
If you've enjoyed our content or have any thoughts to share, we'd love to hear from you! Mention @gluedtomycrafts or tag #gluedtomycrafts on Instagram!