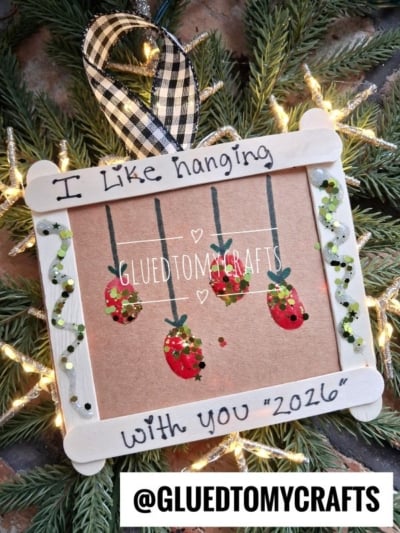
Some ornaments come from a store. The best ones come from tiny hands, a little glitter, and an afternoon spent together at the kitchen table.
This popsicle stick and thumbprint ornament combines all three. Each red thumbprint becomes a shiny Christmas bauble “hanging” from a drawn string, and the frame carries a sweet pun: “I Like Hanging With You.“ Add the year to the bottom, and you have a keepsake that captures exactly how small those fingers were this holiday season.
It’s simple enough for preschoolers with a little help and fun enough for older kids to make on their own. It also works well for classroom gifts, grandparent presents, or a cozy family craft night. Years from now, you’ll pull it out of the ornament box and remember this exact Christmas.
Craft Supplies:
Gather everything before you start:
- 4 wooden popsicle sticks (jumbo craft sticks)
- Cardstock paper (white or kraft)
- Ink pad or washable paint
- Fine-tip markers (black being important!)
- Glitter glue
- Loose craft glitter
- Hot glue gun or strong craft glue
- Craft ribbon (about 6–8 inches)
- Scissors
- Pencil (for tracing)
- Baby wipes or a damp paper towel (for messy fingers)
Directions:
Step 1: Assemble the Popsicle Stick Frame
Lay two popsicle sticks vertically on your work surface, parallel to each other. Space them so the ends of your other sticks will rest on top of them.
Next, add a dot of glue to each end of the vertical sticks. Place the remaining two sticks horizontally across the top and bottom to form a square. The horizontal sticks should sit on the front layer, since you’ll write on them later.
Press each corner gently and hold for a few seconds. Let the frame set completely before moving on.
Safety tip: Hot glue gets very hot. Adults should handle this step, or use craft glue with younger kids and allow extra drying time.
Step 2: Decorate the Side Sticks
Now for the sparkle. Take the glitter glue and squeeze a wavy line down the length of each vertical side stick. Little wiggles look best, so there’s no need for perfection.
While the glitter glue is still wet, press a few sequins into it. Space them out along the line so they catch the light like tiny gems.
Set the frame aside to dry. Glitter glue can take 30 minutes or more, so this is a great time to work on the center.
Step 3: Cut and Fit the Kraft Paper Center
Place your frame on top of the kraft paper or cardboard. Trace around the outside edge with a pencil.
Cut out the square just inside your traced lines. You want it large enough to cover the opening from behind but not so large that it peeks out past the edges.
Flip the frame over and run a thin line of glue along the back of all four sticks. Press the kraft paper square onto the back, smoothing it flat. Turn it face up again, and you now have a blank canvas inside your frame.
Step 4: Stamp the Thumbprint Ornaments
This is the part kids love most.
Have your child press their thumb firmly onto the ink pad, or dip it lightly into paint. Then press it onto the kraft paper and lift straight up.
Make four thumbprints total:
- Place three near the upper part of the paper, spread across the width.
- Place one a little lower, toward the center-left, so it looks like it’s hanging on a longer string.
Varying the heights makes the design feel playful and natural. Wipe fingers clean right away, then let the prints dry for a few minutes so they don’t smudge.
Tip: Smaller kids might do better using an index finger. The prints will be a bit smaller, but just as cute.
Step 5: Add Caps and Strings
Once the prints are dry, it’s time to turn them into ornaments.
Use your marker to draw a small cap or loop at the top of each thumbprint. This mimics the metal topper on a real Christmas bauble.
Then grab your fine-tip marker. Draw a thin, straight line from the top of each cap up to the bottom edge of the top popsicle stick. Suddenly, your thumbprints are hanging from the frame.
Step 6: Apply the Glitter Accents
Add a tiny dab of craft glue to each ornament. Sprinkle a pinch of glitter over the glue.
Gently tap off the excess onto a paper plate so you can pour it back into the container. A little glitter goes a long way here. You want each ornament to twinkle, not disappear under sparkle.
Step 7: Write the Message
With your black marker, write “I Like Hanging” across the top popsicle stick.
On the bottom stick, write “with you” followed by the year, such as “2026.”
Older kids can write this themselves, which adds an extra layer of sentiment. For younger children, a parent or teacher can write it, or lightly pencil it in first so kids can trace over the letters.
Step 8: Attach the Ribbon Hanger
Cut a piece of ribbon about 6 to 8 inches long. Fold it in half to form a loop.
Glue both ends of the ribbon to the back of the top popsicle stick, near the center. Hold it in place until the glue sets.
Give the ornament a final check, let everything dry fully, and then find the perfect spot on your tree.
RELATED —> Christmas Gnome Photo Ornaments

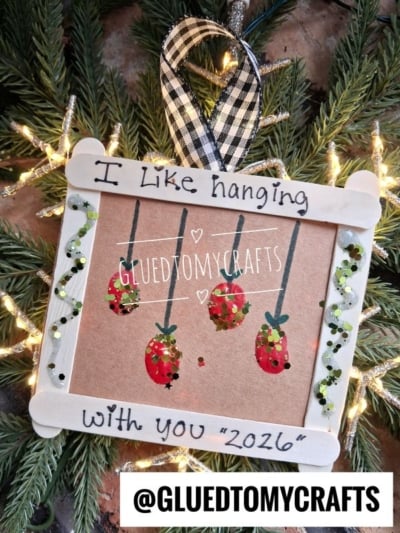
Little hands grow up so quickly. This thumbprint ornament freezes one small moment in time, wrapped in a pun that’s sure to bring a smile every December.
Whether you make one with your own kids, a whole class, or the grandchildren, we’d love to see how yours turns out. Snap a photo of your finished ornament and share it with us. Tell us who helped make it and what year it marks.
Now grab those popsicle sticks, warm up the glue gun, and start making memories that will hang on your tree for years to come. Happy crafting, and merry Christmas!
