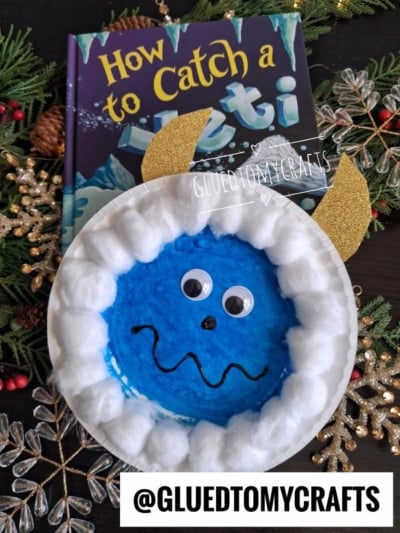
Winter is the perfect time to stay cozy indoors and get a little creative. And what better way to celebrate the snowy season than with a friendly, fluffy yeti? This paper plate and cotton ball yeti craft is bright, silly, and easy to make. Kids get to paint, glue, squish soft cotton balls, and give their yeti its very own goofy personality.
This craft works for preschoolers, early elementary kids, and anyone who loves a good monster, as long as that monster is more cuddly than scary. It’s great for classroom winter units, rainy-day boredom busters, holiday break fun, or a quiet afternoon at the kitchen table.
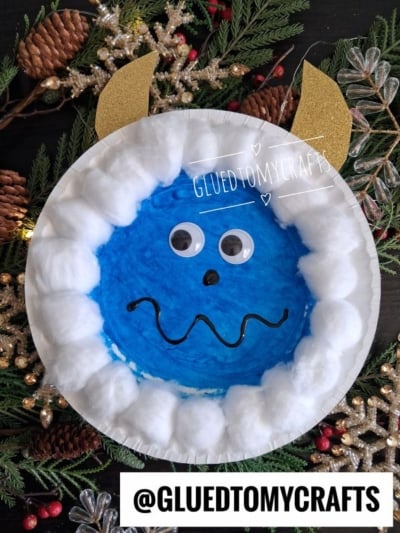
Your little crafters will love the textures, too. The soft cotton fur, the sparkly gold horns, and the wobbly googly eyes give them plenty to touch and explore. And when they’re done, they’ll have an adorable yeti to hang on the fridge or show off on the classroom wall.
Grab your supplies and let’s make some snowy-day magic!
Craft Supplies:
Here’s everything you’ll need to make one yeti:
- 1 white paper plate (the sturdy kind works best)
- Blue paint (tempera or washable acrylic)
- Paintbrush or sponge
- White cotton balls (about 20–30, depending on plate size)
- 2 large googly eyes
- Black marker or black puffy paint
- Gold glitter cardstock (for the horns)
- Craft glue (white school glue works well)
- Scissors
- Pencil (for tracing the horns)
- Newspaper or a craft mat to protect your table
Optional extras: paint smocks or old t-shirts, a glue stick for the cardstock, and a hole punch with ribbon if you’d like to hang your yeti.
Directions:
- Cover your table with newspaper or a craft mat. Paint and glue can get a little messy, and that’s part of the fun! Put a smock or old shirt on your crafter, then lay out all your supplies so everything is within easy reach.
- Have your child paint the inner circle of the paper plate with bright blue paint. This will be your yeti’s face. Leave the outer rim white, since the cotton ball fur will cover it later.
- Set the plate aside to dry completely. This usually takes about 20–30 minutes, depending on how thick the paint is.
- Turn the gold glitter cardstock over to the plain side. Draw two curved horn shapes with a pencil. Each horn should be about 3–4 inches tall, wide at the bottom and pointed at the top, with a gentle curve.
- Cut out the horns. Older kids can do this on their own with safety scissors. For younger children, an adult can cut the horns while the child helps pick the shape or trace the lines.
- Once the paint is dry, flip the plate over so the back faces up. Glue the bottom of each horn to the back of the plate near the top edge, so the pointy tips stick up above the plate. Angle them slightly outward to give your yeti that classic horned look.
- Press the horns down firmly and let the glue set for a few minutes before flipping the plate back over.
- Now for the fluffiest part! Squeeze a line of craft glue along a section of the plate’s white outer rim. Press cotton balls onto the glue one at a time, placing them close together.
- Keep working around the plate, a section at a time, until the whole rim is covered in a soft, snowy ring of fur. Gently pull or stretch some cotton balls if you want a wilder, shaggier yeti.
- Place a dot of glue on the back of each googly eye. Press them onto the upper middle part of the blue face, side by side. Big eyes give your yeti a sweet, surprised look, so go as large as you like!
- Use a black marker or puffy paint to add a small round nose just below and between the eyes. Then draw a wavy, squiggly line underneath for the mouth. This silly, wiggly smile makes your yeti look like it’s giggling or shivering in the cold.
- If you’re using puffy paint, let it dry flat for several hours so it keeps its raised, bumpy shape.
- Lay your yeti flat until all the glue and paint are fully dry. Then it’s ready to display! Hang it on the fridge, tape it to a door, or line up a whole family of yetis on a classroom bulletin board.
RELATED —> Fork Painted Yeti Craft Idea
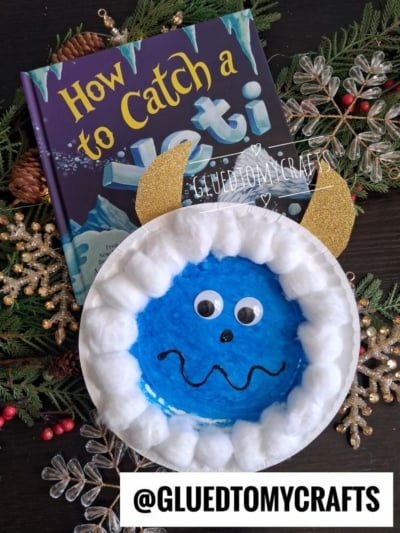
GRAB THE HOW TO CATCH A YETI BOOK VIA OUR AMAZON AFFILIATE LINK
This paper plate and cotton ball yeti craft is all about having fun together. Kids get to paint, glue, and build a soft, sparkly friend, and you get to watch their creativity shine. Some yetis will be neat, some will be wild, and every one of them will be wonderful.
So gather your plates, fluff up those cotton balls, and let the snowy fun begin. Happy crafting, and enjoy your new frosty friends!

Paper Plate Yeti Craft Idea For Kids
Get ready to unleash your child's inner artist with this Cotton Ball and Paper Plate Yeti craft idea from us. It's perfect for a winter story time event!
Here’s your checklist of supplies to bring this craft to life:
- School Glue
Prepare your creative haven by laying down a protective cover before the crafting magic begins!
Directions:
- Cover your table with newspaper or a craft mat. Paint and glue can get a little messy, and that's part of the fun! Put a smock or old shirt on your crafter, then lay out all your supplies so everything is within easy reach.
- Have your child paint the inner circle of the paper plate with bright blue paint. This will be your yeti's face. Leave the outer rim white, since the cotton ball fur will cover it later.
- Set the plate aside to dry completely. This usually takes about 20–30 minutes, depending on how thick the paint is.
- Turn the gold glitter cardstock over to the plain side. Draw two curved horn shapes with a pencil. Each horn should be about 3–4 inches tall, wide at the bottom and pointed at the top, with a gentle curve.
- Cut out the horns. Older kids can do this on their own with safety scissors. For younger children, an adult can cut the horns while the child helps pick the shape or trace the lines.
- Once the paint is dry, flip the plate over so the back faces up. Glue the bottom of each horn to the back of the plate near the top edge, so the pointy tips stick up above the plate. Angle them slightly outward to give your yeti that classic horned look.
- Press the horns down firmly and let the glue set for a few minutes before flipping the plate back over.
- Now for the fluffiest part! Squeeze a line of craft glue along a section of the plate's white outer rim. Press cotton balls onto the glue one at a time, placing them close together.
- Keep working around the plate, a section at a time, until the whole rim is covered in a soft, snowy ring of fur. Gently pull or stretch some cotton balls if you want a wilder, shaggier yeti.
- Place a dot of glue on the back of each googly eye. Press them onto the upper middle part of the blue face, side by side. Big eyes give your yeti a sweet, surprised look, so go as large as you like!
- Use a black marker or puffy paint to add a small round nose just below and between the eyes. Then draw a wavy, squiggly line underneath for the mouth. This silly, wiggly smile makes your yeti look like it's giggling or shivering in the cold.
- If you're using puffy paint, let it dry flat for several hours so it keeps its raised, bumpy shape.
- Lay your yeti flat until all the glue and paint are fully dry. Then it's ready to display! Hang it on the fridge, tape it to a door, or line up a whole family of yetis on a classroom bulletin board.


Grab our favorite books via our Amazon affiliate link! In our Amazon storefront you will find books, toys and craft supplies we absolutely love using for our Glued To My Crafts tutorials!
If you've enjoyed our content or have any thoughts to share, we'd love to hear from you! Mention @gluedtomycrafts or tag #gluedtomycrafts on Instagram!