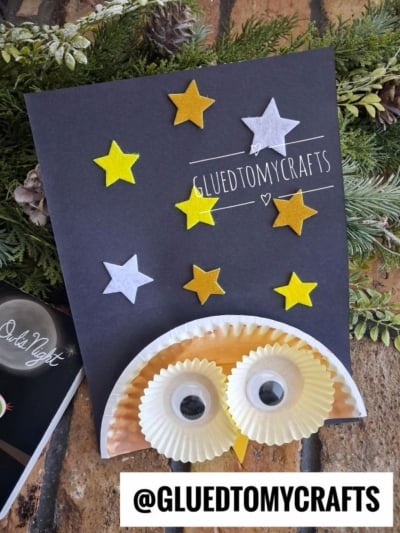
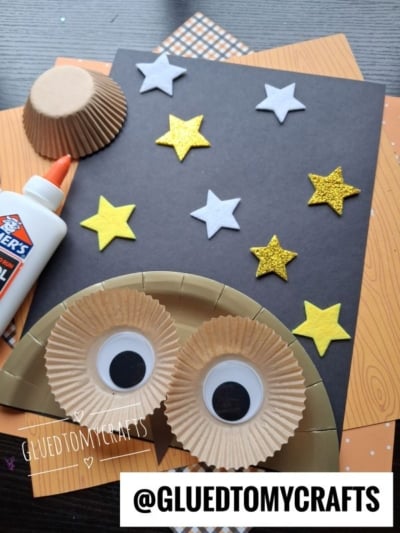
There’s something magical about owls. They stay up late, they see in the dark, and those big round eyes seem to know all the secrets of the night. That’s why we love this sweet little paper plate owl perched under a sky full of twinkling stars.
This craft is simple and colorful, and it’s made from supplies you probably already have at home or in the classroom. Half a paper plate becomes a cozy owl body. Cupcake liners turn into big, bright eyes. A handful of felt stars lights up the night sky.
It’s perfect for preschoolers and elementary-aged kids, and it works just as well at the kitchen table as it does in a busy classroom. Let’s get gluing!
Craft Supplies:
- 1 paper plate (you’ll use half)
- 1 sheet of black or dark grey construction paper
- 2 yellow cupcake liners
- 2 large googly eyes
- Small piece of yellow construction paper (for the beak)
- Felt or foam stars in gold, yellow, and white (glittery ones add extra sparkle!)
- Brown or tan paint or watercolors
- Paintbrush
- Glue (a glue stick plus white school glue works best)
- Scissors
Grown-up tip: Lay down newspaper or a plastic tablecloth before painting. Little artists can get very enthusiastic!
Directions:
- Fold your paper plate in half and cut along the fold. You only need one half for your owl. Save the other half for a second owl friend or another craft day.
- Paint the half plate with brown or tan paint. Don’t worry about perfect coverage. Streaks and brush marks look just like feathers!
- Set it aside to dry completely. This usually takes about 10–20 minutes, depending on how much paint you used.
- Turn your black construction paper so it’s standing tall (vertical). Place your dry paper plate at the bottom of the page with the curved edge facing up and the straight edge lined up with the bottom of the paper.
- Spread glue along the edges of the plate and press it down firmly. Now your owl has a home in the night sky!
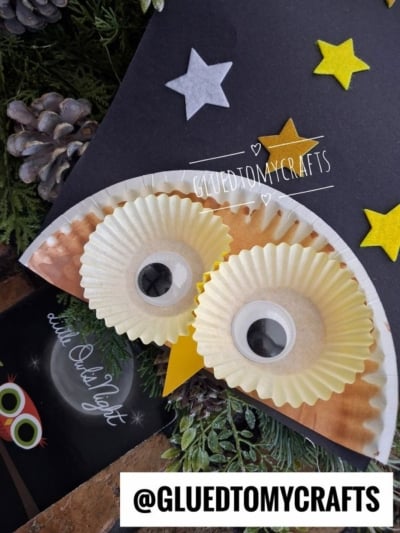
- Take your two yellow cupcake liners and glue them side by side near the top of the paper plate. Let them touch or slightly overlap in the middle. This makes your owl look wide-eyed and curious. Use white school glue for this step. It holds the liners better than a glue stick.
- Now for the best part! Place a dab of glue in the center of each cupcake liner and press a googly eye on top.
- Cut a small triangle from your yellow construction paper. Glue it just below the spot where the two cupcake liners meet, with the point facing down.
- Grab your felt or foam stars and scatter them across the dark paper above your owl. Mix gold, yellow, and white stars for a sky that really shines. Spread them out, cluster them together, or make your own constellation. There’s no wrong way to decorate the night!
- Glue each star in place and let your masterpiece dry. Hoot hoot, you did it!
RELATED —> Pool Noodle Stamped Owl Craft
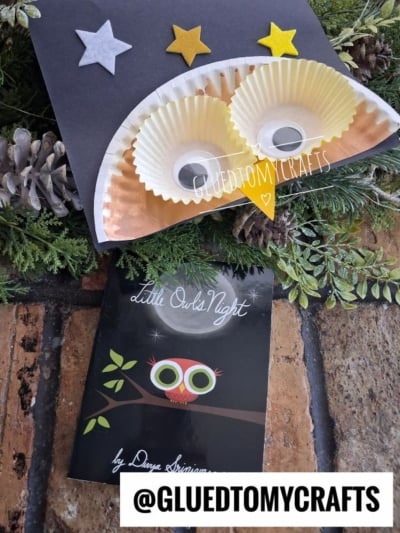
This craft is a perfect match for the children’s book Owl’s Night. Read the story together first, then make your own owl under the stars. Kids love bringing a story to life with their hands.
GRAB THE BOOK “LITTLE OWL’S NIGHT” VIA OUR AMAZON AFFILIATE LINK
We’d love to see your little night owls! Snap a photo of your finished craft and tag us @gluedtomycrafts so we can cheer you on.
Happy crafting, friends. Keep it fun, keep it creative, and stay glued to your crafts! 🦉✨

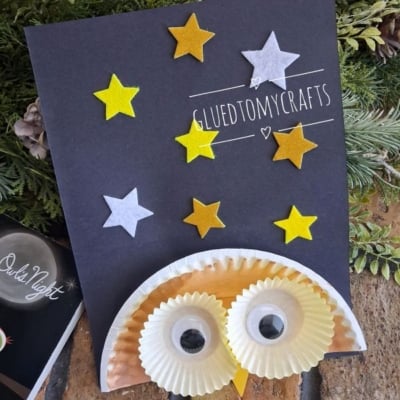
Night Owl Craft Idea with a Paper Plate and Cupcake Liners
Make a starry night owl with this paper plate owl craft! An easy craft for kids using cupcake liners and felt stars. Get the step-by-step tutorial.
Here’s your checklist of supplies to bring this craft to life:
- School Glue
Prepare your creative haven by laying down a protective cover before the crafting magic begins!
Directions:
- Fold your paper plate in half and cut along the fold. You only need one half for your owl. Save the other half for a second owl friend or another craft day.
- Paint the half plate with brown or tan paint. Don't worry about perfect coverage. Streaks and brush marks look just like feathers!
- Set it aside to dry completely. This usually takes about 10–20 minutes, depending on how much paint you used.
- Turn your black construction paper so it's standing tall (vertical). Place your dry paper plate at the bottom of the page with the curved edge facing up and the straight edge lined up with the bottom of the paper.
- Spread glue along the edges of the plate and press it down firmly. Now your owl has a home in the night sky!
- Take your two yellow cupcake liners and glue them side by side near the top of the paper plate. Let them touch or slightly overlap in the middle. This makes your owl look wide-eyed and curious. Use white school glue for this step. It holds the liners better than a glue stick.
- Now for the best part! Place a dab of glue in the center of each cupcake liner and press a googly eye on top.
- Cut a small triangle from your yellow construction paper. Glue it just below the spot where the two cupcake liners meet, with the point facing down.
- Grab your felt or foam stars and scatter them across the dark paper above your owl. Mix gold, yellow, and white stars for a sky that really shines. Spread them out, cluster them together, or make your own constellation. There's no wrong way to decorate the night!
- Glue each star in place and let your masterpiece dry. Hoot hoot, you did it!


Grab our favorite books via our Amazon affiliate link! In our Amazon storefront you will find books, toys and craft supplies we absolutely love using for our Glued To My Crafts tutorials!
If you've enjoyed our content or have any thoughts to share, we'd love to hear from you! Mention @gluedtomycrafts or tag #gluedtomycrafts on Instagram!