Some ornaments come from the store. The best ones come from little hands, a bit of glue, and a whole lot of holiday cheer.
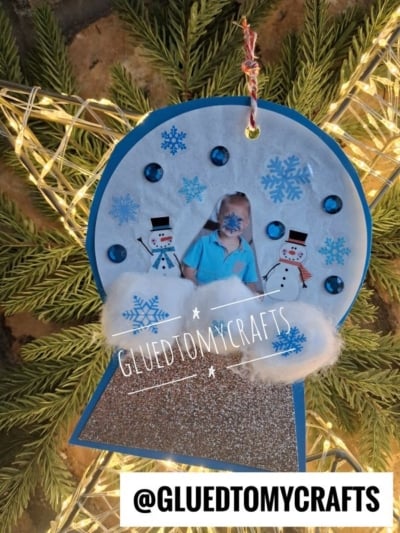
This cupcake liner snow globe ornament is one of those keepsakes. It’s simple enough for preschoolers, fun enough for big kids, and sweet enough that grandparents will want one of their own. A plain white cupcake liner becomes a frosty snow globe.
A favorite photo goes in the middle, and stickers, sparkly gems, and fluffy cotton ball “snow” finish the scene. The result is a personalized ornament your family will pull out of the decoration box year after year.
Craft Supplies:
Gather everything before you start so the fun keeps flowing:
- Cupcake liners (standard size works best; one per ornament)
- Cardstock paper (for the snow globe backing)
- Glitter paper (silver, gold, or brown for the snow globe base)
- A child’s photo (a small printed photo, about 2 inches tall)
- Cotton balls
- Snowflake stickers
- Snowman stickers
- Rhinestone gems (self-adhesive gems are easiest for little ones)
- Baker’s twine
- Hole punch
- Glue (a glue stick for paper, plus tacky glue or school glue for cotton balls and gems)
Helpful extras: scissors, a pencil, a round jar lid or cup to trace, and a paper plate for gluing.
Directions:
1. Set Up Your Craft Space
Cover your table with newspaper or a plastic tablecloth. Pour a small puddle of tacky glue onto a paper plate so kids can dip cotton balls easily. Sort the stickers and gems into small bowls or muffin tin cups. A tidy setup makes the whole project calmer and more fun.
2. Flatten the Cupcake Liner
Gently press a white cupcake liner flat with your palms. Smooth out the fluted edges so it becomes a wide, ruffled circle. Those little ridges give your globe a frosty, textured look, just like real glass catching the light.
Tip: Place the liner under a heavy book for a few minutes if it keeps popping back up.
3. Glue the Liner to the Cardstock
Rub a glue stick over a piece of blue cardstock. Press the flattened cupcake liner on top and smooth it from the center outward. Leave enough room below the liner for the snow globe base — you’ll need a little space to draw the trapezoid stand in the next step.
4. Add the Glittery Trapezoid Base
Cut a trapezoid from your glitter paper. Position it just below the cupcake liner so it looks like a snow globe stand, then glue it down. Slightly overlap the bottom of the liner so the two pieces connect naturally. Leave a thin border of blue cardstock showing around the edges for a clean, framed look.
5. Cut Out the Snow Globe Shape
Now that everything is glued in place, it’s time to cut! Trim around the entire design — following the round edge of the cupcake liner and the shape of the glitter base — leaving a thin blue border all the way around. This blue cardstock edge is what gives your ornament that classic snow globe silhouette.
Adults should handle this step for younger kids, while older children can cut it themselves with safety scissors.
6. Add the Star of the Show: The Photo
Trim around your child’s photo so only their body and face remain. Cutting close to the edges makes them look like they’re standing inside the snow globe. Glue the photo in the center of the cupcake liner.
Kids love this part. Seeing themselves “inside” a winter wonderland always gets a giggle.
7. Build a Snowy Scene with Stickers
Now the creativity really kicks in. Let kids place snowman stickers on either side of the photo, like friendly winter buddies. Then scatter snowflake stickers all around the globe. Big ones, small ones, and different shapes all add to the magic.
There’s no wrong way to do this. A crowded snowstorm and a gentle flurry are both perfect.
8. Add a Little Sparkle
Press rhinestone gems around the top edge of the globe. Space them evenly for a polished look or let kids sprinkle them wherever they like. Self-adhesive gems are easiest, but a tiny dot of tacky glue works too.
9. Pile On the Cotton Ball Snow
Gently pull a few cotton balls apart to make them fluffier. Dip them lightly in glue and press them along the bottom curve of the globe, just above the glitter base. These soft snow drifts give your ornament wonderful texture.
For an extra-special touch, stick one or two snowflake stickers right on top of the cotton.
10. Let It Dry
Set the ornament flat somewhere safe for about 20 to 30 minutes. This gives the glue time to hold the cotton and gems in place. It’s a great moment to clean up or start a second ornament for Grandma.
11. Punch a Hole and Add the Hanger
Once dry, punch a hole at the top center of the blue backing. Thread a 6- to 8-inch piece of baker’s twine through the hole and tie the ends in a knot to form a loop.
12. Hang It on the Tree
Find the perfect branch, ideally one near the lights so the gems sparkle, and hang your new ornament. Snap a picture of your little crafter next to their creation. You’ll love looking back at it next year.
RELATED —> Toilet Paper Roll Stamped Christmas Tree Wreath
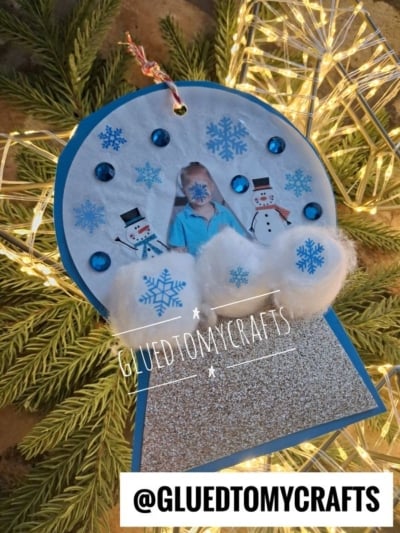
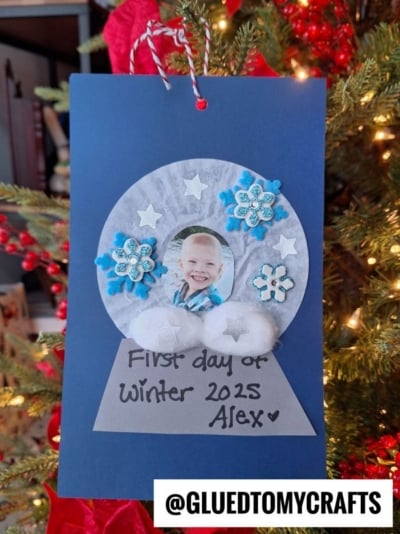
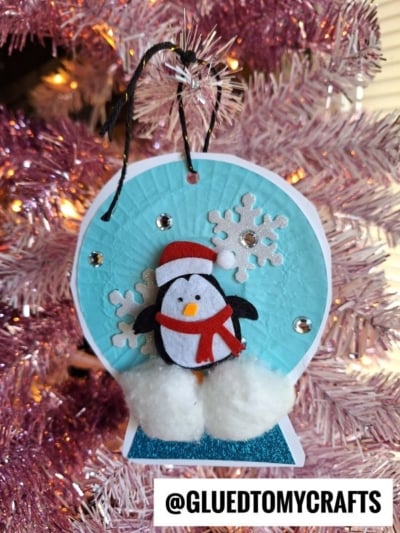
The best part of this cupcake liner snow globe ornament isn’t the perfect circle or how neatly the stickers line up. It’s the proud smile when your child hangs it on the tree and says, “I made that!”
So grab some cupcake liners, gather the kids, and make some holiday memories together. Each snow globe captures a little piece of this Christmas, and you’ll get to unwrap it again every year. Happy crafting, and merry Christmas!