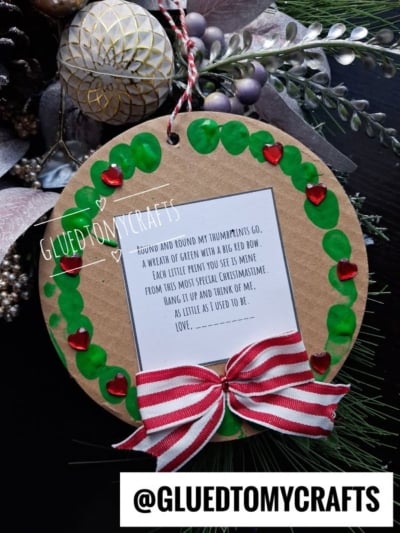
Some of the best Christmas ornaments aren’t the shiny ones from the store. They’re the ones made by tiny hands, a little smudged and a little crooked, and absolutely priceless.
This Thumbprint Christmas Wreath Ornament is one of those treasures. Your little one presses their thumb into green paint, round and round, to form a cheerful wreath. Add a few red heart “berries,” a striped bow, and a sweet poem in the center, and you have a keepsake that grandparents, aunts, uncles, and parents will pull out of the ornament box for years to come.
We made this project simpler by skipping the cardboard cutting. Instead, we use small cardboard cake boards. They’re perfectly round, sturdy, and inexpensive, and they come in packs, which makes them ideal for classrooms, playgroups, or a big family crafting session. Pair one with our free printable poem card, and you can finish this craft in one cozy afternoon.
Craft Supplies:
Here’s everything you need to make one ornament:
- Small cardboard cake board (a 4-inch or 5-inch round works best)
- Green paint (washable kids’ paint or acrylic craft paint)
- Red heart rhinestones or gems
- Red ribbon/pre-made bow
- Twine
- Glue (a glue stick or tacky glue for the poem card, plus tacky glue or a hot glue gun for the gems and bow)
- Hole punch
- Free printable poem card – password is GLUEDTOMYCRAFTS2026
- Scissors
- Paper plate (for the paint)
- Baby wipes or a damp paper towel (trust us on this one)
- Black marker or pen (for signing)
Directions:
Step 1: Print and Cut the Poem Card
Download and print our free poem card printable on white cardstock. Cardstock holds up better than regular printer paper and won’t wrinkle when you glue it down.
Cut out one of the poem tags {there are six total per print out.}
Step 2: Stamp the Thumbprint Wreath
Squeeze a small puddle of green paint onto a paper plate. Have your child press their thumb into the paint, then stamp it onto the outer edge of the cake board.
Keep going, round and round, overlapping the prints slightly as you work your way around the circle. Leave the center open so the poem card has room to sit. Two rows of prints, one slightly inside the other, give the wreath a fuller, leafier look.
A few tips for this step:
- Re-dip often. A fresh coat of paint every print or two keeps the thumbprints bold and clear.
- Press, don’t smear. Show your child how to press straight down and lift straight up.
- Embrace the wobbles. Uneven prints are part of the charm. This is a keepsake, not a showroom piece.
Wipe little thumbs clean with a baby wipe, then let the paint dry completely. Washable paint usually dries in about 20 to 30 minutes.
Step 3: Add the Red Gem “Berries”
Once the paint is dry, it’s time for some sparkle. Glue the red heart rhinestones on top of the green thumbprints, spacing them evenly around the wreath.
Step 4: Glue the Poem Card to the Center
Apply glue to the back of the poem card and press it into the center of the wreath. Smooth it out from the middle toward the edges so it lies flat.
Step 5: Attach the Ribbon Bow at the Bottom
Tie your red ribbon into a bow and glue it to the bottom center of the wreath so it overlaps both the thumbprints and the bottom edge of the poem card. That “big red bow” from the poem now comes to life!
Grown-up step: A hot glue gun holds the bow most securely. If you’re crafting with kids, have an adult handle this part. Tacky glue works too, but give it extra time to set.
Step 6: Punch a Hole and Thread the Baker’s Twine
Use a hole punch to make a hole at the top center of the cake board, about a quarter inch from the edge. Most standard cardboard cake boards punch easily with a regular hole punch.
Thread the twine through the hole and tie the ends in a knot to form a loop. Now your ornament is ready to hang on the tree!
Step 7: Sign the Child’s Name
Finish the ornament by writing your child’s name on the line after “Love.” Older kids may want to sign it themselves, which adds an extra layer of sentiment. For younger children, a grown-up can write the name neatly.
Flip the ornament over and add the year on the back. Future you will be so glad you did.
RELATED —> Christmas Bow Photo Gift Tag Ornament
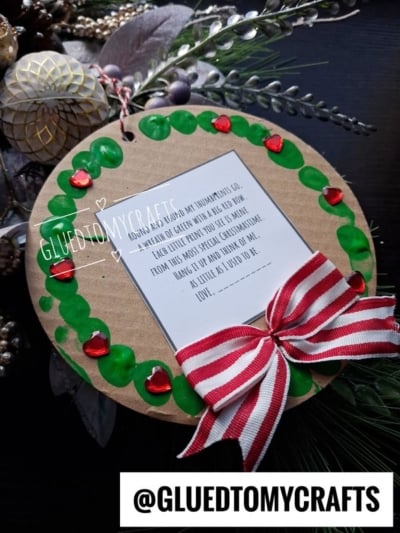
This thumbprint wreath ornament is quick, budget-friendly, and filled with heart. It’s the kind of gift that gets better with every passing Christmas, as those tiny thumbprints become a sweet reminder of just how little they once were.
Download our free Thumbprint Wreath poem card printable, grab a pack of small cardboard cake boards, and get stamping. We’d love to see your finished wreaths! Share your photos and tag us at @GluedToCrafts so we can admire every little thumbprint.
Happy crafting, and Merry Christmas from all of us at Glued To My Crafts!
