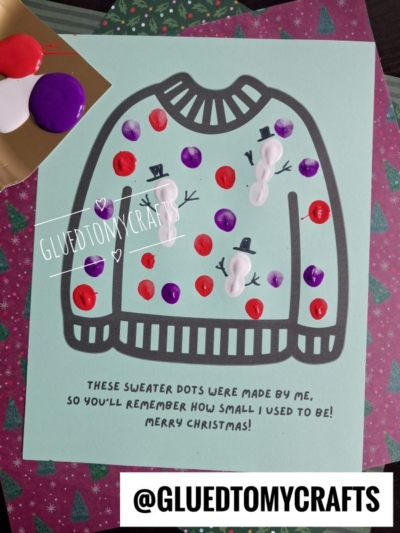
Little fingers grow up fast. That’s why we love keepsake crafts that capture a moment you can hold onto.
This thumbprint Christmas sweater craft is a new favorite of mine. Your child presses tiny painted fingerprints onto a printed sweater, turning it into a cheerful “ugly Christmas sweater” covered in colorful dots and adorable fingerprint snowmen. It’s simple enough for toddlers, fun for preschoolers, and sweet enough to frame.
The best part is the poem printed right on the card. Years from now, you’ll pull this out of a box of decorations and smile at just how small those fingerprints were.
Grab the free printable below, and let’s make some holiday magic.
Craft Supplies:
Gather these supplies before you begin:
- Free Christmas Sweater Card Printable – on box.com – password is GLUEDTOMYCRAFTS2026
- Colored cardstock paper
- Acrylic paint – we used purple, red and white
- Black fine-tip marker
- Paper plate to use as a paint palette
- Baby wipes or a damp paper towel for quick finger cleanup
- Smock or old T-shirt (optional, but highly recommended)
Feel free to swap the paint colors. Green, gold, and blue all look festive on this sweater too.
Directions:
Step 1: Print the Template
Download the free sweater printable and print it on colored cardstock paper.
Step 2: Set Up Your Paint Palette
Squeeze a small dollops of your acrylic paint onto a paper plate. Keep each color separate so they don’t blend into a muddy brown.
You only need a little paint. A blob about the size of a nickel is plenty for each color.
Step 3: Add Colorful Fingerprint Dots
Now for the fun part. Have your child dip one fingertip into red or purple paint, then press it gently onto the sweater. Lift straight up to get a clean, round dot.
Encourage them to scatter dots all over the sweater. Wipe fingers clean between colors to keep each shade bright.
Leave a few open spaces for the snowmen you’ll add next.
Step 4: Create the Fingerprint Snowmen
Dip a fingertip into white paint. Press three dots in a short vertical stack, with each one slightly overlapping the last. That’s your snowman!
For extra charm, make the bottom dot with a thumb and the top dot with a pinky. This gives your snowman a classic big-to-small shape.
Add two or three snowmen across the sweater. Spread them out so they don’t crowd each other.
Step 5: Let Everything Dry
Set the card aside on a flat surface and let the paint dry completely. Acrylic paint usually dries in about 15 to 30 minutes, depending on how thick the dots are.
Don’t skip this step. Drawing on wet paint will smear the marker and blur your snowmen.
Step 6: Add the Marker Details
Once the paint is dry, use a black fine-tip marker to bring your snowmen to life:
- Top hats: Draw a small rectangle on top of each snowman’s head with a flat brim underneath.
- Stick arms: Add thin lines sticking out from the middle dot. A few little “fingers” at the ends make them extra cute.
- Faces: Dot on two tiny eyes and a small nose. Use an orange marker for a carrot nose if you have one.
Older kids can handle this step themselves. For toddlers, a grown-up can add the details while the little one watches.
Step 7: Sign and Date It
Write your child’s name and the year on the back or bottom of the card. Trust us, you’ll be glad you did when you’re sorting through keepsakes in ten years.
RELATED —> Christmas Sweater Ornament Craft For Kids
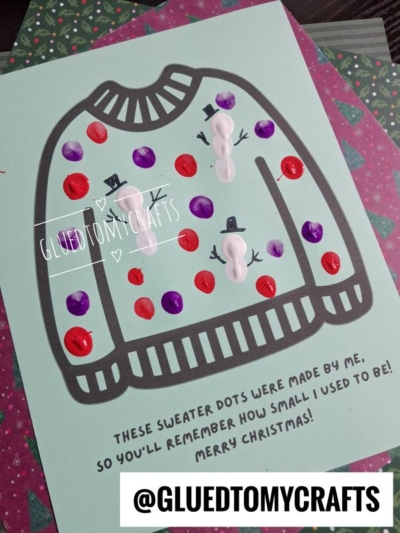
Your thumbprint Christmas sweater template is ready and waiting. Click the download button in the supply list, print it on cardstock paper, and gather your paints. In less than half an hour, you’ll have a sweet holiday keepsake you’ll treasure for years.
We’d love to see your little one’s masterpiece! Snap a photo of your finished sweater and share it on social media. Tag @gluedtomycrafts so we can cheer on your creation. Merry crafting, and Merry Christmas!
