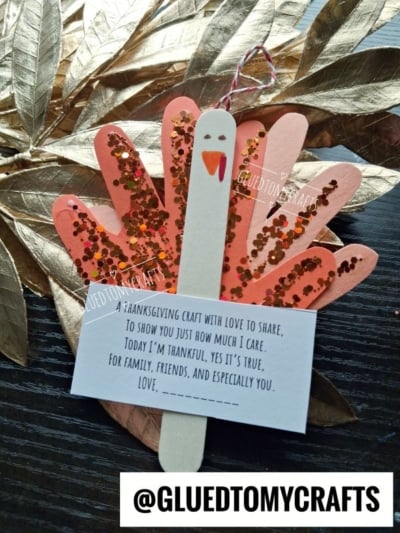
Some crafts get tossed after a week. Others get tucked into a memory box and pulled out year after year. This handprint turkey ornament is the second kind.
It starts with your child’s handprint, which becomes a fan of sparkly turkey feathers. A simple craft stick turns into the turkey’s body, complete with a tiny face. Then a sweet little poem card ties it all together with a message of thanks.
The finished turkey hangs from a loop of baker’s twine, so it can go on a doorknob, a cabinet handle or even the Christmas tree later on. It makes a lovely gift for grandparents, parents, teachers, and family friends.
Best of all, this craft is simple. You don’t need special skills or fancy supplies. If you can trace a hand and use a glue stick, you can make this turkey. It works just as well at the kitchen table as it does in a classroom of 25 kids.
Craft Supplies:
Gather these supplies before you start. Having everything ready makes the process smooth, especially with little ones who are eager to dive in.
- Colored cardstock paper {for the handprint cutouts}
- White cardstock paper {for the printable}
- Wooden jumbo craft stick
- Loose craft glitter
- White school glue
- Markers {for the turkey face}
- Baker’s twine (about 6 inches per ornament)
- Pencil
- Scissors
- Poem Printable – on box.com – password is GLUEDTOMYCRAFTS2026
- Tape or a hot glue gun (hot glue is for adults only)
Directions:
Step 1: Trace the Handprint
Have your child place one hand flat on their colored cardstock with fingers spread wide. Trace around the hand with a pencil.
Spread fingers make the best feathers, so encourage a nice wide “turkey fan.” Wiggly little hands are normal. If the first try looks a bit lumpy, just flip the paper and trace again.
Want fuller feathers? Trace two handprints. You’ll overlap them later for a bigger, fluffier tail.
Step 2: Cut Out the Handprint
Cut along the traced line. Older kids can do this part on their own. For younger children, an adult can handle the cutting, especially around the tricky spaces between the fingers.
Don’t worry about perfect edges. A little wobble adds charm.
Step 3: Add the Glitter Feathers
Place the handprint on a tray or paper plate. Squeeze small dots or lines of white glue onto the fingers and palm, then sprinkle loose craft glitter over the glue.
Then let the handprint dry completely. This usually takes about 20 to 30 minutes.
Step 4: Draw the Turkey Face
While the glitter dries, it’s time to give your turkey some personality. Near the top of the craft stick, use markers to draw:
- Two small black dots for eyes
- A tiny orange triangle for the beak
- A red teardrop or squiggle next to the beak for the wattle
Simple is best here. Small features make the turkey look sweet and keep the focus on those glittery feathers.
Step 5: Attach the Craft Stick
Once the handprint is dry, glue the craft stick to the front of the handprint. Center it so the fingers fan out behind the stick like a tail.
Leave the top of the stick, with the turkey face, peeking above the palm so the turkey’s head stands tall.
If you’re using two handprints, overlap them slightly behind the stick first, glue them together, then add the stick on top.
Step 6: Prepare the Poem Card
Cut out one poem gift tag from the printed printable. Have your child sign their name on the “Love, ______” line.
Step 7: Attach the Poem Card
Glue the poem card horizontally across the lower middle of the craft stick. It should cover part of the palm, with the turkey face above and the feathers fanning out around it.
Press firmly and hold for a few seconds so it sticks well.
Step 8: Add the Twine Hanger
Cut about 6 inches of baker’s twine. Fold it into a loop and tie the ends in a knot.
Attach the knotted end to the back of the craft stick near the top. Strong tape works, but a small dab of hot glue (applied by an adult) holds best.
And just like that, your handprint turkey keepsake is ready to hang!
RELATED —> Handprint Snowflake Poem Keepsake Ornament
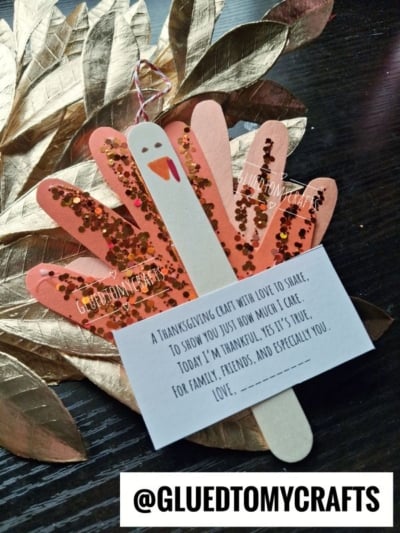
This handprint turkey is more than a craft. It’s a small snapshot of a moment in time, made by little hands and sent with a big message of thanks.
Grandparents tend to treasure these forever. Teachers tuck them away. Parents pull them out every November and remember just how small those fingers used to be.
So clear off the table, grab the glitter, and enjoy making something meaningful together. A little mess is part of the magic.
Happy crafting, and happy Thanksgiving from our family to yours!
