
Little hands make the best turkey feathers! This handprint turkey craft turns your child’s handprint into a cheerful, glittery turkey puppet. It’s simple to make, fun to play with, and makes a sweet Thanksgiving keepsake.
Here at @GLUEDTOMYCRAFTS, this is one of our favorite fall projects. It works for toddlers, preschoolers, and big kids, and it’s just as easy at the kitchen table as it is in a busy classroom. A wooden clothespin becomes the turkey’s body, so kids can hold their puppet, waddle it across the table, and give it their best “gobble, gobble!”
Grab your paper and glitter. Let’s make some turkeys!
Craft Supplies:
- Construction paper {think shades of brown, orange and yellow}
- Wooden spring clothespins (one per turkey)
- Glitter glue/loose craft glitter
- Markers {red, orange and black}
- Scissors (kid-safe scissors for little crafters)
- Pencil for tracing
Before you start: Cover your table with newspaper or a craft mat.
Directions:
1. Trace the handprints
Have your child place one hand flat on the construction paper with fingers spread wide. Trace around the hand with a pencil. Make 2 to 5 tracings in different colors, such as brown, tan, yellow, orange, and pink.
Tip: Wide-spread fingers make the fullest, fluffiest feathers.
2. Cut out each handprint
Cut along the traced lines. Older kids can do this on their own. For younger children, a grown-up can cut the tricky spaces between the fingers.
3. Layer the handprints to create feathers
Stack the handprints from back to front, starting with the darkest color. Fan each layer slightly so the fingers peek out in a rainbow of feathers. Glue the palms together with craft glue.
4. Add sparkle with glitter glue and sequins
Trace glitter glue along the fingers and around the palm of the top handprint. While the glue is still wet, shake sequins onto the feathers. Add just a few, or go all out and pile them on!
Let everything dry for at least 30 minutes before moving on.
5. Draw the turkey face on the clothespin
Use the black marker to draw two small dot eyes near the top of the clothespin. Add a small orange triangle just below the eyes for the beak. Then draw or paint a red squiggle beside the beak for the wattle.
If you use paint, let it dry fully before the next step.
6. Clip the clothespin to finish your puppet
Pinch the clothespin open and clip it onto the bottom center of the palm, with the face pointing up. Now your turkey is ready to strut, wobble, and gobble!
RELATED —> Cupcake Liner Turkey Wreath
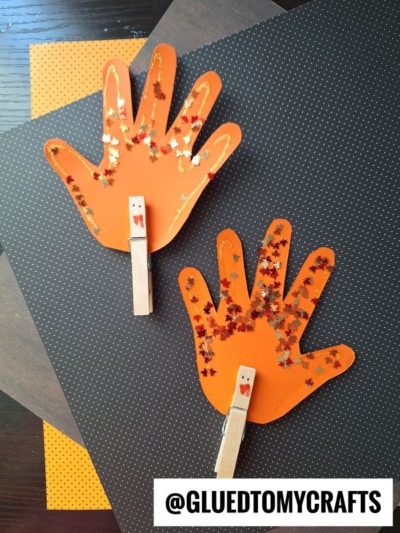

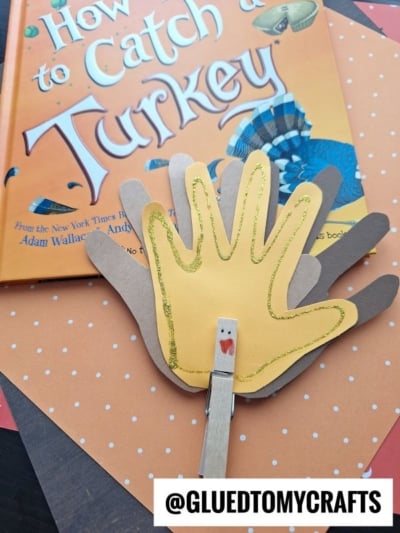
🦃 There’s something truly special about a craft that starts with your child’s hand and ends with a puppet that makes everyone at the table laugh. Whether your turkey is covered in glitter, piled high with sequins, or proudly wearing a name tag at someone’s place setting, it was made with love — and that’s what makes it worth saving.
We hope this turkey craft project brings a little extra joy to your holiday season, gives your kids something to show off, and maybe even sparks a new Thanksgiving tradition your family comes back to year after year. From all of us here at @GLUEDTOMYCRAFTS, thank you so much for crafting along with us. Now go enjoy those turkeys — the paper ones and the ones on the dinner table! 🍂

Handprint and Clothespin Turkey Puppets For Thanksgiving
Here’s your checklist of supplies to bring this craft to life:
Prepare your creative haven by laying down a protective cover before the crafting magic begins!
Directions:
- Have your child place one hand flat on the construction paper with fingers spread wide. Trace around the hand with a pencil. Make 2 to 5 tracings in different colors, such as brown, tan, yellow, orange, and pink.
- Cut along the traced lines. Older kids can do this on their own. For younger children, a grown-up can cut the tricky spaces between the fingers.
- Stack the handprints from back to front, starting with the darkest color. Fan each layer slightly so the fingers peek out in a rainbow of feathers. Glue the palms together with craft glue.
- Trace glitter glue along the fingers and around the palm of the top handprint. While the glue is still wet, shake sequins onto the feathers. Add just a few, or go all out and pile them on!
- Let everything dry for at least 30 minutes before moving on.
- Use the black marker to draw two small dot eyes near the top of the clothespin. Add a small orange triangle just below the eyes for the beak. Then draw or paint a red squiggle beside the beak for the wattle.
- If you use paint, let it dry fully before the next step.
- Pinch the clothespin open and clip it onto the bottom center of the palm, with the face pointing up. Now your turkey is ready to strut, wobble, and gobble!

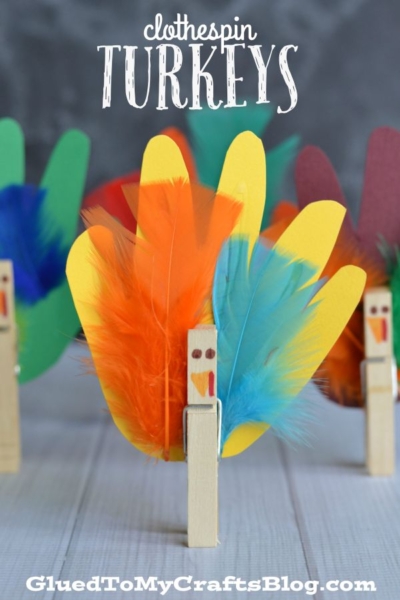
Grab our favorite books via our Amazon affiliate link! In our Amazon storefront you will find books, toys and craft supplies we absolutely love using for our Glued To My Crafts tutorials!