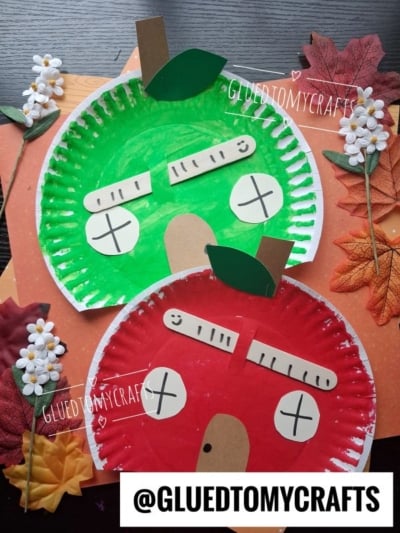
If you’re looking for a simple project that celebrates the season, this Paper Plate Apple House is a winner. It transforms an ordinary paper plate into a cozy little apple home, complete with a friendly worm peeking out of the middle.
Kids adore this craft because it has a playful twist. That popsicle stick isn’t just a stick, it’s a wiggly worm who has moved into the apple. Sliding him in and out of his little tunnel keeps little hands busy long after the glue dries. It’s part art project, part toy, and completely charming.
Best of all, this project uses supplies you probably already have at home or in the classroom. Let’s dig in!
Craft Supplies:
Gather these materials before you start. Most are craft-drawer staples.
- White paper plates (one per apple house)
- Red and/or green paint
- Paint brush
- Brown construction paper (for the stem and door)
- Green construction paper (for the leaf)
- White paper (for the round windows)
- Black marker
- Jumbo popsicle sticks (these become the worms)
- Scissors
- Glue and/or a stapler
Directions:
Step 1: Paint the Plate
Start by cutting off a small sliver off the paper plate, to make a more “house” shape.
Next up, squirt some paint in the center of your white paper plate. Choose red for a classic apple or green for a tart Granny Smith look. Use the paint brush to move the paint around till the plate is completely covered.
Set the plate aside to dry completely.
Step 2: Cut and Attach the Stem and Leaf
While the paint dries, cut a small rectangle from brown construction paper for the stem. Then cut a simple leaf shape from green construction paper.
Once the plate is dry, attach the stem to the top center of the apple. Add the leaf right beside it, angled to one side. You can staple these on for a sturdy hold or use glue if you’d rather skip the stapler with younger kids.
Step 3: Make and Glue the Door
Cut an arch-shaped door from your kraft or brown paper. Think of a rounded top with a flat bottom, like a cozy cottage door.
Glue the door to the bottom center of the apple. Then use your black marker to add a small dot for the doorknob. This tiny detail makes the whole house come to life.
Step 4: Add the Windows
Cut two circles from white paper for the windows. Glue one on each side of the door.
To give them that classic windowpane look, draw a black “+” in the center of each circle. Now your apple house has a door and two bright little windows.
Step 5: Create the Worm
Here comes the star of the show. Take a popsicle stick and draw a simple smiley face on one end using your black marker, just two dot eyes and a curved smile.
Then add short dash marks or vertical lines along the rest of the stick to look like the segments of a worm’s body. Give him personality! A cheerful worm is what makes this craft so much fun.
Step 6: Thread the Worm Through the Apple
Cut two small vertical slits in the middle of the painted plate, spaced about the width of your popsicle stick apart. An adult should handle this step, since it takes a bit of care with the scissors.
Slide the worm through the slits so he weaves through the apple. His smiley face should peek out on one side, looking like he’s poking his head out of his apple home. Kids can slide him back and forth, which is the best part.
And there you have it, a finished apple house with a worm who loves living inside!
RELATED —> Paint Splat Worm Craft Idea For Kids
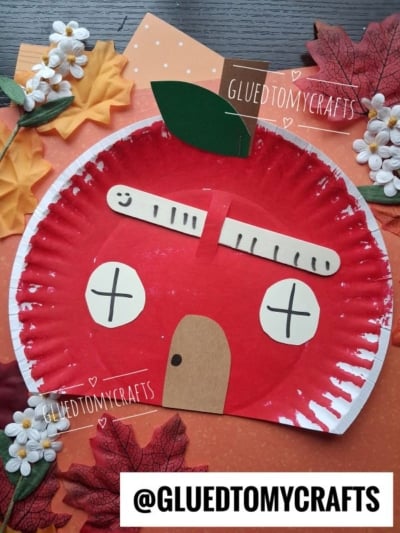
This Paper Plate & Popsicle Stick Worm Apple House is proof that the simplest supplies can spark the biggest smiles. Between the painting, the tiny details, and that lovable worm, your kids will have a keepsake they’re proud to show off.
We’d love to see how your apple houses turn out! Snap a photo of your creations and share them with us. You can tag @gluedtomycrafts on Facebook or Instagram. We can’t wait to see! Happy crafting, and enjoy every colorful moment of the season.
