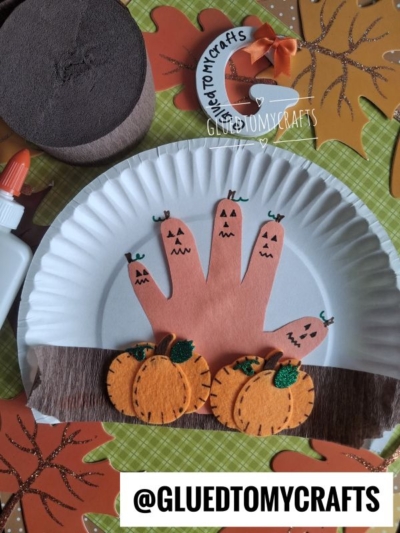
Today’s paper plate and handprint pumpkin patch craft is one of those projects that hits all the right notes. It’s simple, it’s adorable, and it captures a tiny snapshot of your child’s hands at this exact moment in time.
Little ones love seeing their own handprints turned into something creative, and this craft gives each finger a job to do. Five little fingers become five little pumpkins, each with its own goofy jack-o’-lantern grin. It’s perfect for a rainy afternoon at home, a cozy classroom activity, or a fun project to keep small hands busy while the pumpkin spice bakes in the oven.
Let’s gather our supplies and make some fall memories together!
Craft Supplies:
Before you begin, set out everything on a clean, flat surface. Having your materials ready makes the whole process smoother, especially with excited kids waiting to dive in.
- 1 large, white paper plate
- Orange construction paper
- Markers
- Brown crepe paper streamer
- Orange felt pumpkin stickers or small felt pumpkin decorations
- Glue (a bottle or glue stick both work well)
- Scissors
That’s it! Most of these items are probably already tucked away in your craft drawer, which makes this an easy grab-and-go activity.
Directions:
Step 1: Trace and Cut Out the Handprint
Lay the orange construction paper flat on the table. Have your child spread their fingers wide and press their hand onto the paper. Trace carefully around each finger with a pencil, keeping the lines close to their skin for a clean shape.
Once you’ve traced it, cut out the handprint along your pencil lines. If your child is old enough to handle scissors safely, let them help. If not, this is a great step for a grown-up to take the lead. Set the finished cutout aside for a moment.
Step 2: Draw the Jack-o’-Lantern Faces
Here’s where the personality comes to life. Turn the handprint so the fingers point upward. Each fingertip is going to become its own little pumpkin.
Using the black marker, draw a jack-o’-lantern face on each fingertip. Give every pumpkin two triangle eyes, a small nose, and a zig-zag mouth. Feel free to make each face a little different, one silly, one spooky, one smiling. This is the part kids love most, so let their imaginations run wild.
Step 3: Glue the Handprint onto the Plate
Take your white paper plate and cut off a small sliver so the “patch” will be flat. Go ahead and now spread a thin layer of glue on the back of the handprint cutout, then press it firmly onto the center of the plate. Make sure the fingers point up toward the top of the plate so your pumpkins stand tall. Hold it in place for a few seconds to help it stick.
Step 4: Add the Brown Crepe Paper Dirt
Now for the pumpkin patch ground. Cut a strip of brown crepe paper streamer long enough to stretch across the bottom third of the plate. Crinkle it gently with your fingers to give it a textured, earthy look.
Glue this strip horizontally across the bottom of the plate, letting it overlap the palm of the handprint. This brown crepe paper acts as the fence or ground of your pumpkin patch, giving your little pumpkins a cozy place to sit.
Step 5: Decorate with Felt Pumpkins
Finally, add a few orange felt pumpkin stickers or decorations right on top of the brown crepe paper strip. Two or three pumpkins clustered together looks charming and completes the pumpkin patch scene. If your felt pieces have little green leaves or stems, even better, they add a pop of color and extra fall flair.
And just like that, your handprint pumpkin patch is ready to display!
RELATED —> Torn Paper Pumpkin Craft Idea For Fall
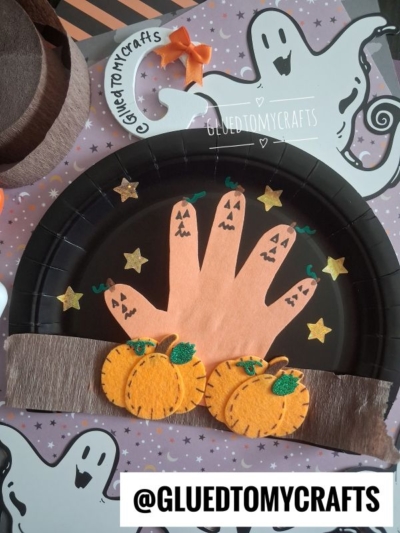
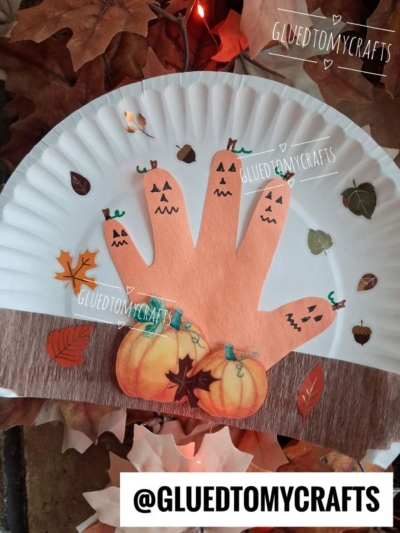
Crafts like this one are about so much more than the finished product. They’re about the giggles when the marker slips, the pride on your child’s face when they see their handprint transformed, and the quiet joy of making something together.
Once the glue is dry, there are plenty of sweet ways to enjoy your creation. Prop it up on a windowsill or tape it to the fridge to brighten your home all season long. It also makes a heartfelt gift for grandparents, who treasure anything featuring those tiny hands. Teachers can turn a whole classroom’s worth into a festive fall bulletin board that parents will adore.
Don’t forget to write the date and your child’s age somewhere on the back. Years from now, you’ll be so glad you did. Happy crafting, and enjoy every messy, memorable minute of the season!

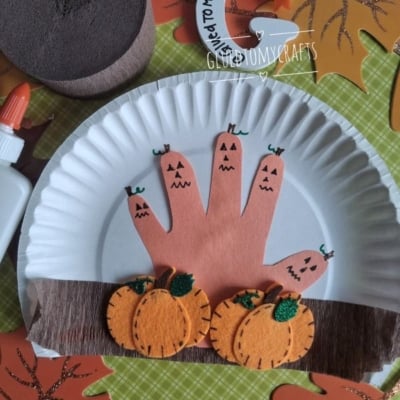
Haunted Paper Plate Pumpkin Patch At Night Craft
Here’s your checklist of supplies to bring this craft to life:
- Large Paper Plate
- Cardstock Paper
- Crepe Paper
- Embellishments
Prepare your creative haven by laying down a protective cover before the crafting magic begins!
Directions:
- Lay the orange construction paper flat on the table. Have your child spread their fingers wide and press their hand onto the paper. Trace carefully around each finger with a pencil, keeping the lines close to their skin for a clean shape.
- Once you've traced it, cut out the handprint along your pencil lines. If your child is old enough to handle scissors safely, let them help. If not, this is a great step for a grown-up to take the lead. Set the finished cutout aside for a moment.
- Here's where the personality comes to life. Turn the handprint so the fingers point upward. Each fingertip is going to become its own little pumpkin.
- Using the black marker, draw a jack-o'-lantern face on each fingertip. Give every pumpkin two triangle eyes, a small nose, and a zig-zag mouth. Feel free to make each face a little different, one silly, one spooky, one smiling. This is the part kids love most, so let their imaginations run wild.
- Take your white paper plate and cut off a small sliver so the "patch" will be flat. Go ahead and now spread a thin layer of glue on the back of the handprint cutout, then press it firmly onto the center of the plate. Make sure the fingers point up toward the top of the plate so your pumpkins stand tall. Hold it in place for a few seconds to help it stick.
- Now for the pumpkin patch ground. Cut a strip of brown crepe paper streamer long enough to stretch across the bottom third of the plate. Crinkle it gently with your fingers to give it a textured, earthy look.
- Glue this strip horizontally across the bottom of the plate, letting it overlap the palm of the handprint. This brown crepe paper acts as the fence or ground of your pumpkin patch, giving your little pumpkins a cozy place to sit.
- Finally, add a few orange felt pumpkin stickers or decorations right on top of the brown crepe paper strip. Two or three pumpkins clustered together looks charming and completes the pumpkin patch scene. If your felt pieces have little green leaves or stems, even better, they add a pop of color and extra fall flair.
- And just like that, your handprint pumpkin patch is ready to display!


Grab our favorite books via our Amazon affiliate link! In our Amazon storefront you will find books, toys and craft supplies we absolutely love using for our Glued To My Crafts tutorials!