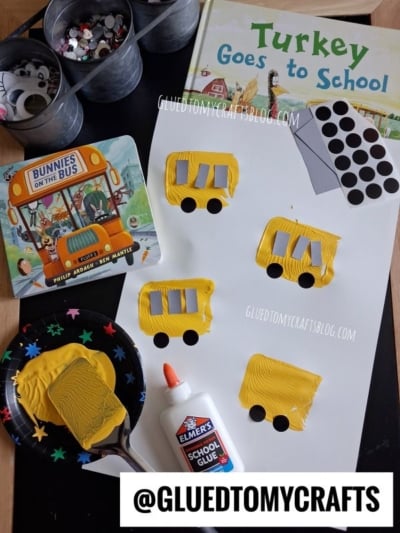
Nothing says “school is back” quite like the sight of a big yellow bus rolling down the street. That first ride can spark all kinds of feelings in little ones, from wiggly excitement to a few nervous butterflies. A simple back to school craft is a wonderful way to celebrate the season and help kids feel ready for the days ahead.
This spatula stamped yellow school bus is a favorite for a reason. It uses a fun stamping technique that even the youngest crafters can master, and the finished buses look adorable lined up on a bulletin board or the fridge. Best of all, you likely have most of the supplies on hand already. Let’s dig in.
Craft Supplies:
Gather these materials before you start. Having everything ready keeps little ones focused and the flow smooth.
- Yellow acrylic paint – the star color for your bus body
- A textured spatula – a rubber or plastic one will work
- White paper – card stock or plain construction paper both work
- Black circle stickers – these become the wheels
- Gray construction paper rectangles – cut into small shapes for the windows
- Elmer’s School Glue – washable and easy to clean up
- A small paper plate – use it as a simple paint palette
A quick tip: cut your gray window rectangles ahead of time if you’re working with toddlers. Older kids can enjoy cutting their own.
Directions:
Step 1: Set Up Your Paint Station
Squeeze a generous dollop of yellow paint onto the small paper plate. Lay a sheet of white paper flat in front of each child and roll up any long sleeves.
Step 2: Stamp the Bus Body
Have your child dip the flat side of the spatula into the yellow paint, coating it evenly. Then press it firmly onto the white paper and lift straight up. That single press creates a textured rectangle, which becomes the body of the bus.
For a longer bus, stamp two rectangles side by side so they overlap slightly. Encourage kids to space their buses out if they want to make a whole fleet on one page. Let the paint dry for a few minutes before moving on.
Step 3: Add the Wheels
Once the paint feels dry to the touch, it’s time for wheels. Peel two black circle stickers and press them along the bottom edge of the yellow rectangle. This is a great fine-motor moment, since peeling and placing stickers takes a little focus and control.
Step 4: Glue On the Windows
Squeeze a small line of Elmer’s glue onto each gray rectangle, then press the windows across the top half of the bus. Three windows in a row looks classic, but there’s no wrong way to do it. Give the glue a few minutes to set, and your bus is complete.
Tips for Smooth Crafting:
- Use washable paint and glue. Spills happen, and washable supplies save you the stress.
- Cover your surface. A vinyl tablecloth or newspaper protects tables from stray paint.
- Let each layer dry. Rushing the wheels or windows onto wet paint can smudge the shape.
- Keep wipes nearby. Sticky fingers are part of the fun, but a quick wipe keeps things tidy.
Fun Variations to Try:
Once kids get the hang of stamping, invite them to make the craft their own:
- Add a driver by drawing a small face in one window.
- Use tiny paper cutouts or stickers to fill the bus with happy passengers.
- Write each child’s name on the side of their bus for a personal touch.
- Swap the yellow for other colors and turn the buses into city buses or trains.
- Add a paper road along the bottom of the page and line up several buses.
RELATED —> Popsicle Stick School Bus Frame
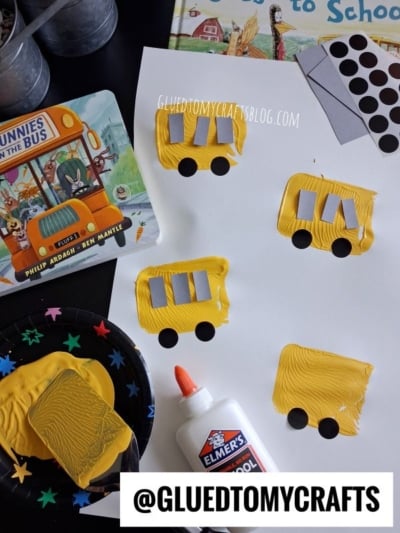
Crafts feel even richer when you connect them to a story. After the glue dries, cozy up and read a bus-themed picture book together. Two great choices are Bunnies on the Bus by Philip Ardagh and Ben Mantle, a lively romp full of giggles, and Turkey Goes to School, a sweet tale that eases first-day jitters.
Reading and crafting side by side helps kids build language, spark imagination, and connect the story to something they made with their own hands. It’s a simple pairing that turns one afternoon into a full learning moment.
So grab your spatula, squeeze out some yellow paint, and get stamping. Your little ones will have a whole fleet of buses ready to roll for the new school year.

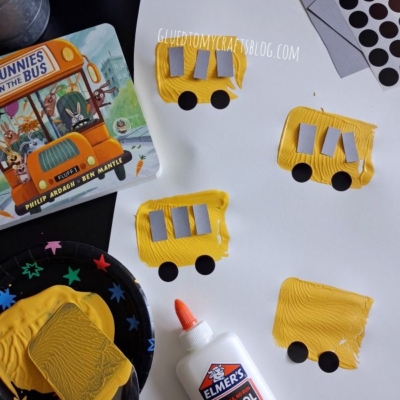
Spatula Stamped School Bus Craft Idea For Back To School Season
Here’s your checklist of supplies to bring this craft to life:
- Construction Paper
- Cardstock Paper
- Craft Paint
- Dot Stickers
- Spatula
- School Glue
Prepare your creative haven by laying down a protective cover before the crafting magic begins!
Directions:
- Squeeze a generous dollop of yellow paint onto the small paper plate. Lay a sheet of white paper flat in front of each child and roll up any long sleeves.
- Have your child dip the flat side of the spatula into the yellow paint, coating it evenly. Then press it firmly onto the white paper and lift straight up. That single press creates a textured rectangle, which becomes the body of the bus.
- For a longer bus, stamp two rectangles side by side so they overlap slightly. Encourage kids to space their buses out if they want to make a whole fleet on one page. Let the paint dry for a few minutes before moving on.
- Once the paint feels dry to the touch, it's time for wheels. Peel two black circle stickers and press them along the bottom edge of the yellow rectangle. This is a great fine-motor moment, since peeling and placing stickers takes a little focus and control.
- Squeeze a small line of Elmer's glue onto each gray rectangle, then press the windows across the top half of the bus. Three windows in a row looks classic, but there's no wrong way to do it. Give the glue a few minutes to set, and your bus is complete.


Grab our favorite books via our Amazon affiliate link! In our Amazon storefront you will find books, toys and craft supplies we absolutely love using for our Glued To My Crafts tutorials!