There’s something magical about crafting with kids once the weather turns crisp and the leaves start to change.
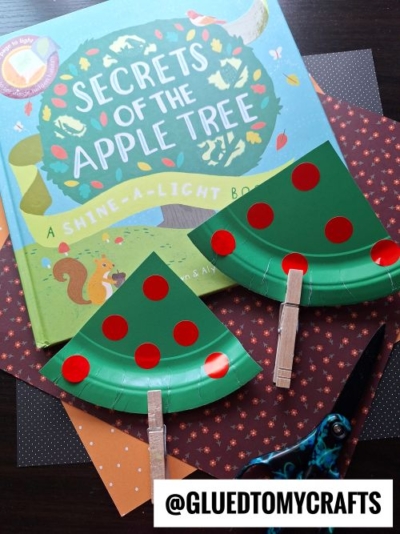
Fall brings warm colors, cozy afternoons, and the perfect excuse to pull out the craft supplies. If you’re looking for a simple project that little hands can manage on their own, this paper plate apple tree is a winner. It uses everyday materials you probably already have at home, and the dot stickers make it fun without any messy fingers.
This craft works beautifully for classroom activities, rainy-day fun, or a quiet weekend project. Best of all, kids get to build a tree from scratch and fill it with colorful “apples.” Let’s get started!
Craft Supplies:
Gather these supplies before you begin. Everything on this list is budget-friendly and easy to find:
- Paper plates (2 to 3 per tree, colored green or ready for painting)
- Green paint (only if your plates aren’t already green)
- Scissors (child-safe if little ones are cutting)
- Stapler
- Red dot stickers (these become your apples)
- Wooden clothespin (this becomes the sturdy trunk)
Directions:
Follow these steps and you’ll have a charming apple tree in no time.
- If you’re using plain white paper plates, paint them green and let them dry completely. Two shades of green look lovely together, so mix a light green and a dark green if you can. Already have green plates? Skip ahead to the fun part.
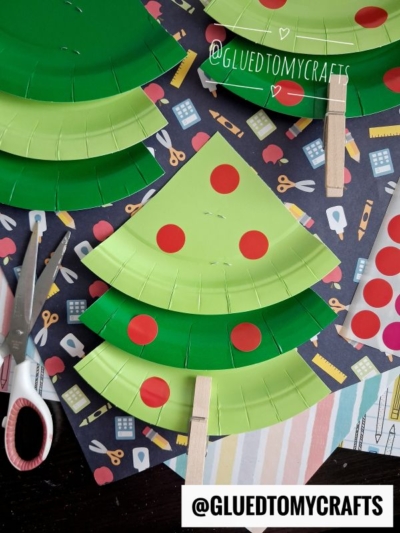
- Cut each paper plate into wedge-shaped pieces, using roughly one-fourth of a plate per section. You’ll need two to three wedges for each tree. The curved, textured rims of the plates should point downward to look like leafy branches.
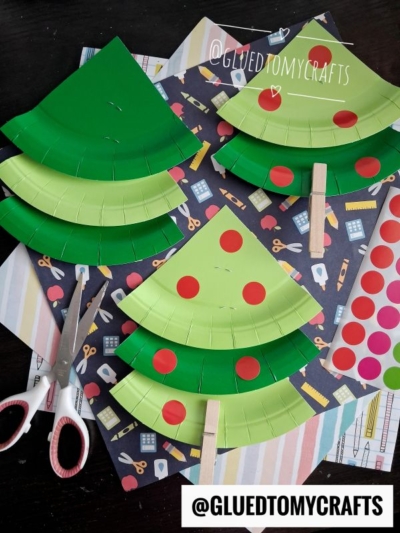
- Lay your two or three wedges on top of each other, stacking them vertically from smallest at the top to widest at the bottom. Alternate the light and dark green shades for a layered, full look. Staple the sections together where they overlap. Your tree shape will start to appear right away.
- Now for the best part. Peel off your red dot stickers and let your child press them onto the branches. These are the apples! There’s no wrong way to do this, so encourage kids to scatter them however they like. A few on each layer looks just right.
- Clip a wooden clothespin to the center bottom of your tree. This acts as the trunk and lets the tree stand up on its own.
- Stand your finished apple tree upright and admire your work. It makes a sweet little decoration for a windowsill, desk, or classroom shelf.
RELATED —> Paper Plate & Tissue Paper Red Apple Craft
This apple tree craft proves that the simplest projects often bring the biggest smiles. With a few paper plates and a handful of colorful stickers, your kids can create something they’ll be proud of.
We’d love to see how your apple trees turn out! Snap a photo of your little one’s masterpiece and share it with us. Happy crafting, and enjoy every colorful moment of the season.

Paper Plate & Dot Sticker Apple Tree Craft
Make an easy paper plate apple tree with your kids this fall! This simple craft uses dot sticker apples and a clothespin trunk.
Here’s your checklist of supplies to bring this craft to life:
- Cardstock Paper
- Large Paper Plate
- Dot Stickers
- Embellishments
Prepare your creative haven by laying down a protective cover before the crafting magic begins!
Directions:
- If you're using plain white paper plates, paint them green and let them dry completely. Two shades of green look lovely together, so mix a light green and a dark green if you can. Already have green plates? Skip ahead to the fun part.
- Cut each paper plate into wedge-shaped pieces, using roughly one-fourth of a plate per section. You'll need two to three wedges for each tree. The curved, textured rims of the plates should point downward to look like leafy branches.
- Lay your two or three wedges on top of each other, stacking them vertically from smallest at the top to widest at the bottom. Alternate the light and dark green shades for a layered, full look. Staple the sections together where they overlap. Your tree shape will start to appear right away.
- Now for the best part. Peel off your red dot stickers and let your child press them onto the branches. These are the apples! There's no wrong way to do this, so encourage kids to scatter them however they like. A few on each layer looks just right.
- Clip a wooden clothespin to the center bottom of your tree. This acts as the trunk and lets the tree stand up on its own.
- Stand your finished apple tree upright and admire your work. It makes a sweet little decoration for a windowsill, desk, or classroom shelf.


Grab our favorite books via our Amazon affiliate link! In our Amazon storefront you will find books, toys and craft supplies we absolutely love using for our Glued To My Crafts tutorials!
If you've enjoyed our content or have any thoughts to share, we'd love to hear from you! Mention @gluedtomycrafts or tag #gluedtomycrafts on Instagram!