There’s something magical about reading a beloved book and then bringing its world to life with your hands. If you’ve ever shared Pete the Cat and His Four Groovy Buttons with little ones, you know how quickly kids fall in love with that cool blue cat and his easygoing attitude.
This craft takes that story off the page and turns it into a hands-on activity using one surprising kitchen tool: a potato masher!
Craft Supplies:
Gather these simple supplies before you begin:
- Light blue construction paper – your canvas for all those groovy buttons
- Blue paint – washable paint works great for easy cleanup
- A paper plate – this serves as your paint palette
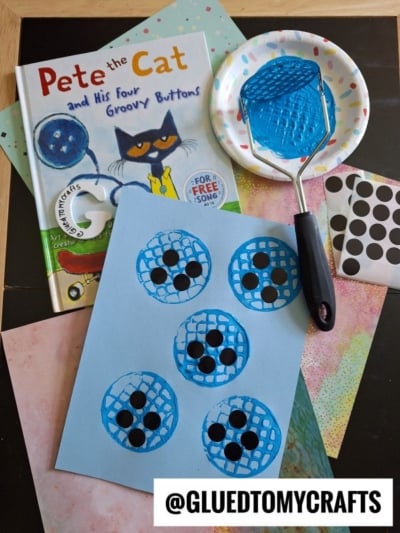
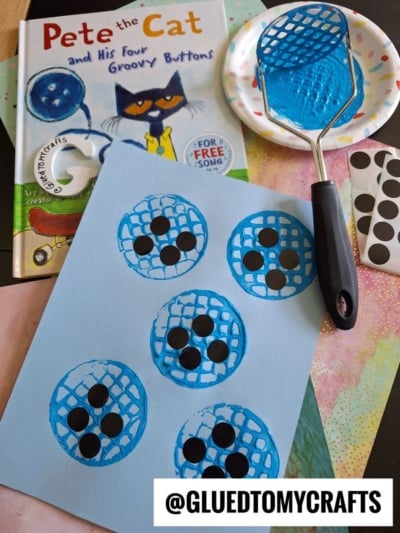
- A metal potato masher – the grid pattern makes the perfect button texture
- Sheets of black dot circle stickers – these become the buttonholes
That’s it! Most of these items are probably already in your home or supply closet.
Directions:
Step 1: Pour the Paint
Squeeze a generous pool of blue paint onto your paper plate. You want enough to coat the masher but not so much that it gets drippy. A little goes a long way, and you can always add more as you go.
Step 2: Dip the Potato Masher
Press the flat head of the potato masher gently into the paint. Make sure the entire grid surface gets an even coat. This is where the magic happens, that waffle-like pattern will give your buttons their fun texture.
Step 3: Stamp Your Buttons
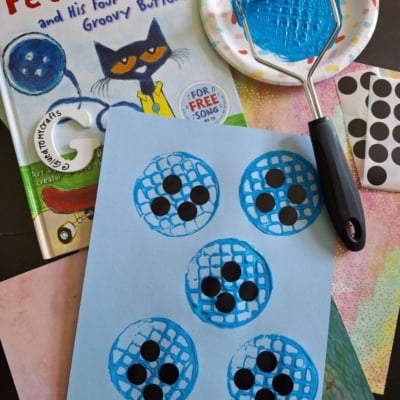
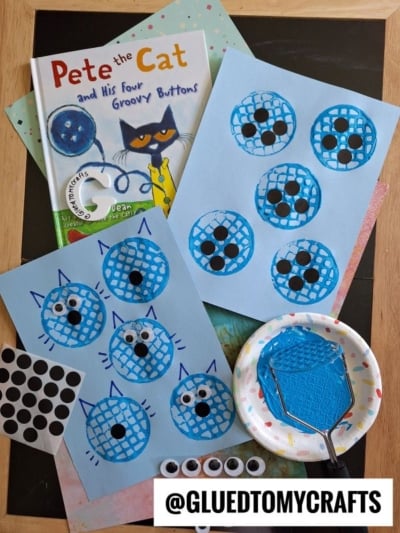
Press the painted masher firmly onto the light blue construction paper, then lift it straight up. You’ll reveal a perfectly textured blue circle! Repeat across the page to create a row of groovy buttons. We suggest making four or five, just like Pete’s buttons in the book. Re-dip the masher in paint between each stamp for the boldest prints.
Step 4: Let the Paint Dry
Set your artwork aside and let the paint dry completely. This usually takes a few minutes, but it’s worth the wait. Drying time is a great moment to read the story again or talk about what colors and shapes kids see.
Step 5: Add the Buttonholes
Once everything is dry, grab those black dot stickers. Place four stickers in a small square pattern right in the center of each stamped circle. These little dots instantly transform your paint blobs into real-looking buttons. Kids love peeling the stickers and pressing them down themselves, so let them take the lead here.
RELATED —> Tissue Paper and Paper Plate Button Craft
And there you have it, a simple, joyful craft that brings Pete the Cat and His Four Groovy Buttons to life. Whether you’re a parent looking for a rainy-day activity, a teacher planning a themed lesson, or a librarian hosting story hour, these potato masher buttons are sure to be a hit.
We’d love to see what you create! Snap a photo of your little ones’ groovy buttons and share them with us. Now grab that potato masher and get stamping, because the best part of any story is making it your own.

Potato Masher Stamped Button Craft Idea For Story Time
Here’s your checklist of supplies to bring this craft to life:
- Cardstock Paper
- Craft Paint
- Dot Stickers
- Embellishments
Prepare your creative haven by laying down a protective cover before the crafting magic begins!
Directions:
- Squeeze a generous pool of blue paint onto your paper plate. You want enough to coat the masher but not so much that it gets drippy. A little goes a long way, and you can always add more as you go.
- Press the flat head of the potato masher gently into the paint. Make sure the entire grid surface gets an even coat. This is where the magic happens, that waffle-like pattern will give your buttons their fun texture.
- Press the painted masher firmly onto the light blue construction paper, then lift it straight up. You'll reveal a perfectly textured blue circle! Repeat across the page to create a row of groovy buttons. We suggest making four or five, just like Pete's buttons in the book. Re-dip the masher in paint between each stamp for the boldest prints.
- Set your artwork aside and let the paint dry completely. This usually takes a few minutes, but it's worth the wait. Drying time is a great moment to read the story again or talk about what colors and shapes kids see.
- Once everything is dry, grab those black dot stickers. Place four stickers in a small square pattern right in the center of each stamped circle. These little dots instantly transform your paint blobs into real-looking buttons. Kids love peeling the stickers and pressing them down themselves, so let them take the lead here.
CLICK HERE TO PRINT THE DIRECTIONS FOR THIS CRAFT