Stamp adorable bear faces with a potato masher and brown paint! This easy preschool craft is perfect for storytime or classroom fun. Great for parents and teachers.
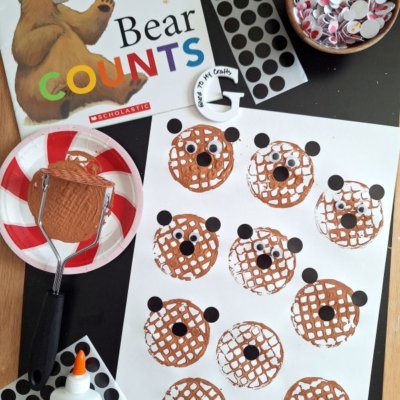
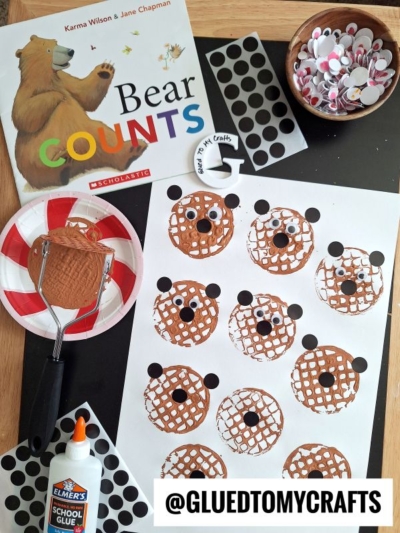
Turn a simple kitchen tool into a fun art activity! In this tutorial, you’ll learn how to use a potato masher to stamp adorable bear faces using brown paint, then bring them to life with googly eyes and sticker details.
This craft is perfect for preschoolers and early elementary children, and it pairs beautifully with a bear-themed story time.
Craft Supplies:
- A potato masher (metal head works best for a clear stamp)
- White cardstock or thick white paper
- Brown washable tempera paint
- A paper plate or shallow tray (for the paint)
- Black circular stickers
- Googly eyes
- Elmer’s washable school glue
- Paper towels or wet wipes for cleanup
Directions:
- First things first – lay down your white paper and squirt some craft paint on your paper plate.
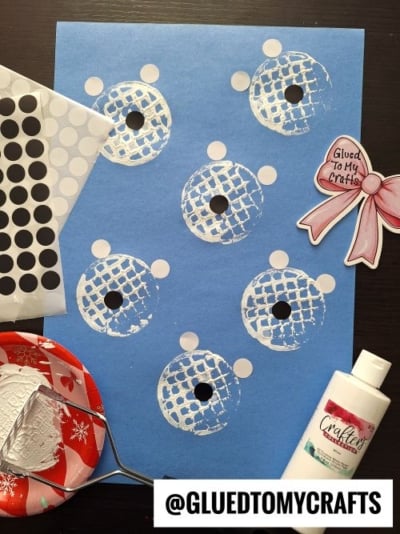
- Press the metal head of the potato masher flat into the brown paint on the paper plate. Lift it straight up so the paint coats the bottom evenly. You should see a thin, even layer of brown paint across the grid pattern of the masher head.
- Press the painted masher head firmly and evenly onto the white paper. Hold it still for two to three seconds, then lift it straight up without sliding. You should see a round, waffle-textured circle – that’s your bear’s face!
- Re-dip the masher between each stamp. Space the bears a few inches apart so you have room to add details later.
- Set the stamped paper aside and let it dry completely before moving on to decorating. This usually takes around ten to fifteen minutes with washable tempera paint.
- Take two larger black circular stickers and place them at the top of each bear face, slightly overlapping the edge of the stamped circle on each side. Press them down firmly. These are your bear’s round ears!
- Add a small drop of school glue to the back of each googly eye (or use self-adhesive ones). Press two googly eyes onto the center of each bear face, roughly where the eyes would naturally sit. Hold each one in place for a few seconds so the glue grabs.
- Press one small black circular sticker onto the center-lower area of each bear face. This is the nose. A little below center looks just right – it gives each bear that classic snout shape.
- Allow the glue to set for at least fifteen to twenty minutes before handling the finished craft. Once dry, your bears are ready to display!
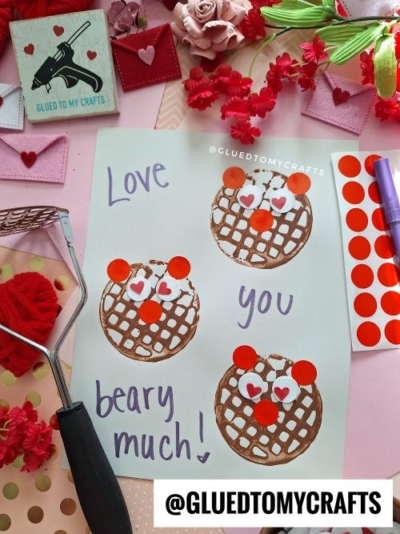
RELATED —> Potato Masher Stamped Love Monster Craft Idea

You’ve just made a whole family of potato masher bears! Each one has its own personality, and the textured stamp gives them a wonderfully cozy, handcrafted look.
Whether you’re a parent looking for a rainy-day project or an educator planning a themed lesson, this simple activity brings together fine motor practice, creativity, and a love of books all in one happy session. Happy crafting, my friends!

Potato Masher Stamped Bear Craft Idea
Stamp adorable bear faces with a potato masher and brown paint! This easy preschool craft is perfect for storytime or classroom fun. Great for parents and teachers.
Here’s your checklist of supplies to bring this craft to life:
- Cardstock Paper
- Craft Paint
- Wiggle Eyes
- Dot Stickers
- Embellishments
- School Glue
Prepare your creative haven by laying down a protective cover before the crafting magic begins!
Directions:
- First things first - lay down your white paper and squirt some craft paint on your paper plate.
- Press the metal head of the potato masher flat into the brown paint on the paper plate. Lift it straight up so the paint coats the bottom evenly. You should see a thin, even layer of brown paint across the grid pattern of the masher head.
- Press the painted masher head firmly and evenly onto the white paper. Hold it still for two to three seconds, then lift it straight up without sliding. You should see a round, waffle-textured circle - that's your bear's face!
- Re-dip the masher between each stamp. Space the bears a few inches apart so you have room to add details later.
- Set the stamped paper aside and let it dry completely before moving on to decorating. This usually takes around ten to fifteen minutes with washable tempera paint.
- Take two larger black circular stickers and place them at the top of each bear face, slightly overlapping the edge of the stamped circle on each side. Press them down firmly. These are your bear's round ears!
- Add a small drop of school glue to the back of each googly eye (or use self-adhesive ones). Press two googly eyes onto the center of each bear face, roughly where the eyes would naturally sit. Hold each one in place for a few seconds so the glue grabs.
- Press one small black circular sticker onto the center-lower area of each bear face. This is the nose. A little below center looks just right - it gives each bear that classic snout shape.
- Allow the glue to set for at least fifteen to twenty minutes before handling the finished craft. Once dry, your bears are ready to display!
CLICK HERE TO PRINT THE DIRECTIONS FOR THIS CRAFT
If you've enjoyed our content or have any thoughts to share, we'd love to hear from you! Mention @gluedtomycrafts or tag #gluedtomycrafts on Instagram!