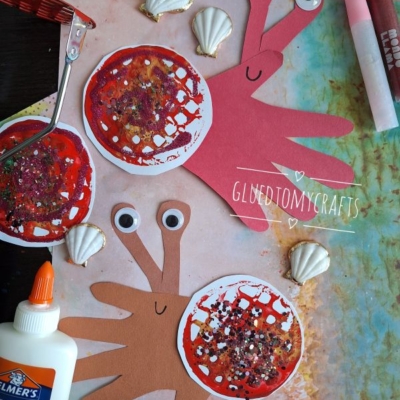
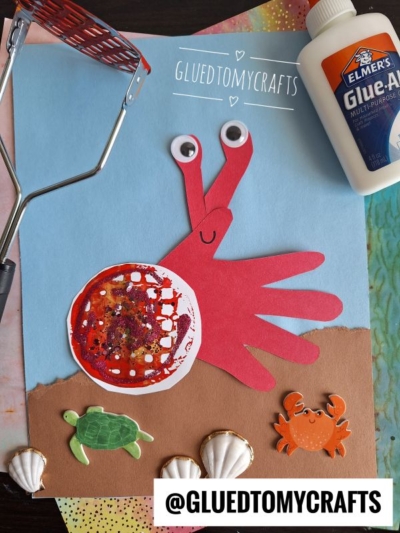
Summer means sandy toes, salty breezes, and – let’s be honest – a few rainy afternoons when the kids need something fun to do. This handprint & potato masher stamped hermit crab craft is the perfect answer. It turns simple supplies into the cutest little ocean buddy, and the secret weapon? A plain old potato masher from your kitchen drawer.
In this tutorial, you’ll learn how to make an adorable handprint hermit crab with a glittery, stamped paper shell. It’s easy, affordable, and works for a single child at home or a whole classroom full of eager crafters.
Craft Supplies:
Gather everything before you start. A prepped workspace keeps the messy parts manageable and the fun flowing.
- Cardstock Paper in red and brown (one sheet of each per crab)
- Cardstock Paper in white for the shells
- Small Paper Plate for holding your paint
- Washable paint in red {or any color you like!}
- Elmer’s Glue-All for a strong, fast-drying hold
- Chunky glitter (and sequins, if you have them)
- Large googly eyes
- A potato masher for stamping the shell texture
- Markers (a black one for the face works great)
- Scissors
Quick tip: Cover your table with newspaper or a wipeable mat. Paint plus glitter equals a sparkly mess that’s easier to clean when you plan ahead.
Directions:
Step 1: Stamp the Paper Shell
First things first – lay your white cardstock paper on your table.
Grab a small paper plate and squeeze a blob of red craft paint.
Now for the fun part. Press the potato masher into the paint and stamp it on the paper, anywhere you like. The grid pattern leaves a cool, shell-like texture every time. Repeat a few times on the paper but make sure you leave some space in between each.
Step 2: Add Glitter and Sequins
While the paint is still a little tacky, add a few swirls of glitter glue and sprinkle chunky glitter over the shell. The wet paint helps it stick without extra glue.
Want more sparkle? Press a few sequins into the center. Shake off the loose bits over a tray so you can reuse them.
Mini-summary: Your shell now has both texture and shine – the two things that make this craft pop.
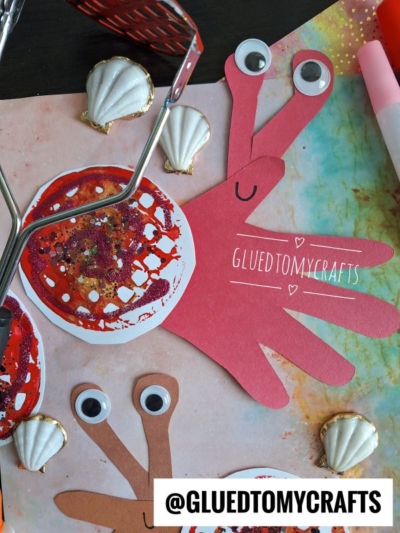
Step 3: Trace and Cut the Handprints
While the paint is drying, it’s time to make the handprint cutouts! Lay your child’s hand flat on the red or brown cardstock with fingers slightly spread. Trace around it with a pencil, then cut out the shape.
The fingers become the crab’s legs, and the palm becomes the body. Brown makes a classic crab look, while red is bright and bold – let your child pick their favorite.
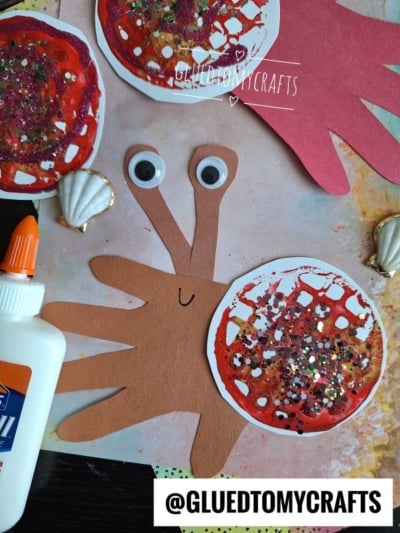
Step 4: Assemble the Eye Stalks
Cut two thin strips of matching cardstock for the eye stalks. Glue them to the top of the palm so they stick up like little antennae.
Add a dab of Elmer’s Glue-All to the top of each strip, then press on a googly eye. Hold for a few seconds so they grip.
Step 5: Draw the Face
Use a black marker to draw a simple curved smile right below the eye stalks. One small line is all it takes to give your crab personality.
This is a great spot to let kids make their own choices. Some want a big grin, others want a tiny shy smile—both are perfect.
Step 6: Glue Everything Together
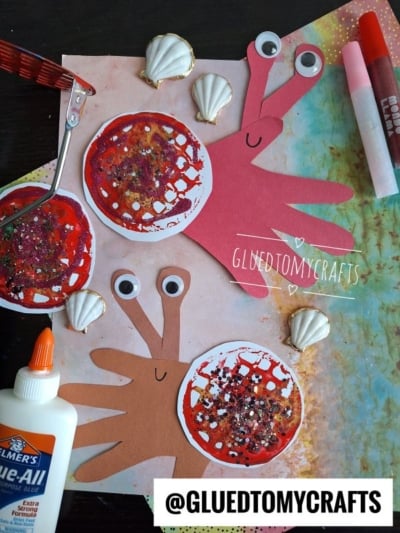
Once the circular potato masher stamped shell shapes are dry, trim them out and glue each one to the back edge of the handprint bodies. Let the colorful circle peek out behind the legs, just like a real hermit crab tucked into its home.
Press firmly and let the whole thing dry flat. That’s it – your handprint red hermit crab is ready to show off.
RELATED —> Coffee Filter Hermit Crab Craft Idea
With a few sheets of cardstock, some paint, and a humble potato masher, you’ve made a hermit crab that’s bursting with summer charm. The best part is how each one turns out a little different – just like the kids who make them.
We’d love to see what you create. Snap a photo of your handprint & potato masher stamped hermit crabs and tag @GluedToMyCrafts so we can cheer on your little artist. Happy crafting, friends!

Potato Masher Stamped Hermit Crab Craft Idea
Here’s your checklist of supplies to bring this craft to life:
- Cardstock Paper
- Craft Paint
- Wiggle Eyes
- Loose Craft Glitter
- Embellishments
- School Glue
Prepare your creative haven by laying down a protective cover before the crafting magic begins!
Directions:
- First things first - lay your white cardstock paper on your table.
- Grab a small paper plate and squeeze a blob of red craft paint.
- Now for the fun part. Press the potato masher into the paint and stamp it on the paper, anywhere you like. The grid pattern leaves a cool, shell-like texture every time. Repeat a few times on the paper but make sure you leave some space in between each.
- While the paint is still a little tacky, add a few swirls of glitter glue and sprinkle chunky glitter over the shell. The wet paint helps it stick without extra glue.
- Want more sparkle? Press a few sequins into the center. Shake off the loose bits over a tray so you can reuse them.
- Mini-summary: Your shell now has both texture and shine - the two things that make this craft pop.
- While the paint is drying, it's time to make the handprint cutouts! Lay your child's hand flat on the red or brown cardstock with fingers slightly spread. Trace around it with a pencil, then cut out the shape.
- The fingers become the crab's legs, and the palm becomes the body. Brown makes a classic crab look, while red is bright and bold - let your child pick their favorite.
- Cut two thin strips of matching cardstock for the eye stalks. Glue them to the top of the palm so they stick up like little antennae.
- Add a dab of Elmer's Glue-All to the top of each strip, then press on a googly eye. Hold for a few seconds so they grip.
- Use a black marker to draw a simple curved smile right below the eye stalks. One small line is all it takes to give your crab personality.
- This is a great spot to let kids make their own choices. Some want a big grin, others want a tiny shy smile—both are perfect.
- Once the circular shell shapes are dry, trim them out and glue each one to the back edge of the handprint bodies. Let the colorful circle peek out behind the legs, just like a real hermit crab tucked into its home.
- Press firmly and let the whole thing dry flat. That's it - your hermit crab is ready to show off.
CLICK HERE TO PRINT THE DIRECTIONS FOR THIS CRAFT