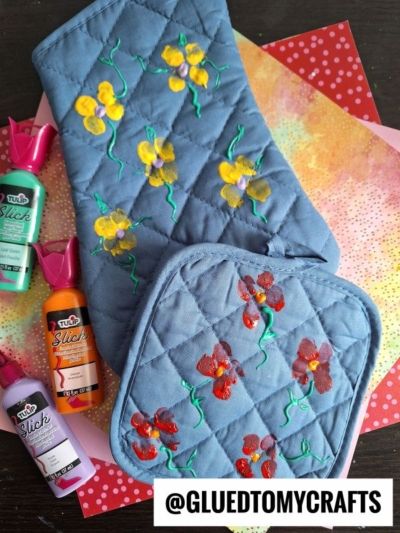
Handmade gifts carry a special kind of magic, especially when they capture a fleeting moment in time. For Mother’s Day, few things melt a heart quite like a craft featuring tiny fingerprints. We designed this fingerprint flower potholder project to combine sentimental value with everyday practicality. It transforms a simple kitchen staple into a cherished keepsake that moms and grandmas can use year-round.
You do not need to be a professional artist to pull this off. This project is incredibly kid-friendly, quick to set up, and requires only a handful of affordable supplies. Whether you want to make a single potholder or a matching set with an oven mitt, the process remains simple and enjoyable!
Craft Supplies:
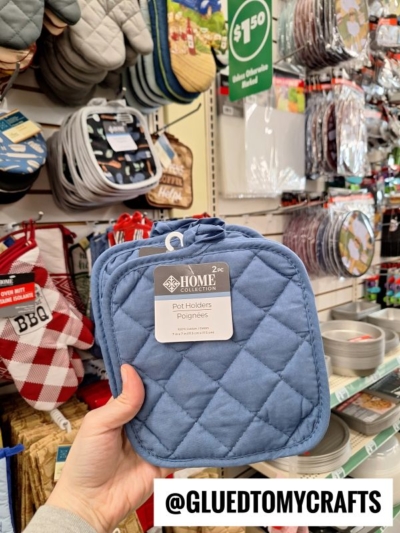
- Quilted potholders or oven mitts: Solid colors work best. We highly recommend medium to dark blue fabric, as it provides a beautiful background for bright paint.
- Tulip Slick Dimensional Fabric Paint: This is the secret to a great result. You will need green for the stems, plus a few bright colors for the flowers (like yellow, red, orange, and purple).
- Small paper plates: Use these as a palette for the kids to dip their fingers into the paint.
- Baby wipes or damp paper towels: Keep these nearby for quick finger cleanups between color changes.
- Scrap cardboard: Place this underneath your fabric to protect your table from accidental spills.
Directions:
- Start by laying down your scrap cardboard to protect your surface.
- Place your plain potholders flat on the table.
- Squirt a small, quarter-sized amount of your chosen flower petal paint (like yellow or red) onto a paper plate. Keeping the paint shallow prevents the kids from getting entirely covered in it.
- Have your child press their thumb or index finger gently into the paint on the paper plate. They only need a thin layer on their fingertip.
- Guide their finger to the potholder and press straight down, then lift straight up.
- Repeat this motion to create four petals arranged in a tight circle or cross shape. The quilted diamond pattern on most potholders provides a great natural grid. You can center each flower inside a diamond to keep the design spaced out neatly.
- Once you finish stamping all the petals on your potholder, use a baby wipe to clean the paint off your child’s hand.
- Next, grab a contrasting color of the Tulip Slick Dimensional Fabric Paint for the center of the flowers. Because this paint comes in a squeeze bottle with a precision tip, you do not need to use fingers for this part.
- Simply squeeze a small dot of paint directly into the center of each four-petal cluster. For example, use a purple dot inside yellow petals, or an orange dot inside red petals.
- Take your green dimensional fabric paint to finish the floral design. Starting from the bottom of each flower, squeeze a thin, squiggly line downward to act as the stem. You can add a tiny leaf or two on the sides of the stem. The raised texture of the “Slick” paint will give the stems a great 3D effect.
- This is the most critical step. Dimensional fabric paint goes on thick and requires ample time to set. Move the potholders to a safe location where they will not be bumped or touched.
RELATED —> Potato Masher Stamped Dandelions
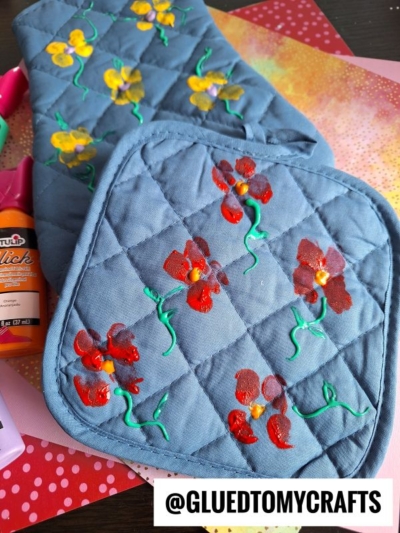
This fingerprint flower potholder is a foolproof craft that pairs utility with profound sentimental value. By using quality dimensional fabric paint and letting the kids literally leave their mark, you create a Mother’s Day gift that will brighten up the kitchen for years to come. Happy crafting, my friends!

Fingerprint Flower Potholders for Mother’s Day
Craft sentimental DIY fingerprint flower potholders with this simple, kid-friendly tutorial. Learn how to make a beautiful Mother's Day gift she will love.
Here’s your checklist of supplies to bring this craft to life:
- Fabric Potholder
- Fabric Paint
Prepare your creative haven by laying down a protective cover before the crafting magic begins!
Directions:
- Start by laying down your scrap cardboard to protect your surface.
- Place your plain potholders flat on the table.
- Squirt a small, quarter-sized amount of your chosen flower petal paint (like yellow or red) onto a paper plate. Keeping the paint shallow prevents the kids from getting entirely covered in it.
- Have your child press their thumb or index finger gently into the paint on the paper plate. They only need a thin layer on their fingertip.
- Guide their finger to the potholder and press straight down, then lift straight up.
- Repeat this motion to create four petals arranged in a tight circle or cross shape. The quilted diamond pattern on most potholders provides a great natural grid. You can center each flower inside a diamond to keep the design spaced out neatly.
- Once you finish stamping all the petals on your potholder, use a baby wipe to clean the paint off your child's hand.
- Next, grab a contrasting color of the Tulip Slick Dimensional Fabric Paint for the center of the flowers. Because this paint comes in a squeeze bottle with a precision tip, you do not need to use fingers for this part.
- Simply squeeze a small dot of paint directly into the center of each four-petal cluster. For example, use a purple dot inside yellow petals, or an orange dot inside red petals.
- Take your green dimensional fabric paint to finish the floral design. Starting from the bottom of each flower, squeeze a thin, squiggly line downward to act as the stem. You can add a tiny leaf or two on the sides of the stem. The raised texture of the "Slick" paint will give the stems a great 3D effect.
- This is the most critical step. Dimensional fabric paint goes on thick and requires ample time to set. Move the potholders to a safe location where they will not be bumped or touched.

Grab our favorite books via our Amazon affiliate link! In our Amazon storefront you will find books, toys and craft supplies we absolutely love using for our Glued To My Crafts tutorials!
If you've enjoyed our content or have any thoughts to share, we'd love to hear from you! Mention @gluedtomycrafts or tag #gluedtomycrafts on Instagram!