Spring brings a wonderful burst of color and a perfect excuse to get creative with your kids. As the weather warms up and the flowers begin to bloom, we often look for fresh, engaging activities to celebrate the season at home.
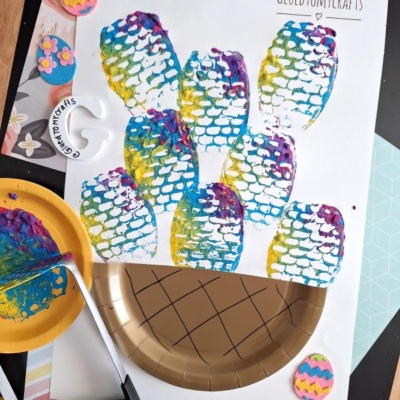
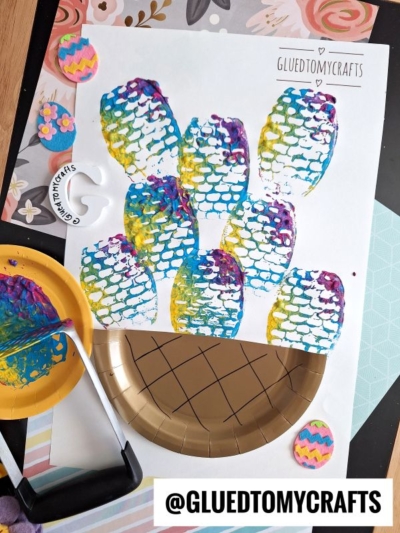
This potato masher stamped Easter egg craft idea for spring offers a fantastic way to spend a joyful afternoon making memories with your family.
Instead of reaching for standard paintbrushes, we are heading into the kitchen to grab a common utensil. A potato masher provides an incredible, unique texture that perfectly mimics the look of decorated Easter eggs!
Craft Supplies:
Before you begin, gather all your supplies to ensure a smooth crafting experience. Here is what you will need:
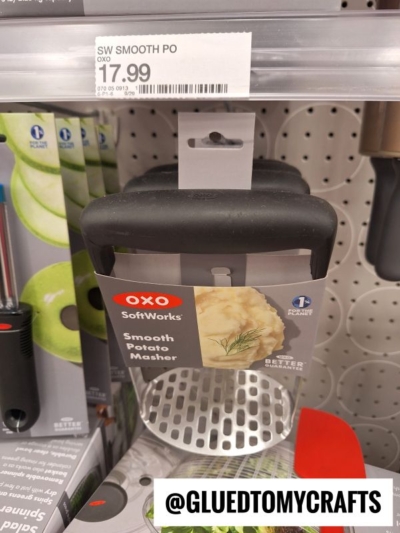
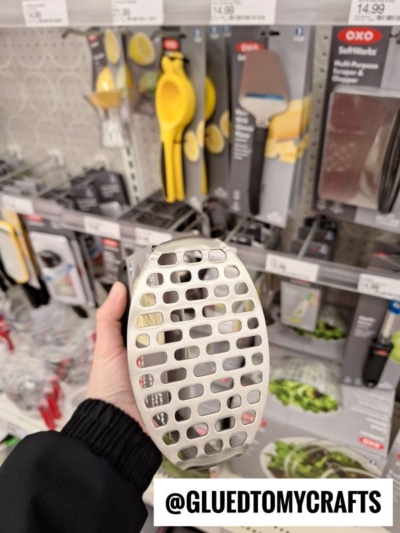
- A potato masher: A traditional round masher with a grid or small holes works best for creating the egg patterns.
- Washable tempera or acrylic paints: Choose vibrant spring colors like bright pink, yellow, light blue, and pastel green.
- White cardstock or heavy craft paper: You need a thick base so the paint does not warp the paper.
- A brown paper plate: This will become your textured Easter basket.
- Paper plates or a paint palette: Use these to hold and mix your paint colors.
- Craft scissors: For cutting out the shapes.
- School glue or a glue stick: To assemble the final piece.
- A brown or black marker: For adding details to the basket.
- Optional decorations: Felt cutouts, stickers, or glitter to add extra flair to your background.
Step-by-Step Instructions:
Ready to get messy and have some fun? Follow these simple steps to create your stamped Easter egg masterpiece.
Step 1: Prepare Your Paint Palette
Start by squeezing quarter-sized amounts of your washable paints onto a paper plate. For a beautiful, multi-colored effect, place a few different colors close to one another or slightly overlapping. When the potato masher picks up the paint, the colors will blend slightly on the paper, giving the eggs a stunning tie-dye or rainbow appearance.
Step 2: Load Up the Potato Masher
Take your clean, dry potato masher and firmly press it down into the paint. You want to make sure the entire bottom grid of the masher is evenly coated. Gently tap the masher on a clean section of the paper plate to remove any large clumps of excess paint. This ensures your stamped pattern comes out crisp and clear.
Step 3: Stamp Your Easter Eggs
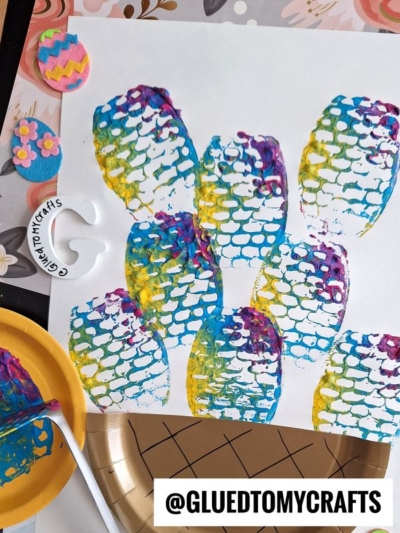
Place a sheet of white cardstock flat on your table. Have your child firmly press the paint-covered potato masher onto the paper. Lift the masher straight up to reveal a beautiful, textured circle!
Repeat this process several times across the paper, reapplying paint to the masher as needed. Try mixing up the color combinations for each stamp. Once you have a page full of colorful, textured circles, set the cardstock aside and let the paint dry completely.
Step 4: Create the Easter Basket
While the paint dries, you can work on the basket. Take your brown paper plate and cut it in half. Take one of the halves and use a marker to draw crisscross lines across the front. This simple detail creates a charming woven basket effect. Go ahead and glue that piece to the bottom of your stamped designs.
Step 5: Customize It
At this point in time you can display it as is or add anything other embellishments you see fit.
RELATED —> Potato Masher Stamped Bunny Craft Idea
Creating art together offers a wonderful way to celebrate the changing of the seasons. This potato masher stamped Easter egg craft perfectly captures the joy, color, and playfulness of spring. It allows kids to get a little messy while practicing their fine motor skills and exploring new textures.
Gather your supplies, head to the kitchen for your stamping tool, and enjoy a creative afternoon with your family. We would love to see how your beautiful Easter baskets turn out! Don’t forget to tag us on Facebook. Happy crafting, my friends!

Potato Masher Stamped Easter Egg Craft Idea For Spring
Here’s your checklist of supplies to bring this craft to life:
- School Glue
- Markers
Prepare your creative haven by laying down a protective cover before the crafting magic begins!
Directions:
- Start by squeezing quarter-sized amounts of your washable paints onto a paper plate. For a beautiful, multi-colored effect, place a few different colors close to one another or slightly overlapping. When the potato masher picks up the paint, the colors will blend slightly on the paper, giving the eggs a stunning tie-dye or rainbow appearance.
- Take your clean, dry potato masher and firmly press it down into the paint. You want to make sure the entire bottom grid of the masher is evenly coated. Gently tap the masher on a clean section of the paper plate to remove any large clumps of excess paint. This ensures your stamped pattern comes out crisp and clear.
- Place a sheet of white cardstock flat on your table. Have your child firmly press the paint-covered potato masher onto the paper. Lift the masher straight up to reveal a beautiful, textured circle!
- Repeat this process several times across the paper, reapplying paint to the masher as needed. Try mixing up the color combinations for each stamp. Once you have a page full of colorful, textured circles, set the cardstock aside and let the paint dry completely.
- While the paint dries, you can work on the basket. Take your brown paper plate and cut it in half. Take one of the halves and use a marker to draw crisscross lines across the front. This simple detail creates a charming woven basket effect. Go ahead and glue that piece to the bottom of your stamped designs.
- At this point in time you can display it as is or add anything other embellishments you see fit.
CLICK HERE TO PRINT THE DIRECTIONS FOR THIS CRAFT