This easy ornament art project idea is perfect for kids of all ages and can be done with just a few simple supplies that you probably already have around the house.

Are you looking for a fun and festive holiday craft to do with your kids? This paper gingerbread Christmas tree ornament is the perfect project! It’s easy, quick, and uses simple supplies you probably already have at home.
Plus, the finished ornaments are so adorable, they’ll be the highlight of your Christmas tree this year!

This craft is great for kids of all ages and takes just a few minutes to complete. Ready to get started? Grab the FREE printable template below, some cardstock, and a few craft supplies, and let’s create some holiday magic!
Craft Supplies:
Before we dive in, let’s gather everything you’ll need to make these adorable ornaments. Don’t worry – this craft uses simple supplies you probably already have at home!
- Tree Printable – Download it for free on our landing page
- Brown Cardstock Paper – For the gingerbread cookie look.
- Scissors – To cut out the tree shape.
- Single Hole Punch – To create a hole for hanging.
- White Tulip Puffy Paint – For the icing effect.
- Ribbon or Twine – To hang your ornament.
- Rhinestone Stickers – For extra sparkle.
- Loose Craft Glitter – Optional, but adds a festive touch.
Directions:
Before you begin, set up a crafting station and let everyone create their own ornament for the tree!
- Download and print the FREE tree template on a sheet of kraft or brown-colored cardstock paper. You’ll need one print per ornament.
- Use scissors to carefully cut out the tree design from the printable.
- Discard any excess paper.
- Use a single hole punch to create a hole at the top of the tree cutout. This will be used to hang the ornament later.
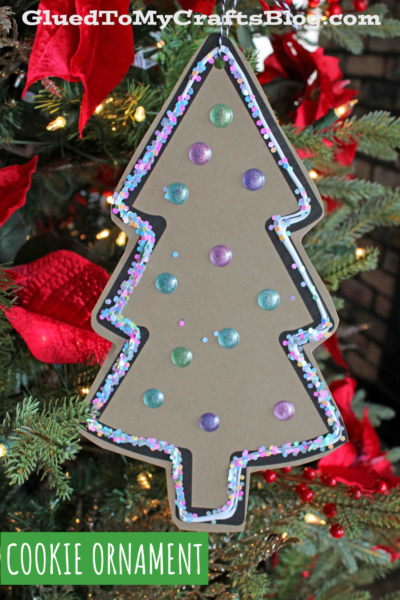
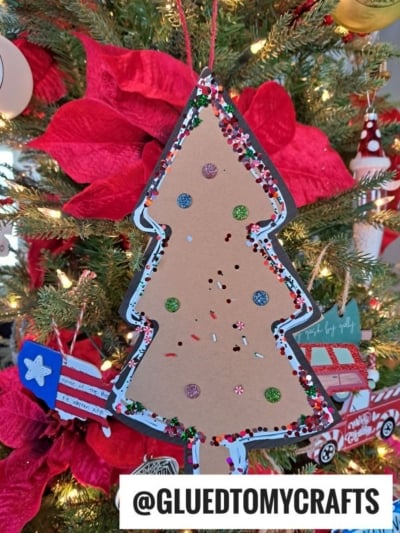
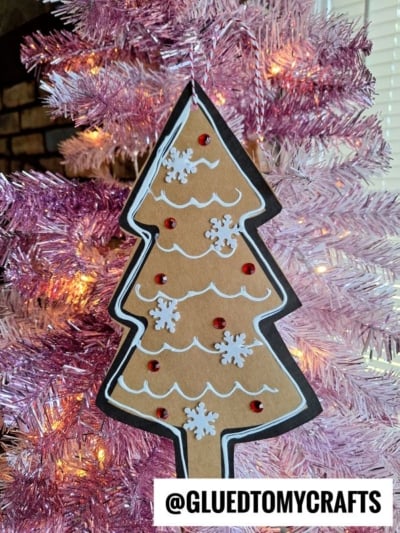
- Use the white puffy paint to outline the edges of the tree, mimicking the look of icing on a gingerbread cookie.
- Add rhinestone stickers and sprinkle on some loose craft glitter to make your ornament sparkle. Get creative with your designs!
- Set your decorated tree aside and allow the paint and glue to dry completely. This step is important to avoid smudging.
- Once dry, thread a piece of ribbon or twine through the hole you punched earlier. Tie a knot or bow, and your ornament is ready to hang!
Tips for Success:
- Use a variety of decorations: Let your kids experiment with different colors of puffy paint, stickers, or even small pom-poms for a unique look.
- Protect your workspace: Lay down newspaper or a craft mat to catch any glitter or paint spills.
- Make it a family activity: Set up a crafting station and let everyone create their own ornament for the tree!
RELATED —> Gingerbread House Ornament
We’d love to see your paper gingerbread Christmas tree ornaments! Share your creations on Instagram or Facebook using the hashtag #HolidayCraftsForKids and tag us for a chance to be featured.

Paper Gingerbread Christmas Tree Cookie Ornament
This easy ornament art project idea is perfect for kids of all ages and can be done with just a few simple supplies that you probably already have around the house.
Here’s your checklist of supplies to bring this craft to life:
Prepare your creative haven by laying down a protective cover before the crafting magic begins!
Directions:
- Download and print the FREE tree template on a sheet of kraft or brown-colored cardstock paper. You’ll need one print per ornament.
- Use scissors to carefully cut out the tree design from the printable.
- Discard any excess paper.
- Use a single hole punch to create a hole at the top of the tree cutout. This will be used to hang the ornament later.
- Use the white puffy paint to outline the edges of the tree, mimicking the look of icing on a gingerbread cookie.
- Add rhinestone stickers and sprinkle on some loose craft glitter to make your ornament sparkle. Get creative with your designs!
- Set your decorated tree aside and allow the paint and glue to dry completely. This step is important to avoid smudging.
- Once dry, thread a piece of ribbon or twine through the hole you punched earlier. Tie a knot or bow, and your ornament is ready to hang!


NEED HELP DOWNLOADING OUR FREE PRINTABLES? PLEASE REFER TO OUR FAQ PAGE
If you've enjoyed our content or have any thoughts to share, we'd love to hear from you! Mention @gluedtomycrafts or tag #gluedtomycrafts on Instagram!