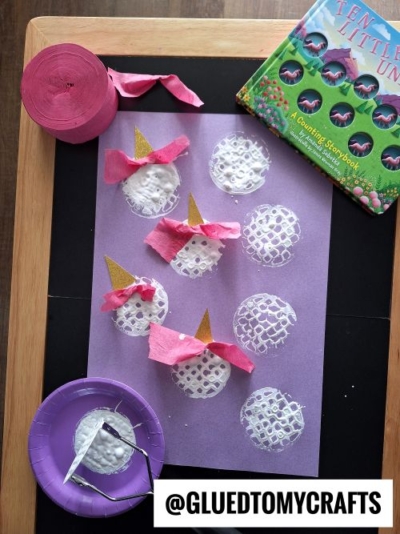
Get ready to turn a simple kitchen tool into a magical art instrument! This potato masher stamped unicorn craft is a wonderfully creative project for kids. It combines the fun of stamping with the enchantment of unicorns, resulting in a unique piece of art.
This activity is perfect for a rainy afternoon, a classroom project, or just a moment of imaginative fun. The best part? The unicorn’s hair is made from torn pieces of soft crepe paper, adding a fantastic texture that kids will love.
Craft Supplies:
Before you begin your crafting adventure, you’ll want to gather all your supplies. Having everything in one place makes the process smooth and enjoyable. Here’s what you’ll need to bring your potato masher unicorns to life.
- Potato Masher: A classic one with a grid pattern works best.
- White Craft Paint: Any washable, non-toxic paint is a great choice.
- Paper Plate: To hold your paint for easy dipping.
- Purple Construction Paper: This will be the vibrant background for your unicorns.
- Pink Crepe Paper: A roll of crepe paper or streamers is perfect.
- Gold Glitter Paper: For that essential, sparkly unicorn horn.
- School Glue: A standard liquid glue or glue stick will work.
- Scissors: For cutting the unicorn horns.
- Optional Embellishments: Googly eyes, a black marker for drawing a face, or extra glitter.
Directions:
Now that you have all your supplies, it’s time for the fun part. Follow these simple steps to create your stamped unicorn art.
- Lay down some newspaper or a disposable tablecloth to protect your work surface. Pour a generous circle of white craft paint onto your paper plate. This will serve as your ink pad for the potato masher. Make sure all your other materials are within easy reach.
- This is where the magic begins! Take your potato masher and dip it flat into the white paint on the paper plate. Make sure the entire grid is coated evenly. Firmly press the paint-covered masher onto the purple construction paper. Lift it straight up to reveal a circular, textured stamp. Repeat this process, stamping as many unicorn heads as you like across the paper. Feel free to overlap them or spread them out.
- Patience is key for this next step. The white paint needs to dry completely before you can add the unicorn details. Depending on how thick the paint is, this could take anywhere from 30 minutes to an hour. This is a great time to take a break, read a story, or prepare the next set of materials.
- While the paint is drying, you can get the unicorn horns ready. Using your scissors, carefully cut small, elongated triangles from the gold glitter paper. These will become the iconic, sparkling horns for your unicorns. You will need one horn for each stamped circle you made on your paper.
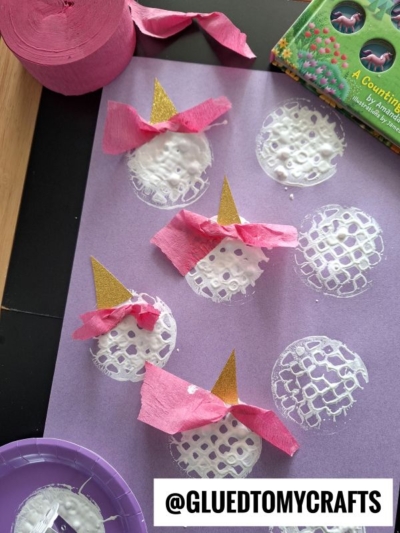
- Once the white paint is completely dry to the touch, it’s time to give your unicorns their horns. Dab a small amount of glue at the top center of one of the white stamped circles. Gently press one of the gold glitter triangles onto the glue. Repeat this for every stamped circle, giving each one a beautiful horn.
- Now, let’s give these unicorns their colorful manes. Take your pink crepe paper and tear it into small, rough pieces. You don’t need to be precise; the varied shapes will add character. Apply some glue around the base of the golden horn on one of your unicorns. Press the torn crepe paper pieces onto the glue, arranging them to look like a fluffy, flowing mane. Continue this for all your unicorns.
- Your unicorns are almost complete! This final step is all about adding personality. You can glue on small googly eyes to give them a whimsical look. Alternatively, use a black marker to draw a simple eye and a smile. If you want extra sparkle, feel free to add a sprinkle of fine glitter to the wet paint or glue for a truly magical effect.
RELATED —> Potato Masher Stamped Bunny Craft Idea
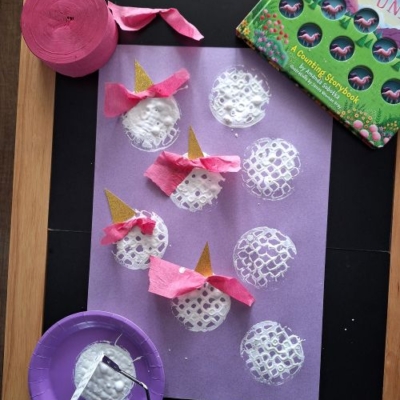
You did it! You’ve successfully turned a common kitchen utensil into a tool for creating a field of enchanting unicorns. This project is a fantastic way to explore textures, shapes, and imagination.
Don’t be afraid to switch things up. Try using different colors for the background paper or the unicorn manes. Maybe you want to create a rainbow unicorn family! Once your artwork is dry, hang it up for everyone to admire.
We would love to see your unique potato masher unicorns. Share your finished creations with us and inspire other crafters to try this fun and easy project. Happy crafting, my friends!

Potato Masher Stamped Unicorn Craft Idea
Bring your potato masher stamped unicorns to life. Gather the right materials for a delightful crafting adventure.
Here’s your checklist of supplies to bring this craft to life:
- Cardstock Paper
- Glitter Cardstock Paper
- Craft Paint
- Crepe Paper
- Embellishments
Prepare your creative haven by laying down a protective cover before the crafting magic begins!
Directions:
- Pour the paint - Add a small puddle of bright green paint to a paper plate. The paint should be wide enough for the potato masher to dip into easily.
- Dip the potato masher - Press the bottom of the potato masher into the green paint. Gently lift it up and let any extra paint drip off, so the stamp doesn’t get too gloppy.
- Stamp the alien bodies - Press the painted potato masher onto the black construction paper. Lift it straight up to reveal a textured green alien body. Repeat to make as many aliens as you’d like.
- Let the paint dry - Set the paper aside until the green stamped shapes are dry. This helps the googly eyes and marker details stay neat.
- Add googly eyes - Glue one, two, or three googly eyes onto each green alien body. Mix them up to make every alien look different and extra silly.
- Draw alien details -Use markers to add antennae, arms, legs, smiles, or spacey little wiggles around each alien. Try different colors for a fun, playful look.
- Let dry completely - Your potato masher stamped aliens are ready for their space adventure. Display them on the fridge, classroom wall, or bulletin board for a blast of goofy galaxy fun!
CLICK HERE TO PRINT THE DIRECTIONS FOR THIS CRAFT
If you've enjoyed our content or have any thoughts to share, we'd love to hear from you! Mention @gluedtomycrafts or tag #gluedtomycrafts on Instagram!