Welcome the bright and cheerful feelings of spring with a craft that’s as fun to make as it is to display. This paper plate and popsicle stick butterfly is a wonderful project for a lazy afternoon. It uses simple materials you likely already have at home. This makes it a perfect activity for kids of all ages. Get ready to transform everyday items into a beautiful piece of art that celebrates the season.
This tutorial will guide you through creating your very own colorful butterfly. We will cover the materials you need and provide easy-to-follow steps. We’ll also share some creative ideas for making your butterfly unique. Let’s gather our supplies and let our creativity take flight.
Materials You’ll Need
The beauty of this craft lies in its simplicity. You won’t need to search for hard-to-find supplies. Here is a list of everything required to bring your paper plate butterfly to life.
Basic Supplies:
- Paper Plates: One standard paper plate is enough to make one butterfly. The plain, uncoated white ones work best for painting and gluing.
- Jumbo Popsicle Stick: This will form the body of your butterfly. A jumbo-sized stick provides a sturdy base.
- Washable Paint or Markers: Choose your favorite spring colors. Pinks, yellows, blues, and purples are great options.
- School Glue: A bottle of white liquid glue is ideal for securing the parts.
- Scissors: You will need these for cutting the paper plate.
- Black Marker: A fine-tip permanent marker is perfect for drawing a happy face on your butterfly.
Optional Decorations:
- Pipe Cleaners: Instead of paper use these to create fun, curly antennae for your butterfly.
- Glitter or Gems: Add some sparkle with plastic gems, sequins, or a sprinkle of glitter.
- Googly Eyes: Instead of drawing eyes, you can glue on a pair of googly eyes for a silly, animated look.
- Stickers: Flower or heart-shaped stickers can add extra charm to the wings.
Step-by-Step Instructions
Now that you have your materials, it’s time for the fun part. Follow these simple steps to assemble your beautiful butterfly.
Step 1: Prepare the Butterfly Wings
First, take a single paper plate and cut it directly in half. Then, take each half and cut it in half again. You should now have four equal, wedge-shaped pieces. These four pieces will become the wings of your butterfly. This is a great step for adults to help with, especially for younger children.
Step 2: Paint and Decorate the Wings
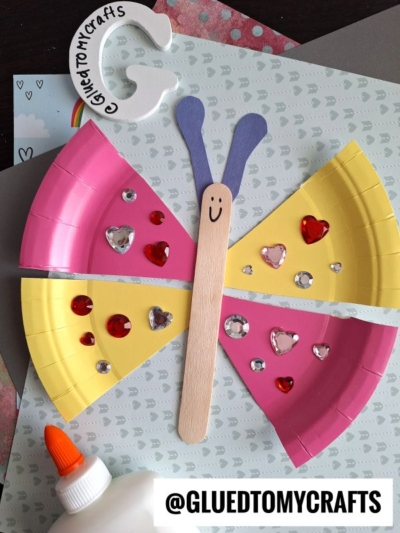
This is where the creativity really begins. Arrange the four paper plate pieces on a protected surface, like newspaper or a plastic tablecloth. Let your child choose their favorite colors to paint the wings. You can paint all the wings one solid color, or mix it up. For example, you can paint the top two wings pink and the bottom two yellow, as seen in the example.
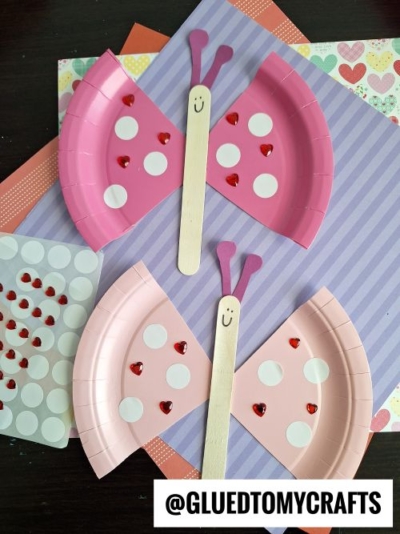
Feel free to experiment with patterns like stripes or polka dots. Once the paint is completely dry, you can add more decorations. Use glue to attach shiny gems, sequins, or glitter. Let your child arrange these decorative elements however they like. This is their chance to make the butterfly’s wings truly unique.
Step 3: Create the Butterfly’s Body
While the wings are drying, you can prepare the butterfly’s body. Take one jumbo popsicle stick. You can leave it as its natural wood color or paint it. If you choose to paint it, select a color that complements the wings.
Once the paint is dry, use a fine-tip black marker to draw a simple smiley face near the top of the popsicle stick. This small detail gives your butterfly a friendly and cheerful personality. If you have googly eyes, you can glue them on now for an extra touch of fun.
Step 4: Assemble Your Butterfly
It’s time to put all the pieces together. Lay the decorated popsicle stick flat on your work surface. Take two of the paper plate wing pieces and apply glue to their straight edges. Press them firmly onto the back of the popsicle stick to form the top wings. Angle them slightly upwards to give the butterfly a sense of flight.
Next, take the remaining two wing pieces and apply glue to their straight edges. Attach them to the back of the popsicle stick just below the top wings. These will be the bottom wings. Let the glue dry completely to ensure all parts are securely attached.
Step 5: Add the Antennae
A butterfly isn’t complete without its antennae. Cut out a “V” shape from a small piece of cardstock paper. Apply a small amount of glue to the folded point and attach it to the back of the popsicle stick, right at the top behind the smiley face.
Customization Tips for Your Craft
One of the best things about this project is how easily you can customize it. Here are a few ideas to inspire you and your little artist.
- Try Different Wing Shapes: Instead of simple quarter-cuts, try trimming the outer edges of the paper plate pieces to create a scalloped or wavy look for more realistic wings.
- Use Different Materials: If you don’t have paint, use crayons or colored pencils to decorate the wings. You can also cover the wings with patterned craft paper for a different texture.
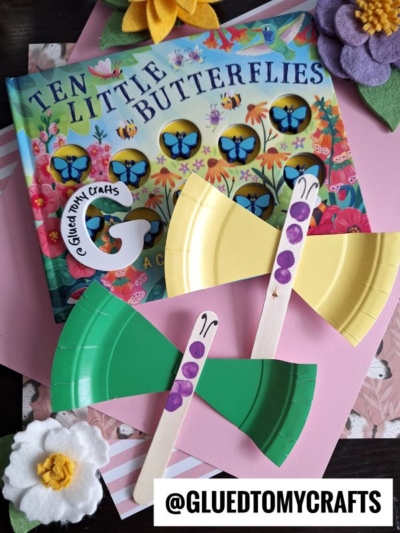
- Create a Themed Butterfly: Make a “rainbow butterfly” by painting each wing a different color of the rainbow. Or, create a “galaxy butterfly” with dark blue and purple paints, adding white splatters for stars and silver glitter for sparkle.
- Add Natural Elements: For a nature-inspired twist, you could glue on small, pressed flowers or leaves to the wings once the paint is dry.
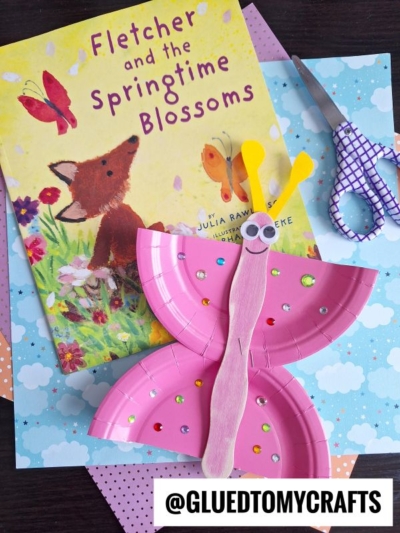
RELATED —> Handprint & Popsicle Stick Butterfly Poem Keepsake


Your beautiful paper plate butterfly is now complete! This simple and engaging craft is a wonderful way to celebrate the arrival of spring. You can hang it in a window, use it as a bookmark, or even attach a magnet to the back to display it on the fridge. Enjoy your new, colorful creation!
