Winter brings chilly weather and cozy afternoons spent indoors. When the temperature drops, crafting offers a fantastic way to keep little hands busy and creative minds engaged.
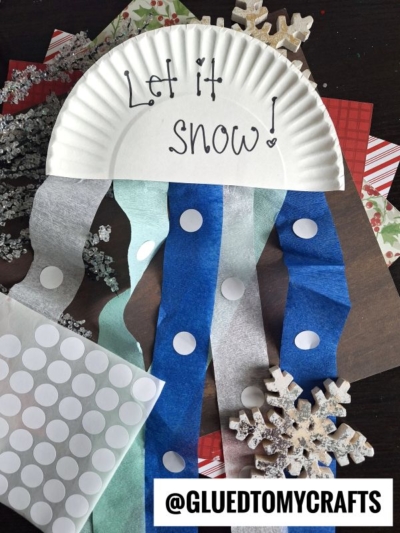
This paper plate and crepe paper snow craft captures the magic of a snowy day without the freezing temperatures. We designed this project to be incredibly simple, making it perfect for toddlers, preschoolers, and early elementary students.
Craft Supplies You Will Need
To create this delightful snow craft, you will need the following materials:
- White paper plates: Standard inexpensive paper plates work best because they are easy to cut.
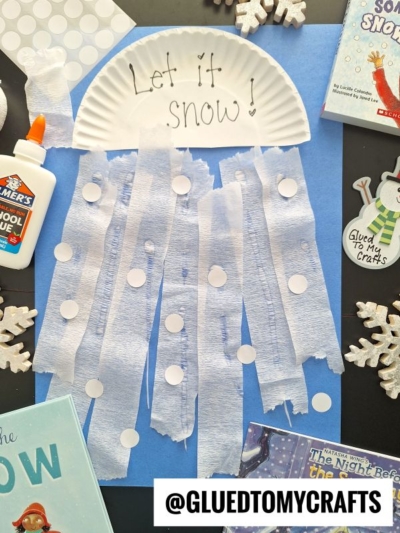
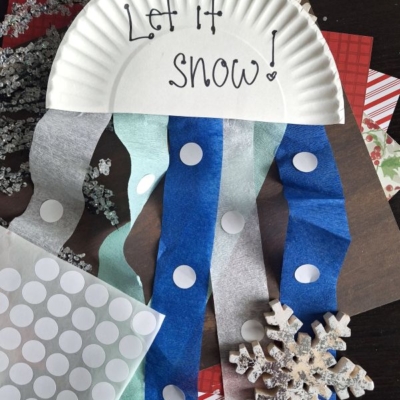
- Crepe paper streamers: Gather a few wintery colors like light blue, dark royal blue, silver, and white.
- White circular stickers: You can also use small circles punched out of white construction paper.
- Black marker: Use a thick marker for writing a fun winter message.
- School glue or a stapler: Both work well for attaching the streamers to the plate.
- Scissors: You will need these to cut the plates and streamers.
Step-by-Step Instructions
Follow these simple steps to build your snowy creation. You can demonstrate each step first, then let your kids take the lead on their own projects.
Step 1: Prep the Paper Plate Cloud
Start by taking a standard white paper plate and cutting it straight down the middle. One paper plate will yield two craft clouds, which is perfect if you have multiple children participating. Turn the half-plate so the flat edge points toward the bottom. The curved top now serves as the fluffy top of your snow cloud.
Step 2: Add Your Snowy Message
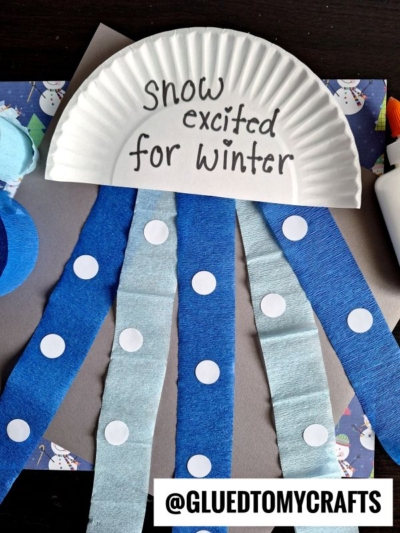
Take your black marker and write a fun, winter-themed message directly in the center of the paper plate. We love using phrases like “Let it snow!” or “Snow excited for winter!”
If your children are learning to write, you can lightly write the words in pencil and have them trace over the letters with the marker. They can also draw small snowflakes or hearts around the words to add a personal touch to their cloud.
Step 3: Attach the Colorful Streamers
Next, cut your crepe paper streamers into strips. You will want them to be about a foot long, but the exact length does not matter. Cut four or five strips per cloud, mixing the colors. For example, you might alternate dark blue, light blue, and silver.
Flip the paper plate over so the written message faces the table. Run a line of school glue along the flat, bottom edge of the plate. Press the top of each crepe paper streamer into the glue, letting the rest of the strip hang down. If you want a faster option with zero drying time, you can simply staple the streamers to the bottom edge.
Step 4: Make It Snow
Now comes the most exciting part for the kids! Flip the plate back over so the streamers hang freely. Take your white circular stickers or white paper circles and attach them randomly all the way down the colorful streamers.
These white circles represent the falling snow. Kids can add as many or as few snowballs as they like. If you use paper circles instead of stickers, just use a tiny dot of school glue to secure each one to the crepe paper. Set the craft aside to dry completely before you hang it up.
RELATED —> Paper Plate Winter Tree Craft Idea
Winter afternoons provide the perfect opportunity to slow down and create something beautiful together. This paper plate and crepe paper snow craft requires minimal setup, uses inexpensive materials, and delivers an adorable result that kids absolutely love.
We highly encourage you to gather your supplies and try this project with your children or students this week. Crafting together builds confidence, fosters creativity, and creates lasting memories. Grab those paper plates, unleash your imagination, and enjoy a wonderful snowy crafting session! Happy crafting, my friends!

Paper Plate & Crepe Paper Snow Craft Idea For Kids
Here’s your checklist of supplies to bring this craft to life:
- Large Paper Plate
- Crepe Paper
- Dot Stickers
Prepare your creative haven by laying down a protective cover before the crafting magic begins!
Directions:
- Start by taking a standard white paper plate and cutting it straight down the middle. One paper plate will yield two craft clouds, which is perfect if you have multiple children participating. Turn the half-plate so the flat edge points toward the bottom. The curved top now serves as the fluffy top of your snow cloud.
- Take your black marker and write a fun, winter-themed message directly in the center of the paper plate. We love using phrases like "Let it snow!" or "Snow excited for winter!"
- If your children are learning to write, you can lightly write the words in pencil and have them trace over the letters with the marker. They can also draw small snowflakes or hearts around the words to add a personal touch to their cloud.
- Next, cut your crepe paper streamers into strips. You will want them to be about a foot long, but the exact length does not matter. Cut four or five strips per cloud, mixing the colors. For example, you might alternate dark blue, light blue, and silver.
- Flip the paper plate over so the written message faces the table. Run a line of school glue along the flat, bottom edge of the plate. Press the top of each crepe paper streamer into the glue, letting the rest of the strip hang down. If you want a faster option with zero drying time, you can simply staple the streamers to the bottom edge.
- Now comes the most exciting part for the kids! Flip the plate back over so the streamers hang freely. Take your white circular stickers or white paper circles and attach them randomly all the way down the colorful streamers.
- These white circles represent the falling snow. Kids can add as many or as few snowballs as they like. If you use paper circles instead of stickers, just use a tiny dot of school glue to secure each one to the crepe paper. Set the craft aside to dry completely before you hang it up.
CLICK HERE TO PRINT THE DIRECTIONS FOR THIS CRAFT