
Looking for a fun and meaningful craft to do with your kids this October? You just found the perfect project. This handprint mummy craft combines spooky seasonal fun with a heartwarming keepsake that parents will cherish for years.
Kids grow up incredibly fast. One day they have tiny hands, and the next, they are entirely grown up. Capturing their hand size in a festive craft gives you a physical memory to look back on. Plus, children love getting messy with art supplies and seeing their hands transform into silly monsters.
This tutorial will guide you through creating a simple painter’s tape mummy handprint. You will learn what materials to gather, the exact steps to build the craft, and how to customize it. Get ready to make some wonderful holiday memories with your little ones!
Gather Your Craft Supplies
You probably already have most of the supplies you need hiding in your craft closet or tool drawer. Here is exactly what you need to gather before you start creating:
- Cardstock Paper: You need black cardstock for the handprint and a fun color {any color you like!} for the background base.
- White Masking Tape or Painter’s Tape: This will act as the mummy’s bandages.
- Large Googly Eyes: Grab at least two for each mummy you plan to make.
- Markers: A black marker for writing the message and drawing a mouth.
- Scissors: Kid-safe scissors if your child wants to practice cutting.
- School Glue or Glue Stick: To attach the handprint to the background paper.
- Decorative Stickers: Look for small ghost cutouts or star stickers to frame the artwork.
Step-by-Step Mummy Craft Instructions
Follow these simple steps to bring your spooky handprint mummy to life. Do not worry about making it perfect. The charm of handmade children’s crafts lies in their quirky, imperfect details!
Step 1: Trace and Cut the Handprint
Start by grabbing your sheet of black cardstock and a pencil. Have your child place their hand flat on the paper with their fingers spread slightly apart. Trace carefully around their fingers and palm.
Once you have a solid outline, cut the handprint out using your scissors. If your child is old enough to practice their scissor skills, let them cut it out themselves. A slightly jagged edge will only add to the spooky mummy aesthetic!
Step 2: Glue Down the Cutout
Apply a generous amount of glue to the back of your decorated mummy handprint. Center it on your second sheet of cardstock paper, with the fingers pointing downward to act as the mummy’s legs. Press down firmly and smooth it out so it sticks well.
Step 3: Wrap the Mummy Bandages
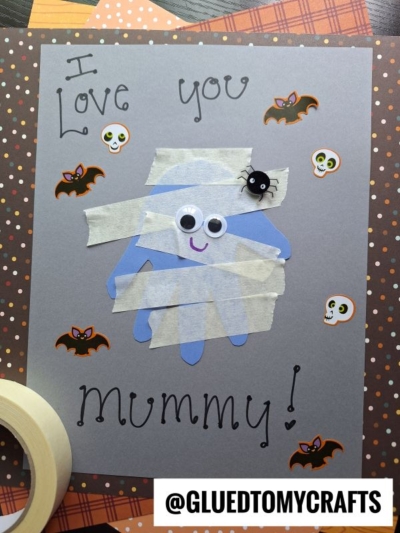
Now comes the fun part for the kids! Take your white masking tape or painter’s tape and tear off several short strips. You want the strips to be just wide enough to cross the black handprint horizontally.
Have your child stick the tape strips across the handprint. Remind them to leave some black spaces showing through, so it looks like authentic mummy wrappings. Angle the tape in different directions to give the mummy texture and personality.
Step 4: Give Your Mummy Sight
Every friendly monster needs a pair of eyes. Take two large googly eyes and glue them directly onto the handprint design. Position them in a gap between the strips of white tape near the top of the handprint. You can use matching eyes or mix and match colors for a silly look.
Step 5: Write the Punny Message
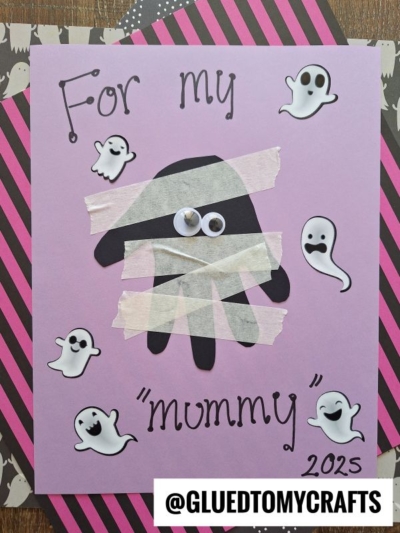
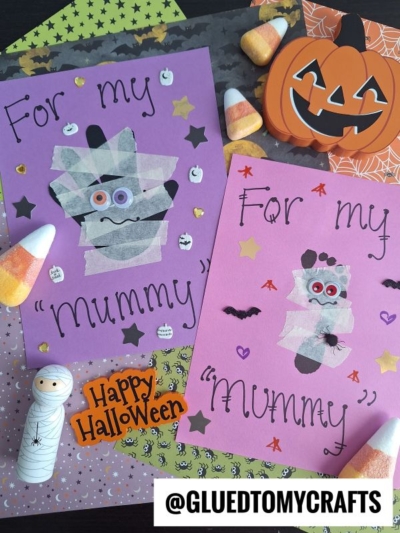
Grab your favorite black marker to add the sentimental touch. At the top center of the purple cardstock, write the words “For my” in clear letters.
At the bottom center, right below the mummy handprint, write the word “mummy” and put it in quotation marks. Do not forget to write the current year (like 2025) in the bottom right corner. This ensures you always remember exactly when your child made this special keepsake.
Step 6: Decorate and Personalize
Now you can let your child’s creativity run wild. Give them a sheet of Halloween stickers to decorate the empty space around the mummy.
Small white ghosts with silly expressions look fantastic floating around the purple background. You can also add tiny white pumpkins, gold star gems, or little spiderweb stickers. The more stickers they add, the more colorful and festive the final project becomes.
And that’s it! Let it all dry completely before you display and/or gift it away proudly for all to see!
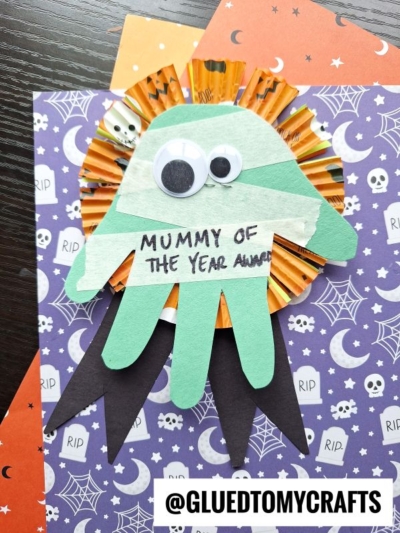
RELATED —> Pipe Cleaner Wrapped Mummy Craft
Making memories with your kids does not require expensive kits or complicated instructions. This handprint mummy craft proves that simple household items like painter’s tape and paper can transform into an adorable, lasting treasure.
Gather your supplies, clear off the kitchen table, and enjoy a fun afternoon of spooky crafting. You will love having this sweet “For my mummy” keepsake to remind you of these precious early years. Happy crafting and happy Halloween!


Handprint Mummy Craft: Easy Halloween Keepsake Tutorial
Here’s your checklist of supplies to bring this craft to life:
- Cardstock Paper
- Wiggle Eyes
- Embellishments
- School Glue
Prepare your creative haven by laying down a protective cover before the crafting magic begins!
Directions:
- Start by grabbing your sheet of black cardstock and a pencil. Have your child place their hand flat on the paper with their fingers spread slightly apart. Trace carefully around their fingers and palm.
- Once you have a solid outline, cut the handprint out using your scissors. If your child is old enough to practice their scissor skills, let them cut it out themselves. A slightly jagged edge will only add to the spooky mummy aesthetic!
- Apply a generous amount of glue to the back of your decorated mummy handprint. Center it on your second sheet of cardstock paper, with the fingers pointing downward to act as the mummy's legs. Press down firmly and smooth it out so it sticks well.
- Now comes the fun part for the kids! Take your white masking tape or painter's tape and tear off several short strips. You want the strips to be just wide enough to cross the black handprint horizontally.
- Have your child stick the tape strips across the handprint. Remind them to leave some black spaces showing through, so it looks like authentic mummy wrappings. Angle the tape in different directions to give the mummy texture and personality.
- Every friendly monster needs a pair of eyes. Take two large googly eyes and glue them directly onto the handprint design. Position them in a gap between the strips of white tape near the top of the handprint. You can use matching eyes or mix and match colors for a silly look.
- Grab your favorite black marker to add the sentimental touch. At the top center of the purple cardstock, write the words "For my" in clear letters.
- At the bottom center, right below the mummy handprint, write the word "mummy" and put it in quotation marks. Do not forget to write the current year (like 2025) in the bottom right corner. This ensures you always remember exactly when your child made this special keepsake.
- Now you can let your child's creativity run wild. Give them a sheet of Halloween stickers to decorate the empty space around the mummy.
- Small white ghosts with silly expressions look fantastic floating around the purple background. You can also add tiny white pumpkins, gold star gems, or little spiderweb stickers. The more stickers they add, the more colorful and festive the final project becomes.
- And that's it! Let it all dry completely before you display and/or gift it away proudly for all to see!
CLICK HERE TO PRINT THE DIRECTIONS FOR THIS CRAFT