The holiday season brings a magical feeling to our homes, and there is no better way to celebrate than by getting crafty with your kids. Creating handmade decorations builds wonderful memories and lets children express their growing imaginations. If you need a fresh, engaging project this winter, we have the perfect activity for you.
Welcome to the ultimate tutorial for our Fork Painted Christmas Tree Gnome! This adorable craft combines the trendy charm of holiday gnomes with the festive shape of a classic evergreen tree. Instead of using standard paintbrushes, we use a simple kitchen fork to create a brilliant, textured effect.
Materials Needed:
Before we start painting, you need to gather your supplies. You likely have most of these items sitting around your house right now!
Here is what you need for this project:
- White Cardstock Paper: This serves as the sturdy base for your artwork. Standard printer paper might warp from the wet paint.
- Green Washable Craft Paint: Choose a bright, festive green to represent the Christmas tree beard.
- A Plastic Fork: Any standard plastic or compostable kitchen fork works wonderfully.
- Paper Plate: You will use this as a makeshift paint palette.
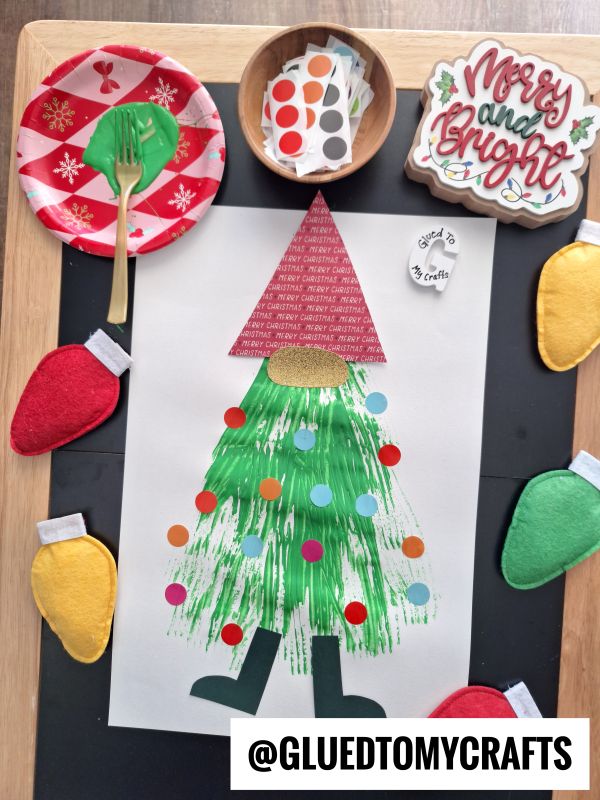
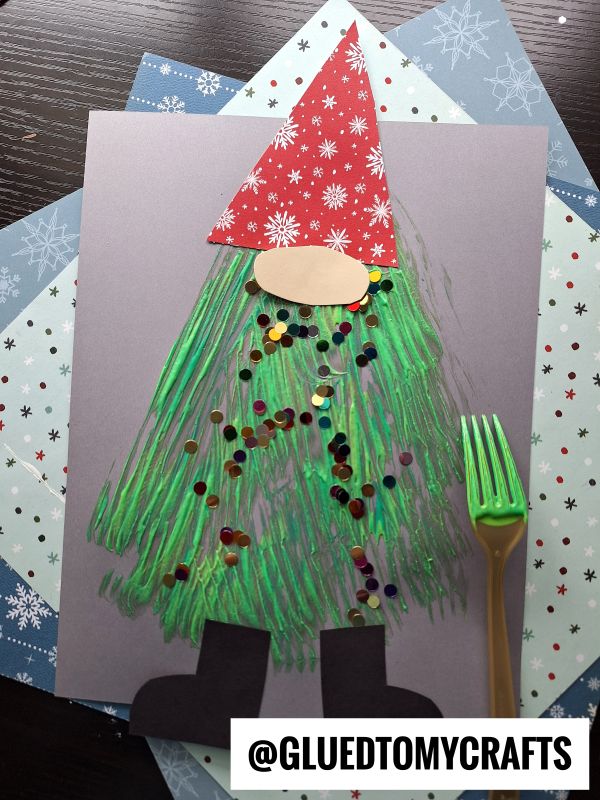
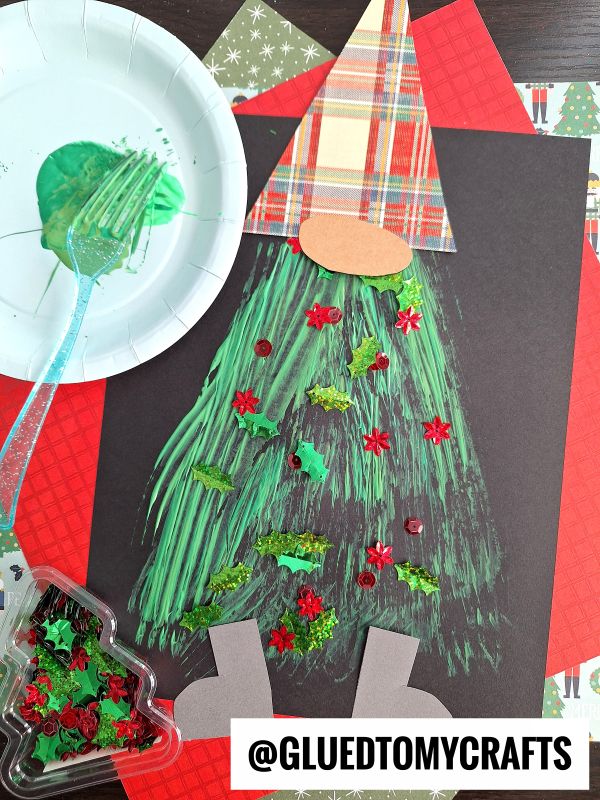
- Scrap & Cardstock Paper: You need red for the hat, black for the boots, and gold glitter paper for the nose.
- Circle Stickers: Red, blue, orange, and pink dot stickers make excellent ornaments.
- School Glue or Glue Stick: Essential for attaching the paper pieces.
- Child-Safe Scissors: For cutting out the hat, nose, and boots.
Step-by-Step Instructions:
Ready to craft? Follow these simple steps to bring your festive gnome to life.
Step 1: Prepare Your Station
- First, clear a spot at your kitchen table or craft desk. Lay down some old newspapers or a reusable silicone mat to protect the surface.
- Squeeze a generous dollop of green craft paint onto your paper plate.
- Place the plastic fork right next to the paint.
- Give your child a blank sheet of white cardstock.
Step 2: Cut Out the Gnome Features
- While you are keeping an eye on the prep work, cut out the paper components. You will need to cut a large triangle out of the red paper for the gnome’s hat.
- Next, cut a small semi-circle from the gold glitter paper for the nose.
- Finally, cut two small boot shapes out of the black paper. If your children are old enough, let them practice their scissor skills by cutting these shapes out themselves.
Step 3: Paint the Textured Beard
- Now for the best part! Have your child dip the flat back of the fork into the green paint. Make sure the tines are fully coated. Press the painted fork onto the lower half of the white cardstock. Drag it downward and outward to create green spikes.
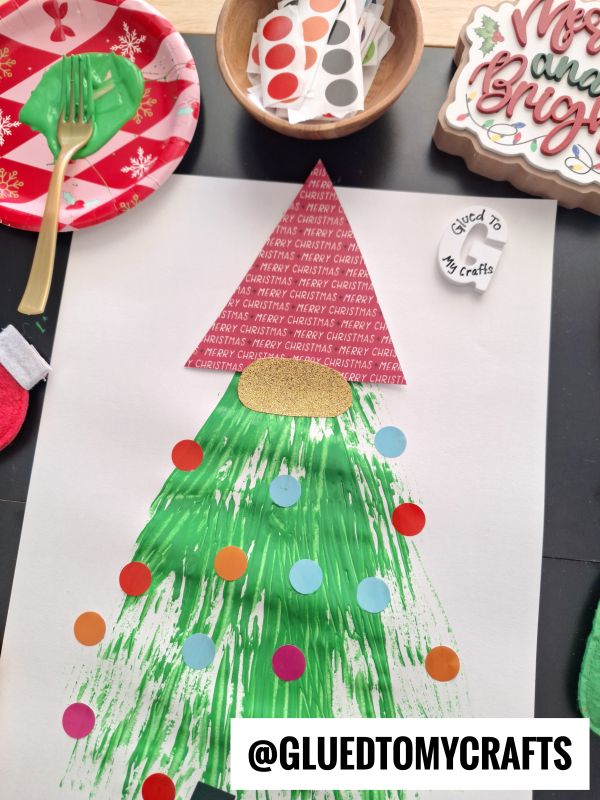
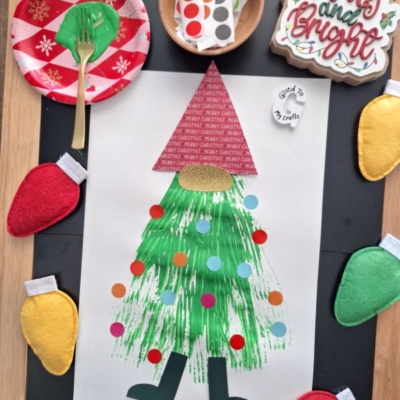
- Keep dipping and pressing in a triangular shape. You want the top to be narrow and the bottom to fan out widely. This green painted area represents both the gnome’s bushy beard and the shape of a Christmas tree.
Step 4: Assemble the Gnome
- While the green paint is still slightly wet, you can start adding the paper elements.
- Apply glue to the back of the red paper hat. Place it right at the top of the green painted triangle.
- Next, take the gold glitter semi-circle. Glue it right where the bottom of the hat meets the top of the green paint. This shiny nose peeking out from under the hat gives the gnome its classic, adorable look.
- Finally, glue the two black boots at the very bottom edge of the green painted beard.
Step 5: Decorate the Tree
- Your gnome needs some holiday cheer! Peel the colorful round stickers from their backing. Hand them to your child and let them stick these “ornaments” all over the green painted beard. They can use as many or as few as they want. The bright pops of pink, blue, red, and orange against the textured green paint look fantastic.
- Set the completed craft aside and let it dry completely before you hang it on the fridge.
RELATED —> Fork Painted Santa Beard Craft For Christmas
Crafting during the holidays brings so much warmth and joy to the season. This Fork Painted Christmas Tree Gnome is inexpensive, straightforward, and guaranteed to produce smiles. It makes a wonderful classroom activity for teachers or a cozy weekend project for parents at home.
We absolutely love seeing how your projects turn out! Gather your supplies, get a little messy with some green paint, and let your creativity shine. Once your gnomes are dry and decorated, snap a photo and share your creations with us on social media. Tag us in your posts so we can admire your fantastic fork painted artwork. Happy crafting and happy holidays!

Fork Painted Christmas Tree Gnome Craft for Kids
Looking for an easy holiday activity? Learn how to make a fork painted Christmas tree gnome with this simple and fun craft tutorial for kids!
Here’s your checklist of supplies to bring this craft to life:
- Cardstock Paper
- Craft Paint
- Embellishments
- School Glue
Prepare your creative haven by laying down a protective cover before the crafting magic begins!
Directions:
- First, clear a spot at your kitchen table or craft desk. Lay down some old newspapers or a reusable silicone mat to protect the surface.
- Squeeze a generous dollop of green craft paint onto your paper plate.
- Place the plastic fork right next to the paint.
- Give your child a blank sheet of white cardstock.
- While you are keeping an eye on the prep work, cut out the paper components. You will need to cut a large triangle out of the red paper for the gnome's hat.
- Next, cut a small semi-circle from the gold glitter paper for the nose.
- Finally, cut two small boot shapes out of the black paper. If your children are old enough, let them practice their scissor skills by cutting these shapes out themselves.
- Now for the best part! Have your child dip the flat back of the fork into the green paint. Make sure the tines are fully coated. Press the painted fork onto the lower half of the white cardstock. Drag it downward and outward to create green spikes.
- Keep dipping and pressing in a triangular shape. You want the top to be narrow and the bottom to fan out widely. This green painted area represents both the gnome's bushy beard and the shape of a Christmas tree.
- While the green paint is still slightly wet, you can start adding the paper elements.
- Apply glue to the back of the red paper hat. Place it right at the top of the green painted triangle.
- Next, take the gold glitter semi-circle. Glue it right where the bottom of the hat meets the top of the green paint. This shiny nose peeking out from under the hat gives the gnome its classic, adorable look.
- Finally, glue the two black boots at the very bottom edge of the green painted beard.
- Your gnome needs some holiday cheer! Peel the colorful round stickers from their backing. Hand them to your child and let them stick these "ornaments" all over the green painted beard. They can use as many or as few as they want. The bright pops of pink, blue, red, and orange against the textured green paint look fantastic.
- Set the completed craft aside and let it dry completely before you hang it on the fridge.
CLICK HERE TO PRINT THE DIRECTIONS FOR THIS CRAFT
If you've enjoyed our content or have any thoughts to share, we'd love to hear from you! Mention @gluedtomycrafts or tag #gluedtomycrafts on Instagram!